Posted Jan 10, 2019, Updated Nov 11, 2024 I created this Spaghetti Squash Mac and Cheese as a satisfying, low-carb, alternative everyone’s favorite classic pasta dish (mac and cheese)! This spaghetti squash mac and cheese recipe is a healthy & delicious dinner, side dish or meal prep idea! It’s perfect to reheat for lunch with a salad or side of veggies. This recipe is also keto-friendly which is great if you are craving mac and cheese but need to eat a low-carb diet.
Spaghetti Squash Mac & Cheese: Ingredients & Substitutions
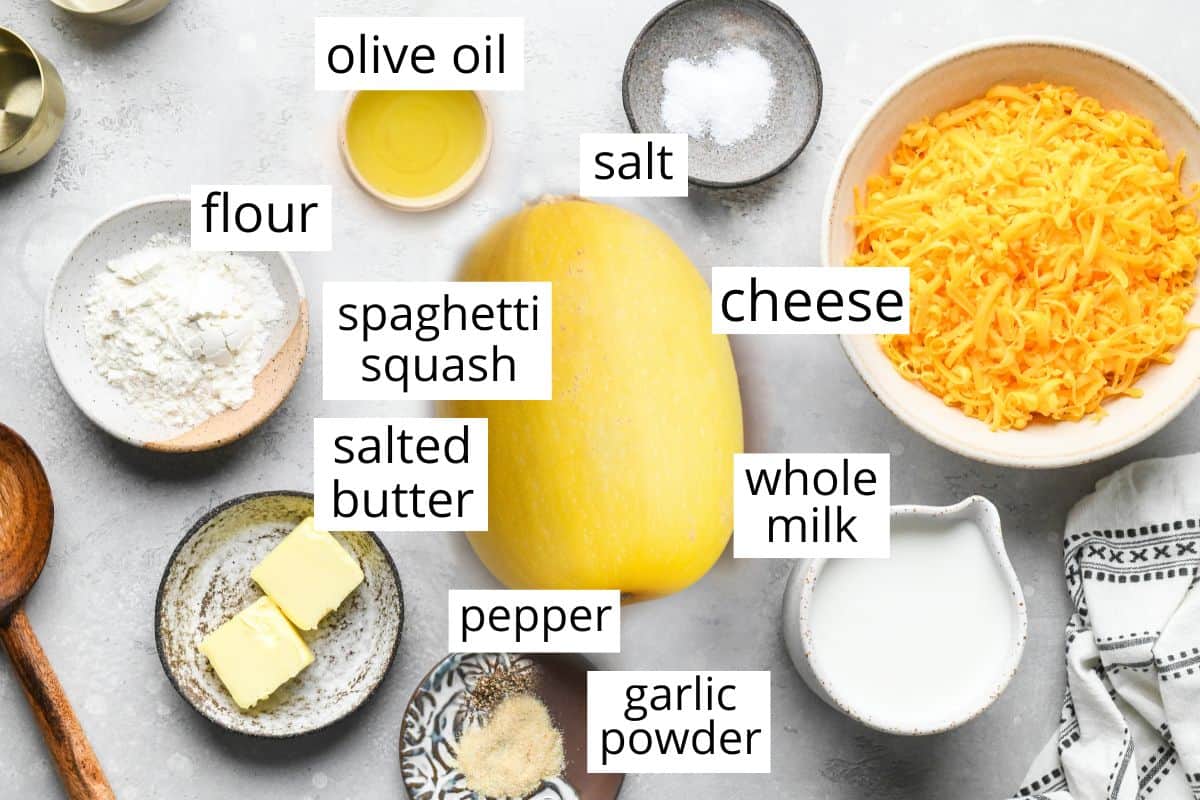
Spaghetti Squash. I do not recommend making substituions for the spaghetti squash in this recipe! The only thing that might vary in regards to the squash is the size. You could use one very large 4 lb. squash and only cut it into two halves instead of four. Olive Oil. Avocado oil is a good substitute. Salted Butter. unsalted butter or ghee are good substitutes. All-purpose flour. gluten-free all-purpose flour, tapioca flour and cornstarch are all great substitutes and make thsi recipe gluten-free. Cheddar Cheese. Use your favorite cheese, some suggestions include: We like extra sharp cheddar in our house, as well as gouda, gruyere, etc.
How to Make Spaghetti Squash Mac and Cheese
We’ll walk through how to make spaghetti squash mac and cheese step-by-step, and don’t forget to watch the video.
Bake the Spaghetti Squash
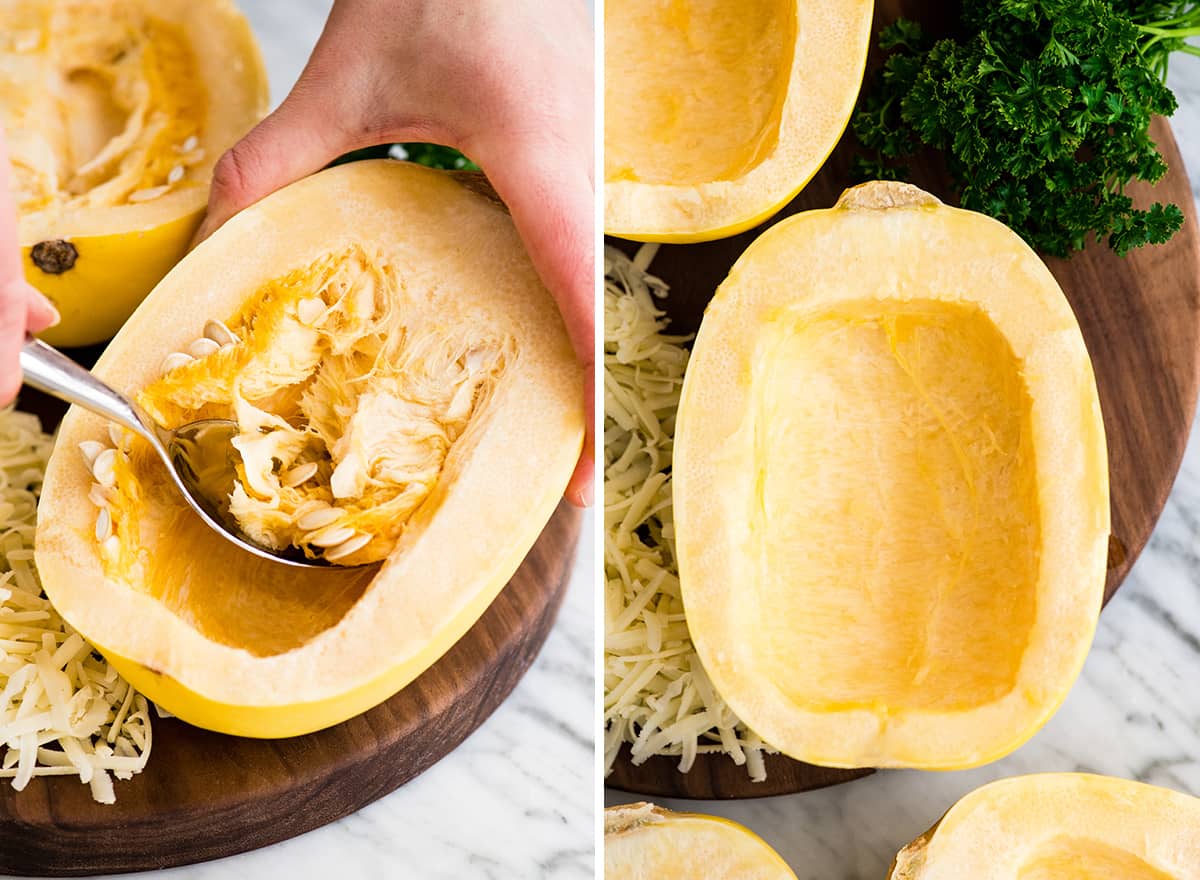
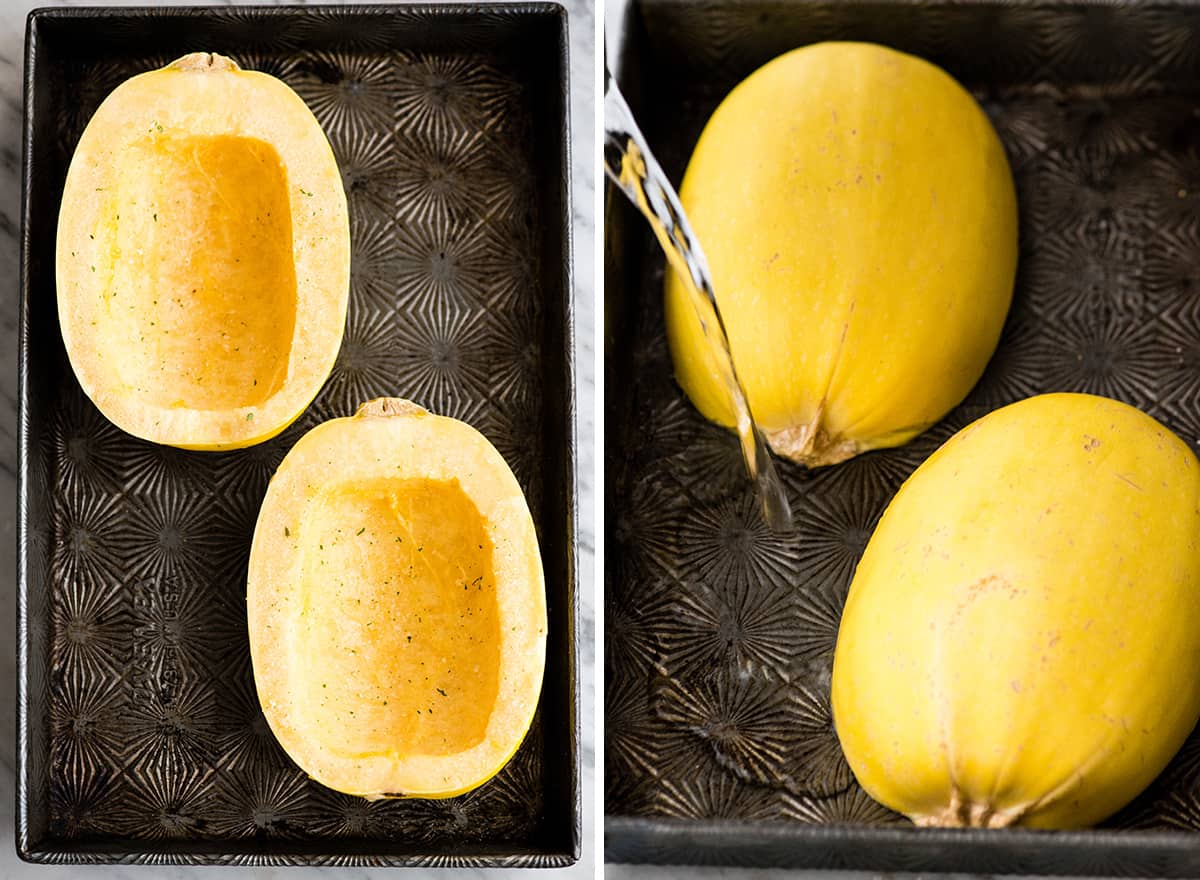
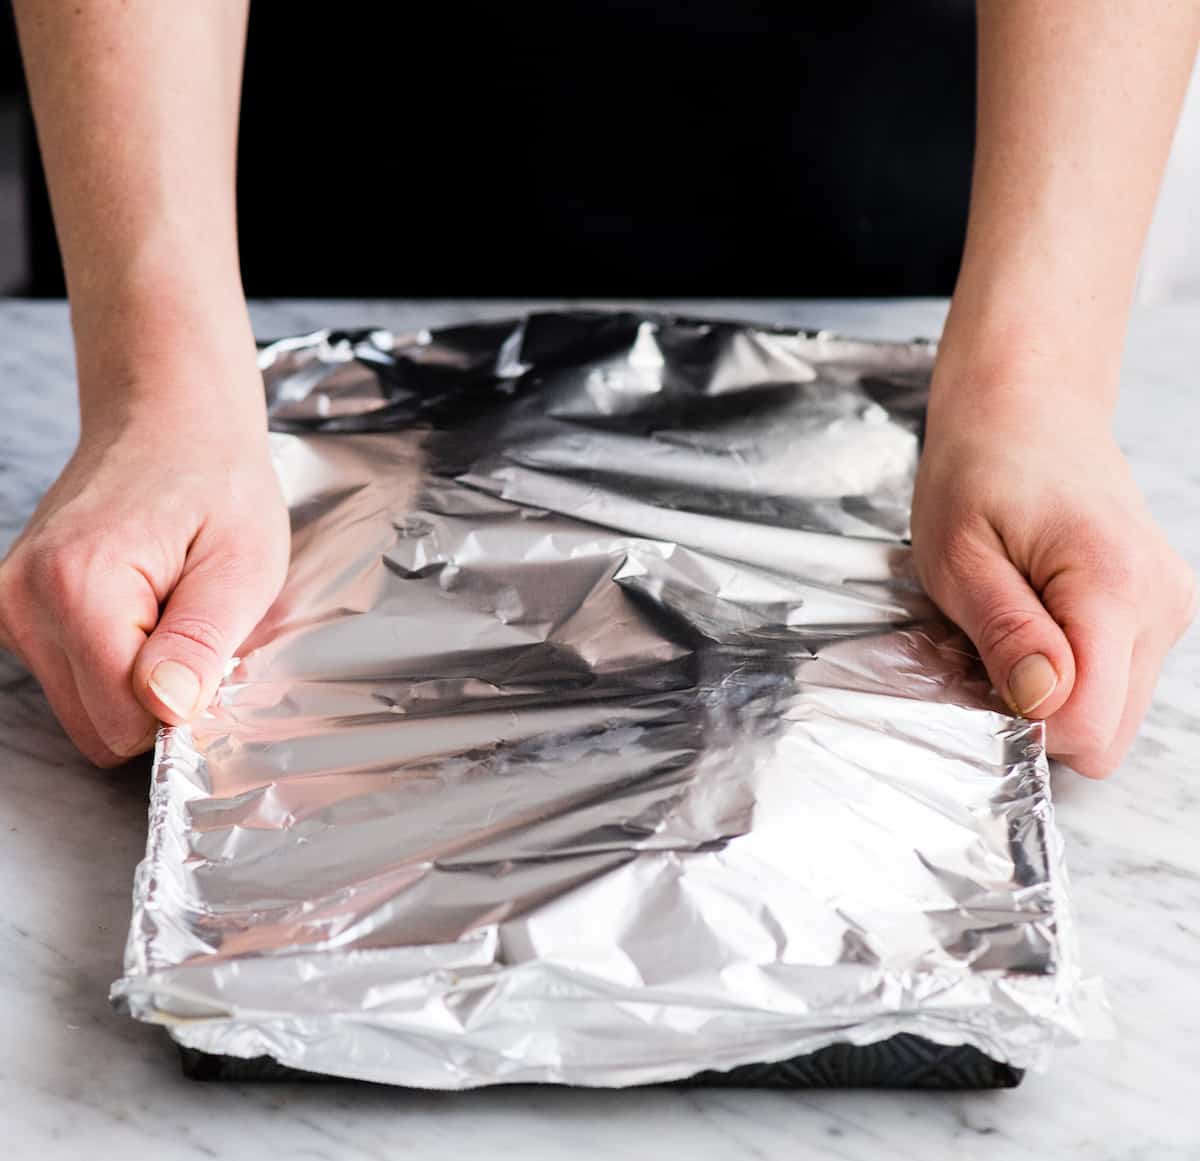
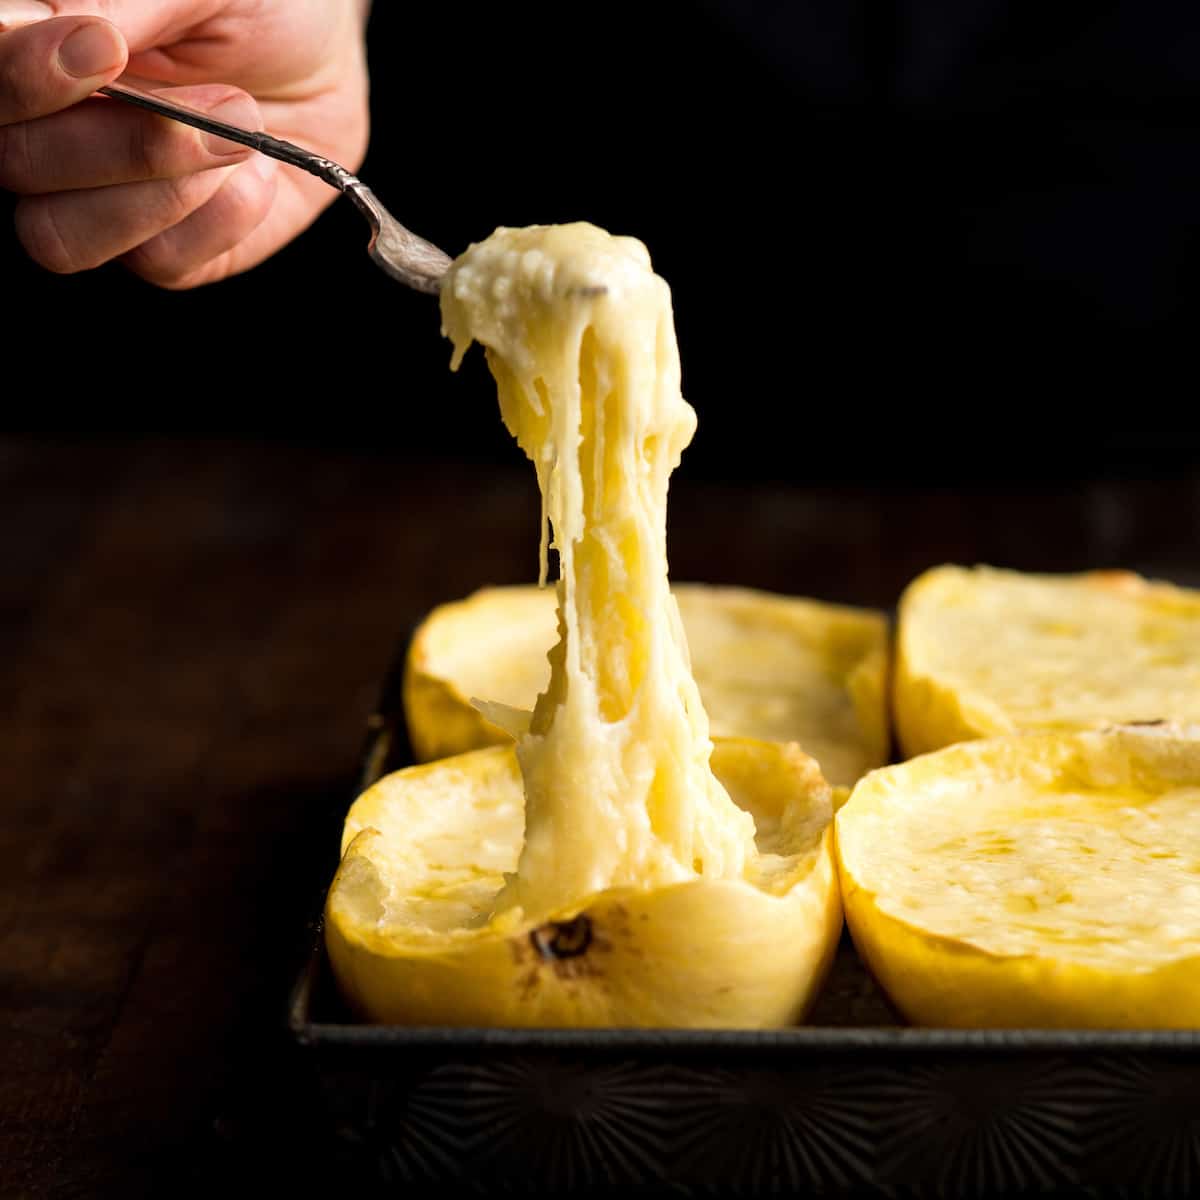
The first step in this recipe is to roast the spaghetti squash. Cut each squash into two equal halves lengthwise. Since the recipe will be baked inside of the shells, it’s important to try to keep them intact and in a good shape. Next, use a firm metal spoon or even an ice cream scooper and scrape the insides out of the squash as you would before carving a pumpkin on Halloween. Throw the insides/seeds away in the garbage. I don’t recommend putting them down the garbage disposal, as the seeds are pretty tough. Spray or brush the inside of each half wiht olive oil then sprinkle the the squash with garlic powder, sea salt and pepper. (or any other spices you choose). After coating the inside with oil & spices, flip the spaghetti squash halves over so they are face-down in a large baking sheet. Pour boiling water into the pan to fill it so that about ½” of the bottom of the spaghetti squash is submerged in water. Baking the Spaghetti Squash in water helps make it moist and easy to shred. Next, cover the baking sheet with foil (to retain the water as long as possible) and place in the preheated oven. Roast for 45-60 minutes (depending on the size of your squash). You will know the spaghetti squash is cooked when you can easily press the top down with your hand and it stays depressed.
Shred the Spaghetti Squash
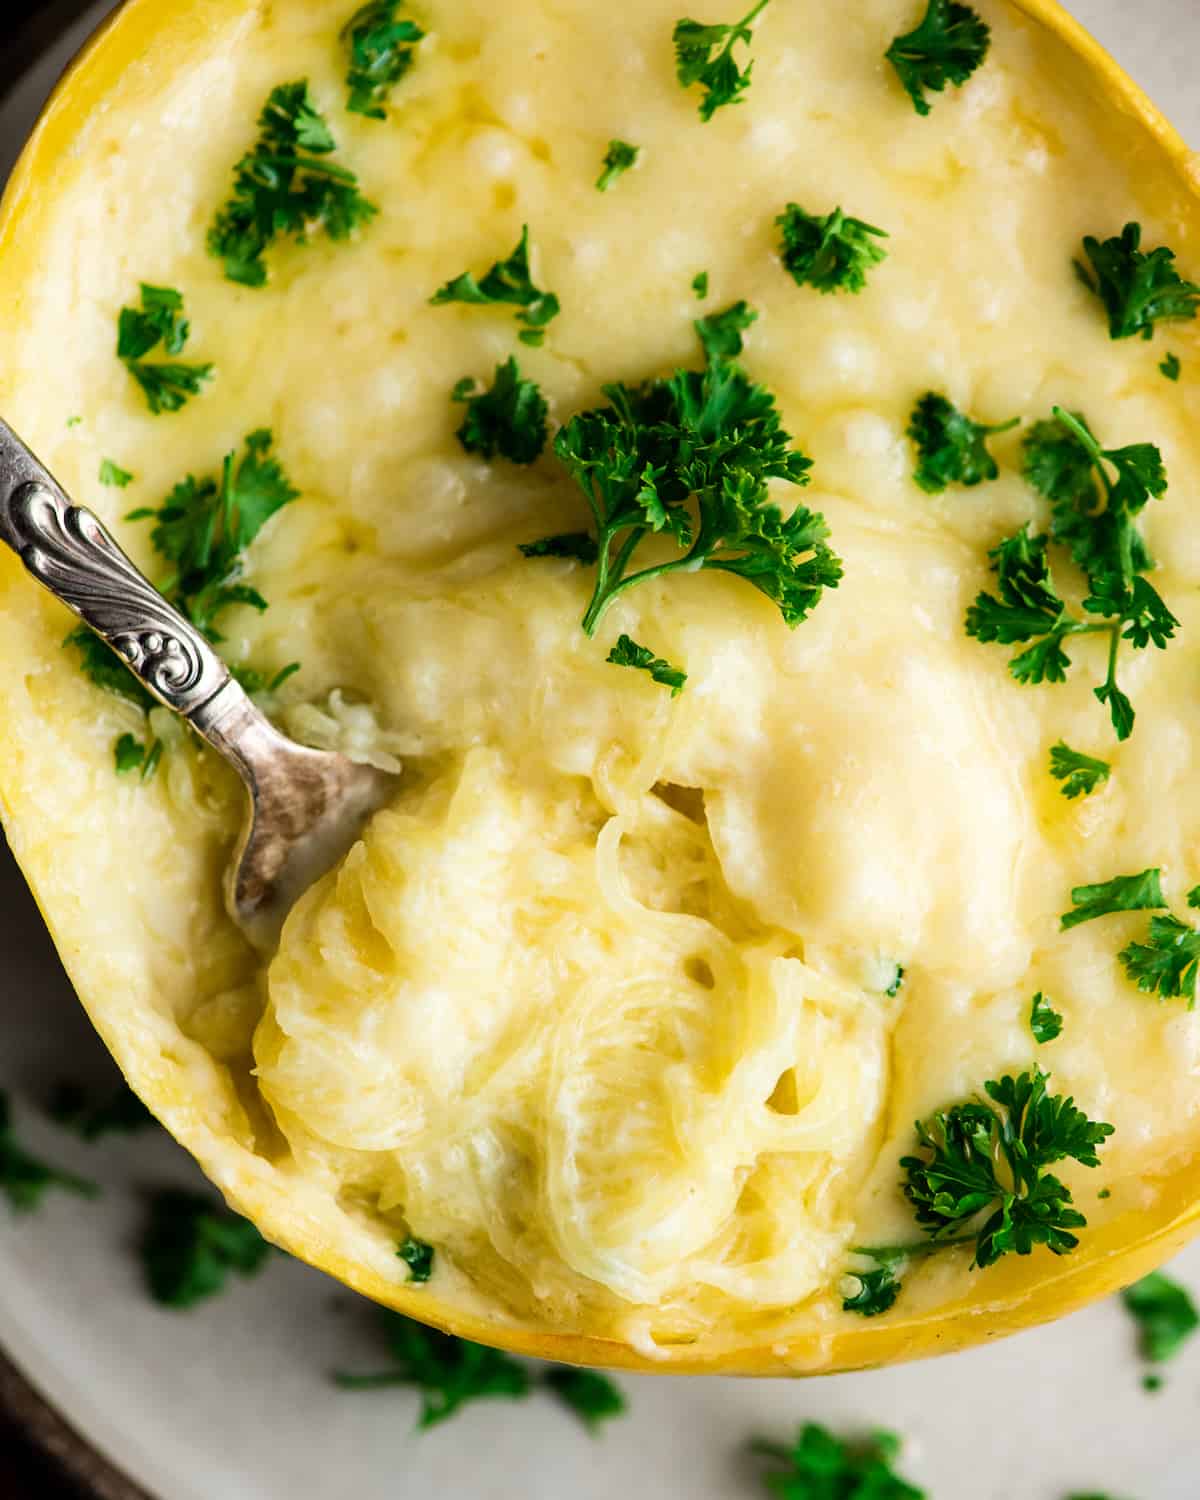
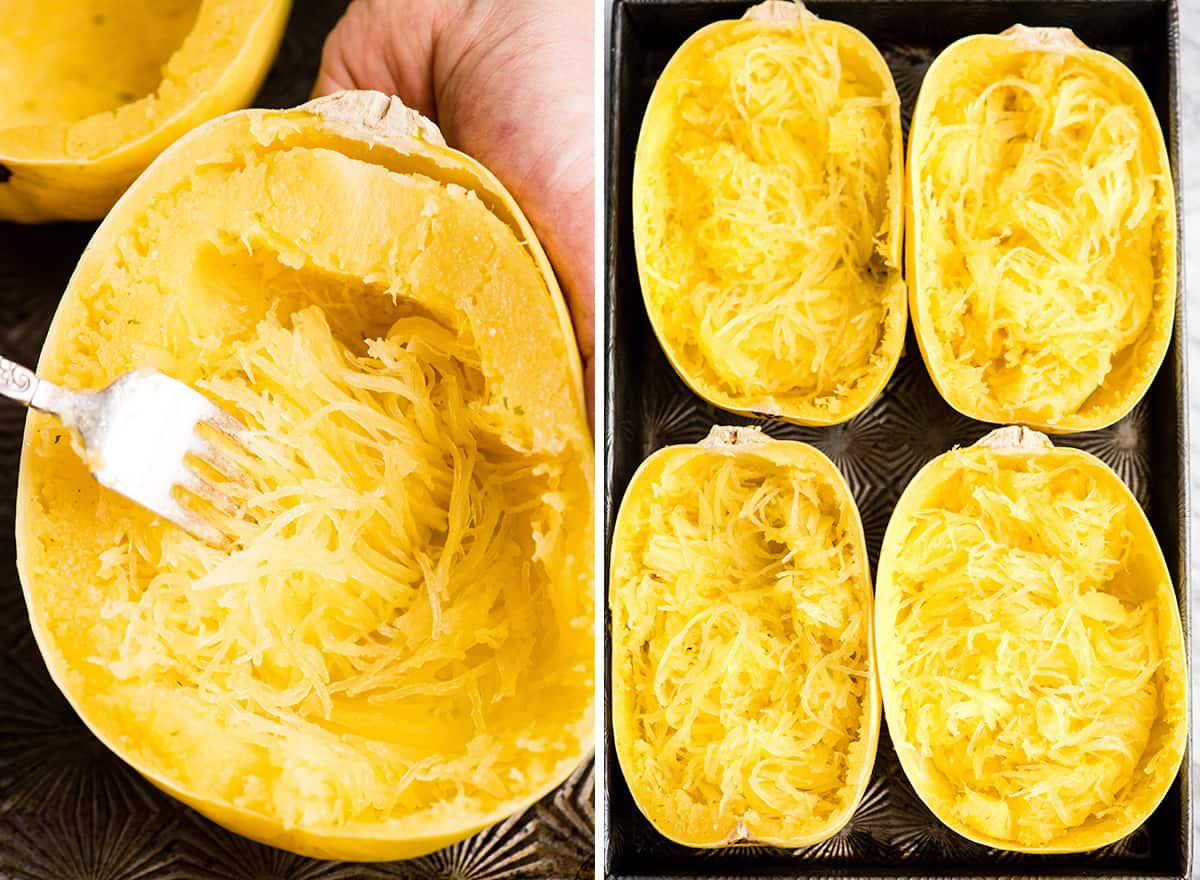
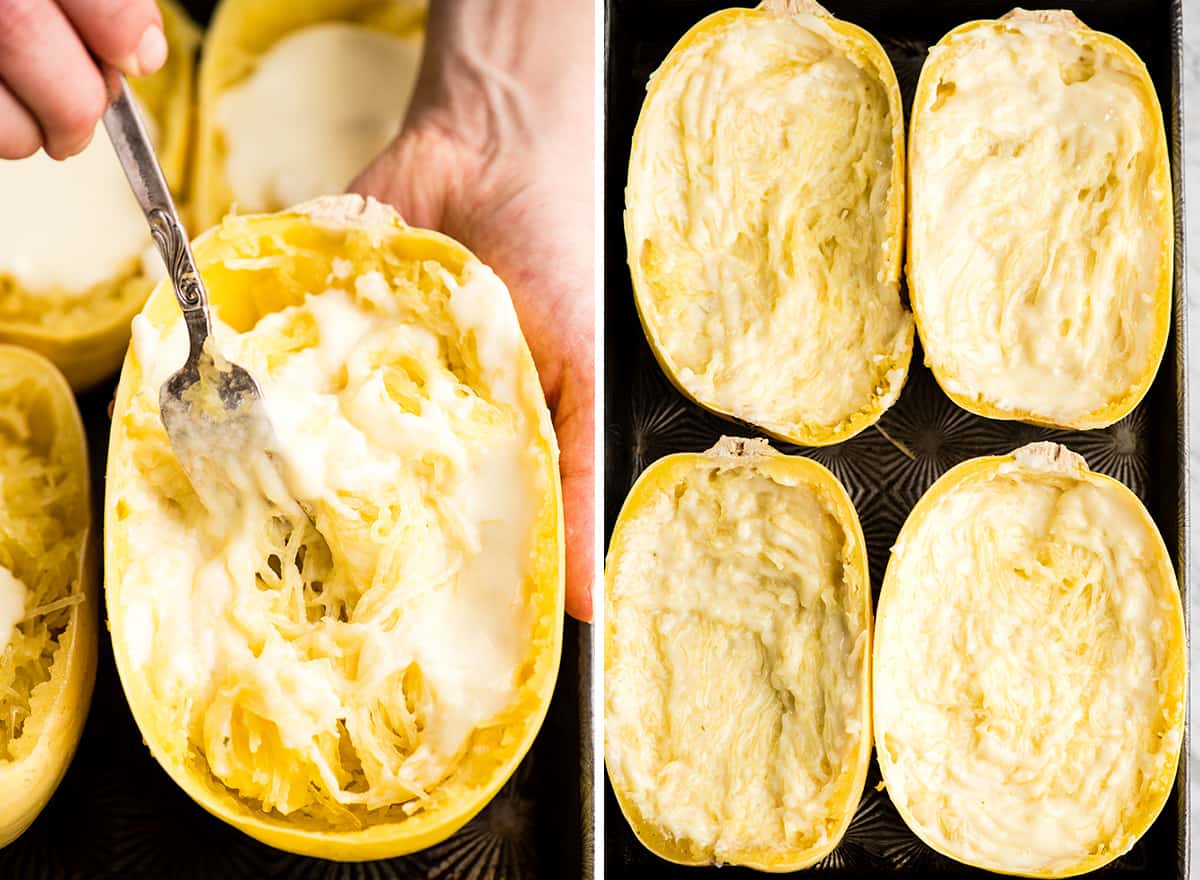
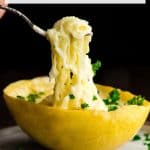
Next, very carefully take a fork and run it lengthwise across the spaghetti squash until all the insides are shredded (as pictured below). Since the cheese sauce will be mixed with the squash inside of the shells and baked, it’s important to shred the squash very carefully and gently to avoid breaking the shells.
Make the Cheese
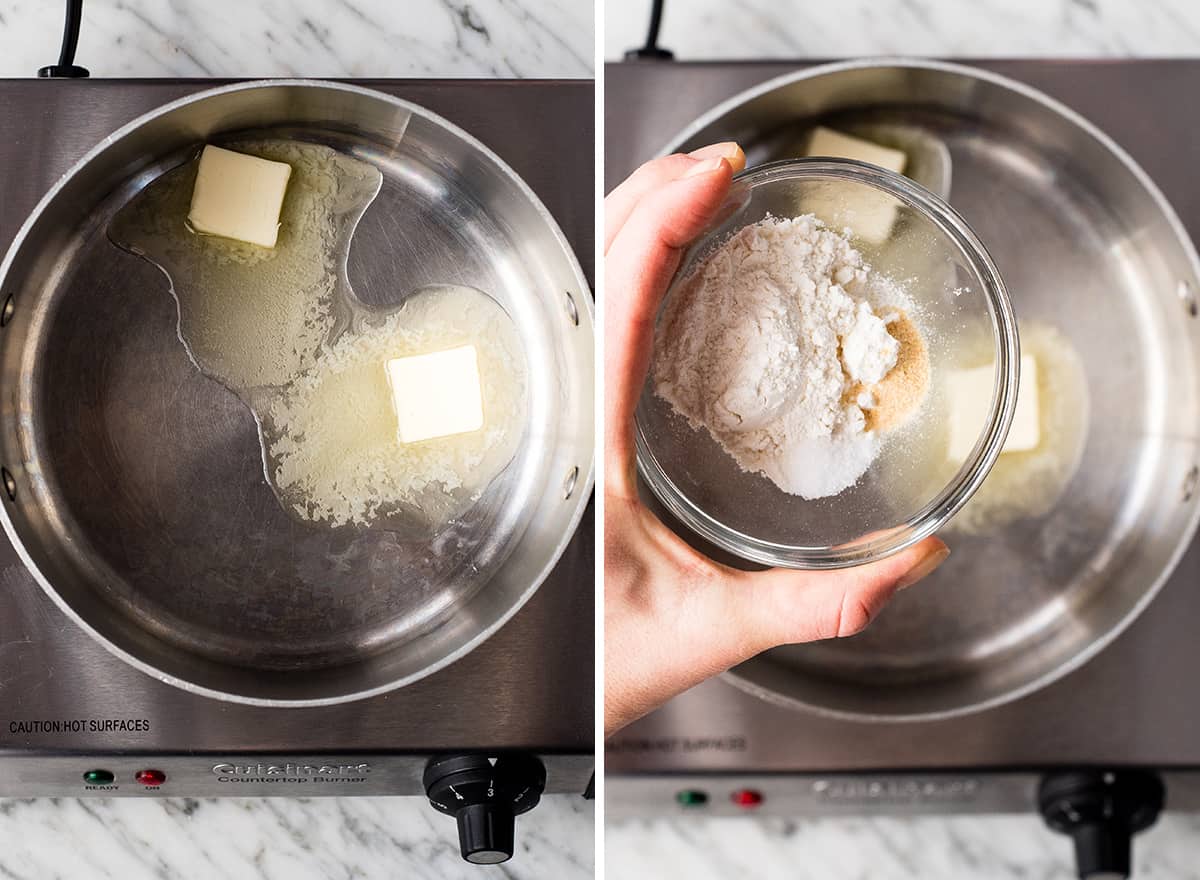
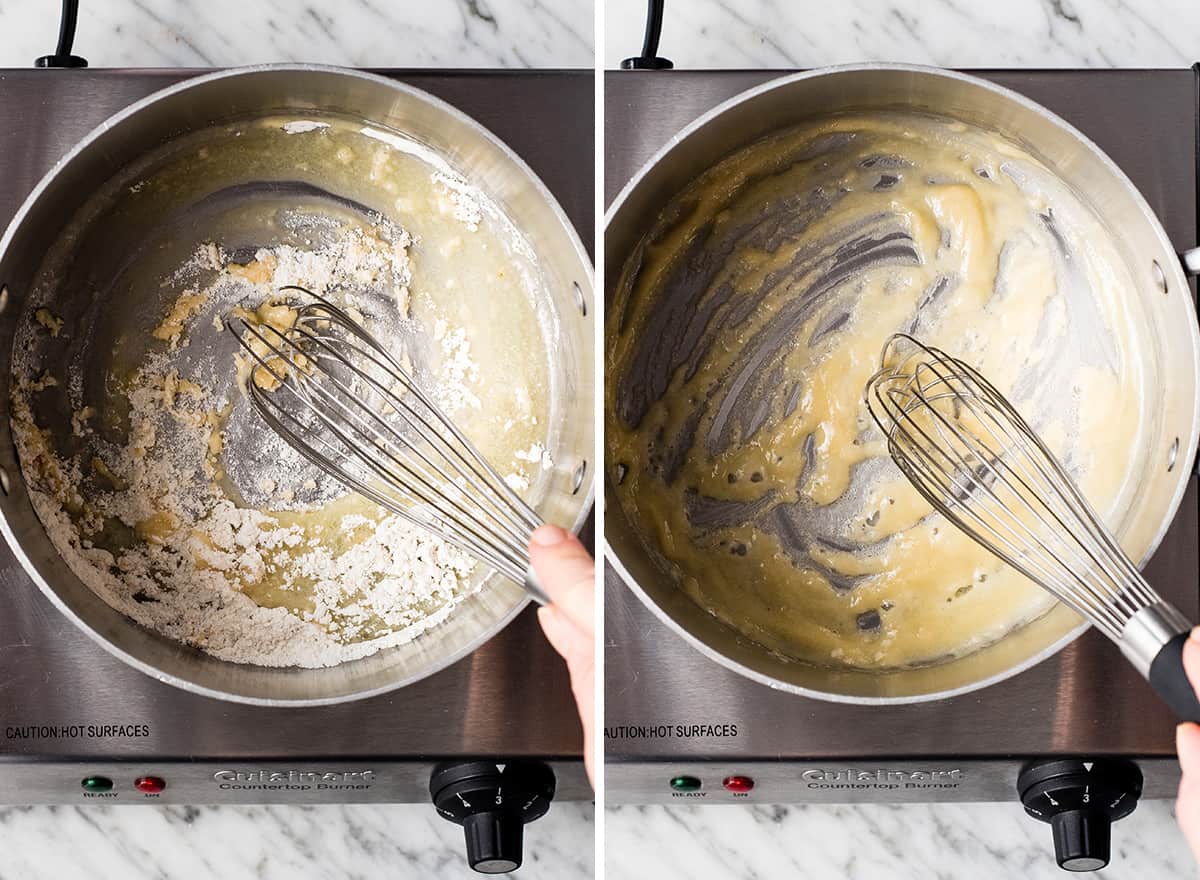
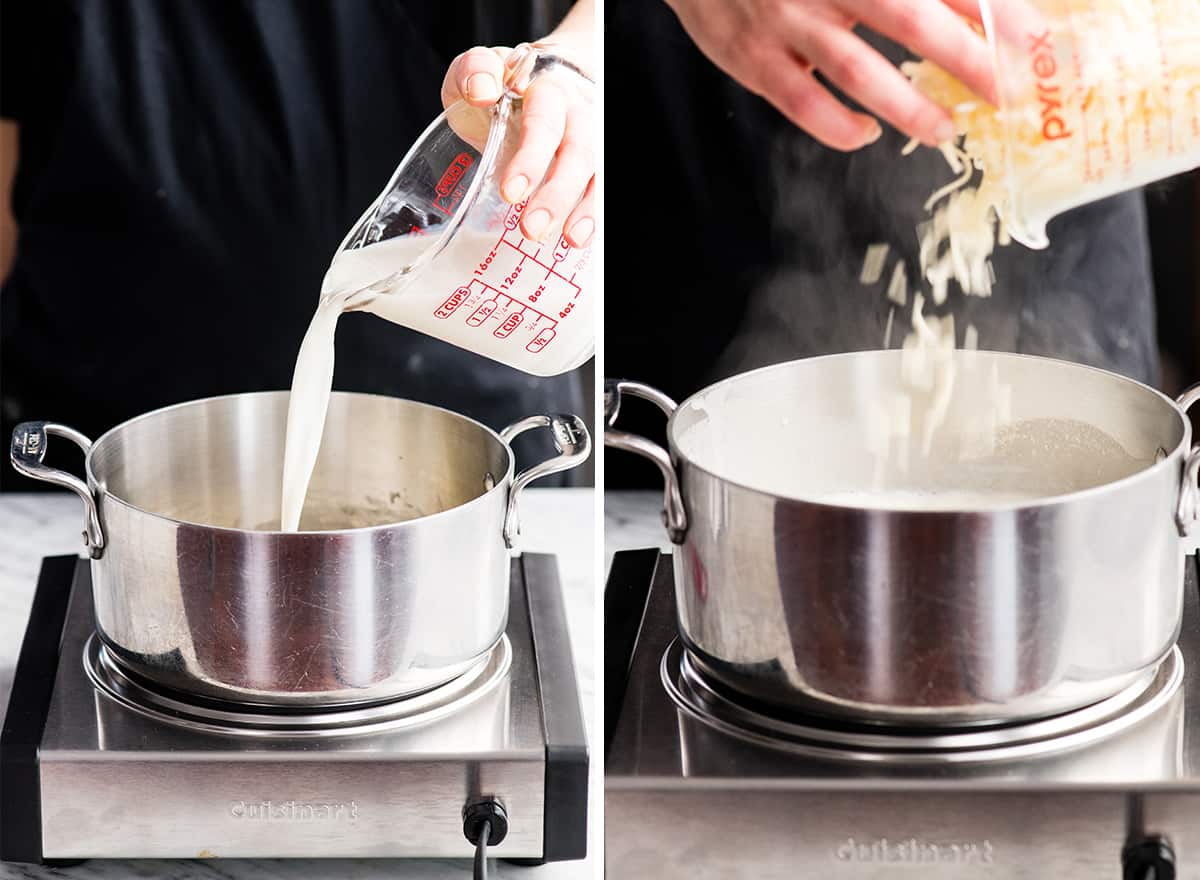
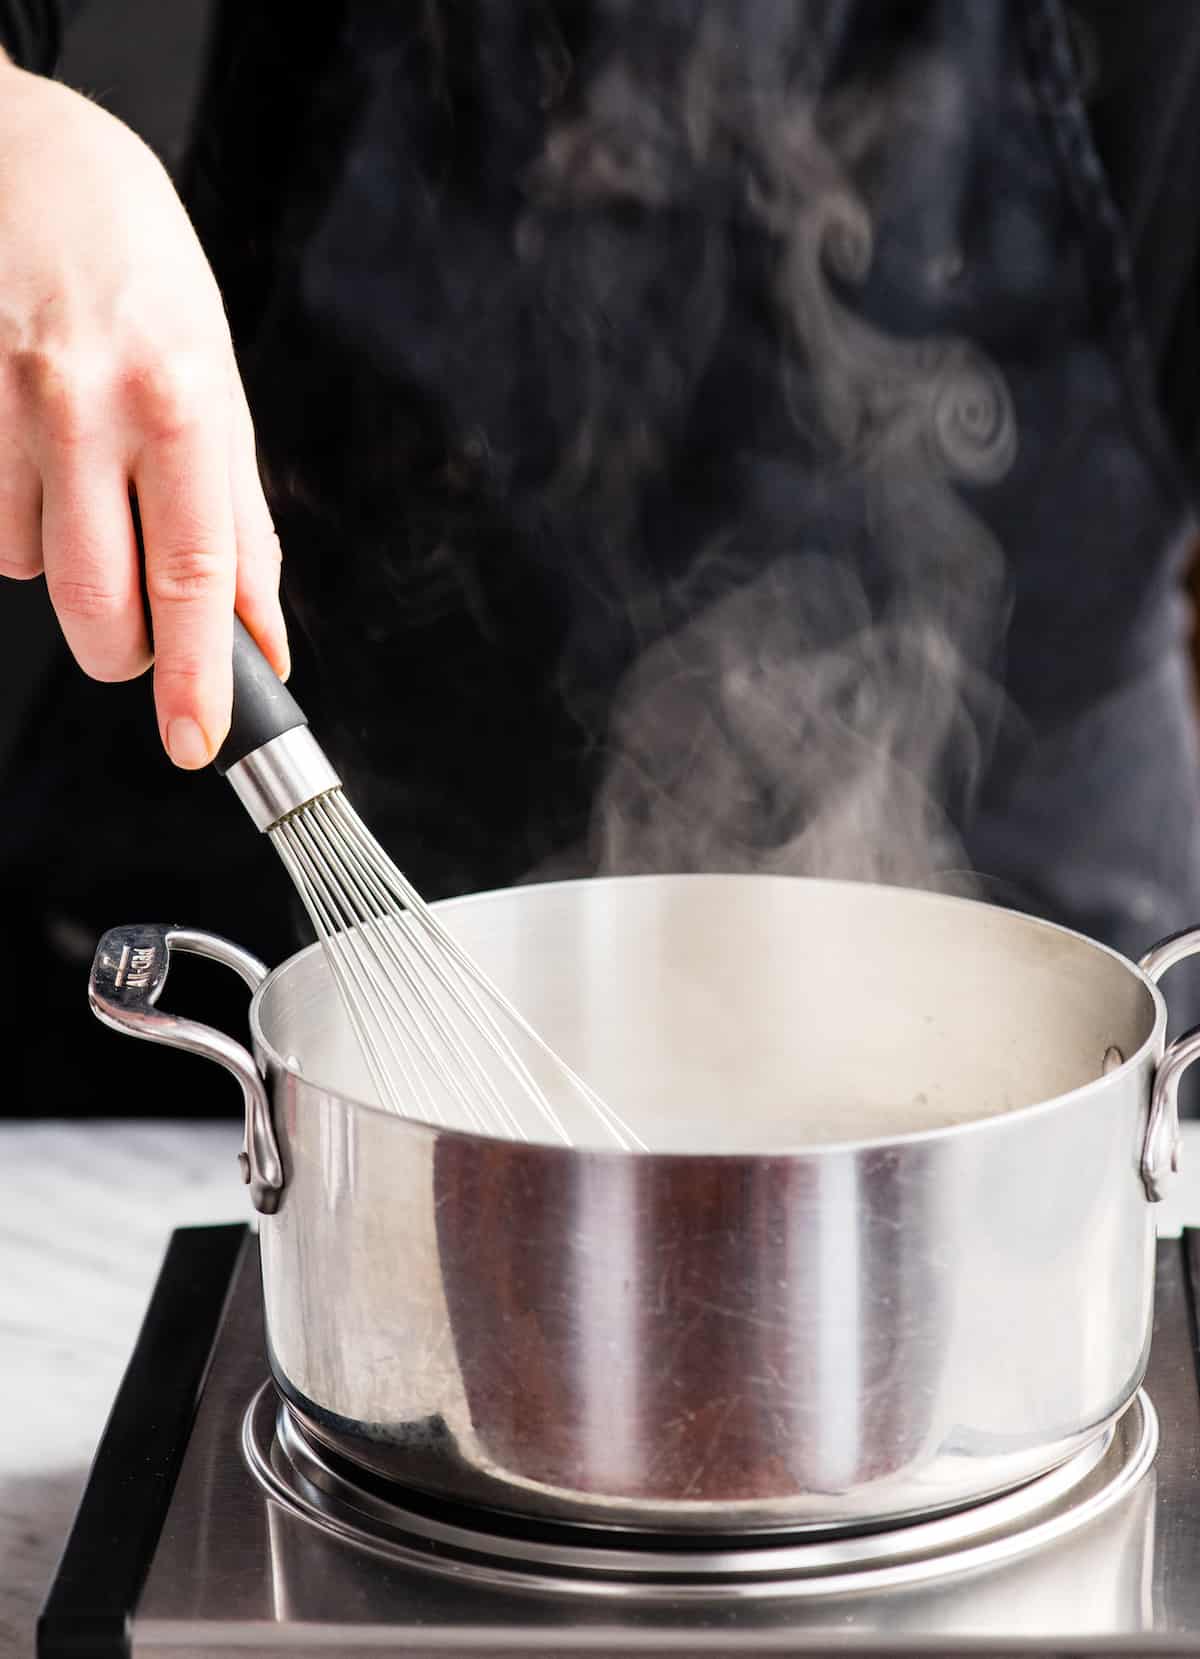
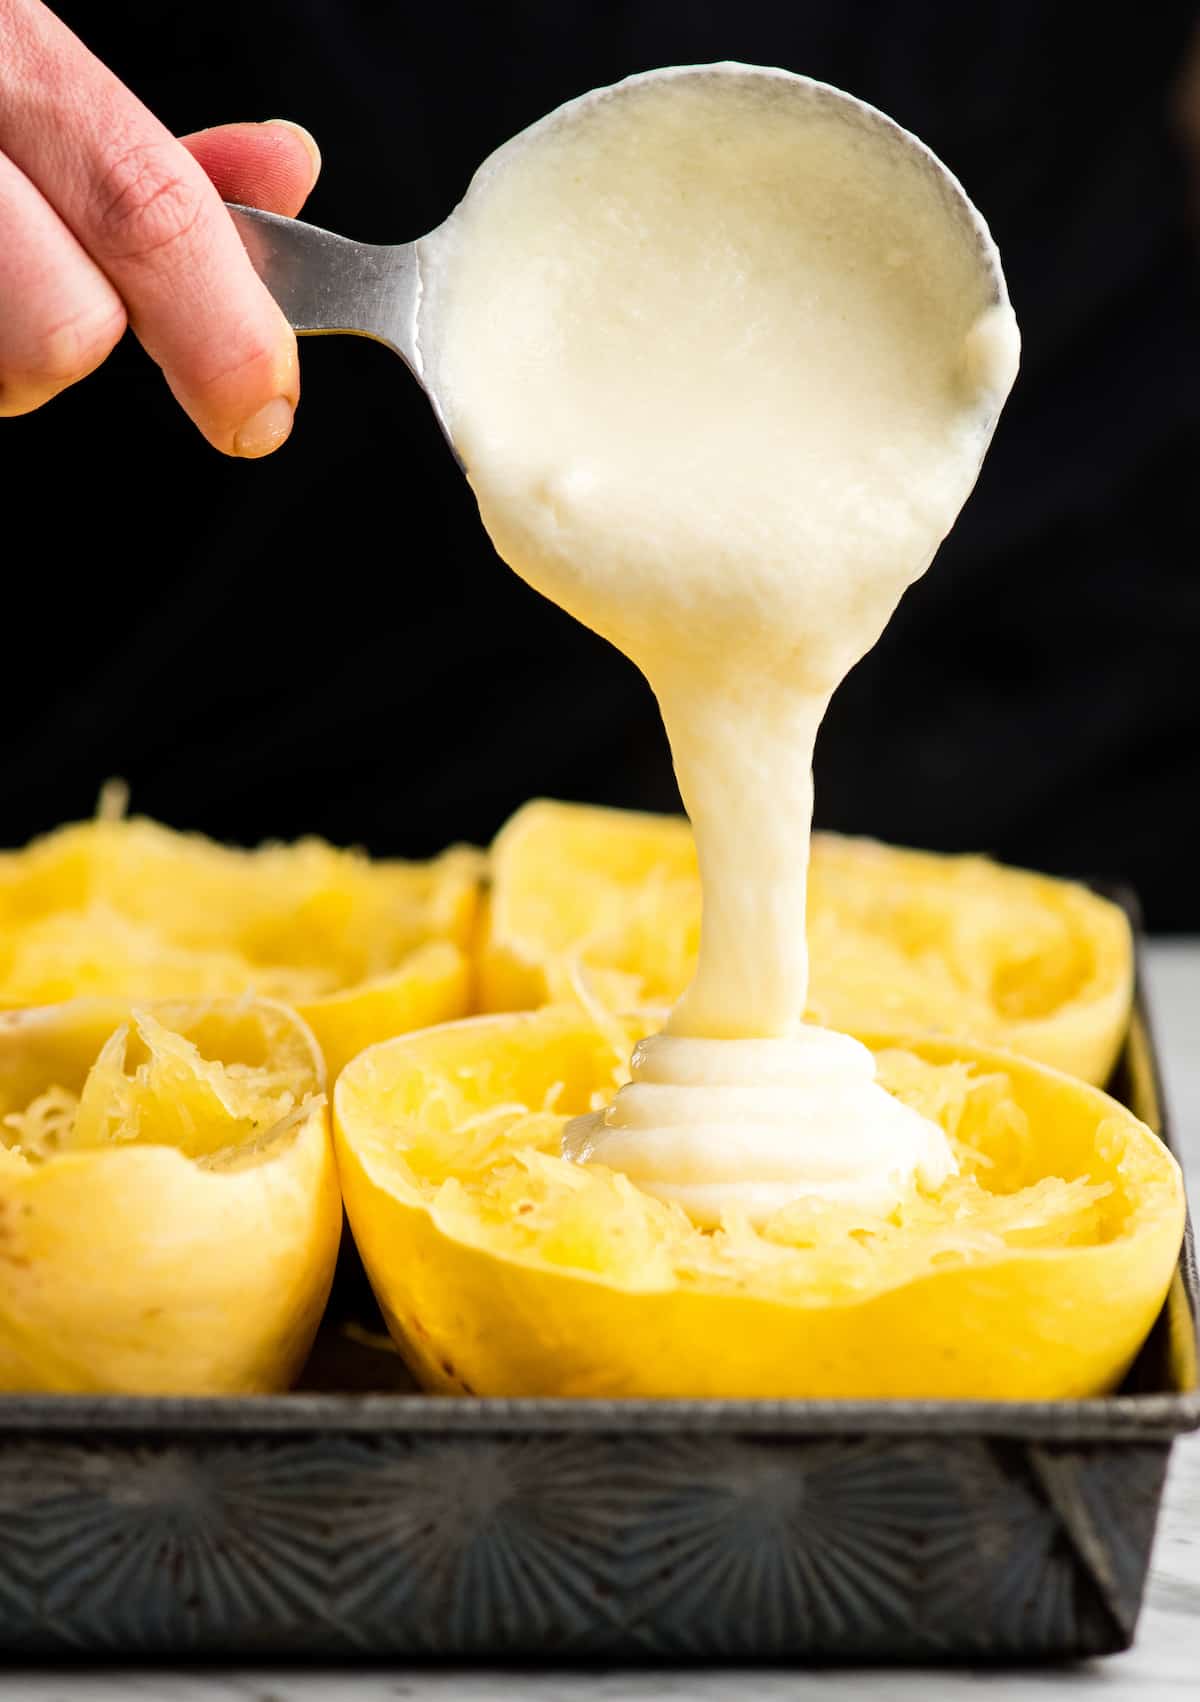
I recommend making the cheese sauce while the squash is roasting in the oven to save time, preferably in the last 10 minutes of baking. To make the cheese sauce, start by making a roux. Melt the butter, mix the dry ingredients together and then add them to the butter in the saucepan. Use a wire whisk and whisk until the dry ingredients are incorporated into the melted butter. Then cook for about 1 minute, or until bubbles begin to form in the mixture (see picture below on the right hand side). Next, pour the milk into the roux in the saucepan, whisking constantly. Cook the milk/roux mixture for 3 to 5 minutes, until it becomes thick. Once the milk mixture is thick, add the shredded cheese and turn off the heat (or at least reduce it to low). Whisk until the cheese is melted and the sauce is smooth. The mixture (before the cheese is added) will release steam as it cooks. This is part of the thickening process (water evaporating) and is normal and critical to a thick melty cheese sauce! The cheese sauce will also thicken as it cools, which is something to be aware of if you prepare it long before the spaghetti squash has finished roasting. If it becomes too thick as it sits, simply re-warm it on the burner over low heat.
Assemble Spaghetti Squash Mac & Cheese
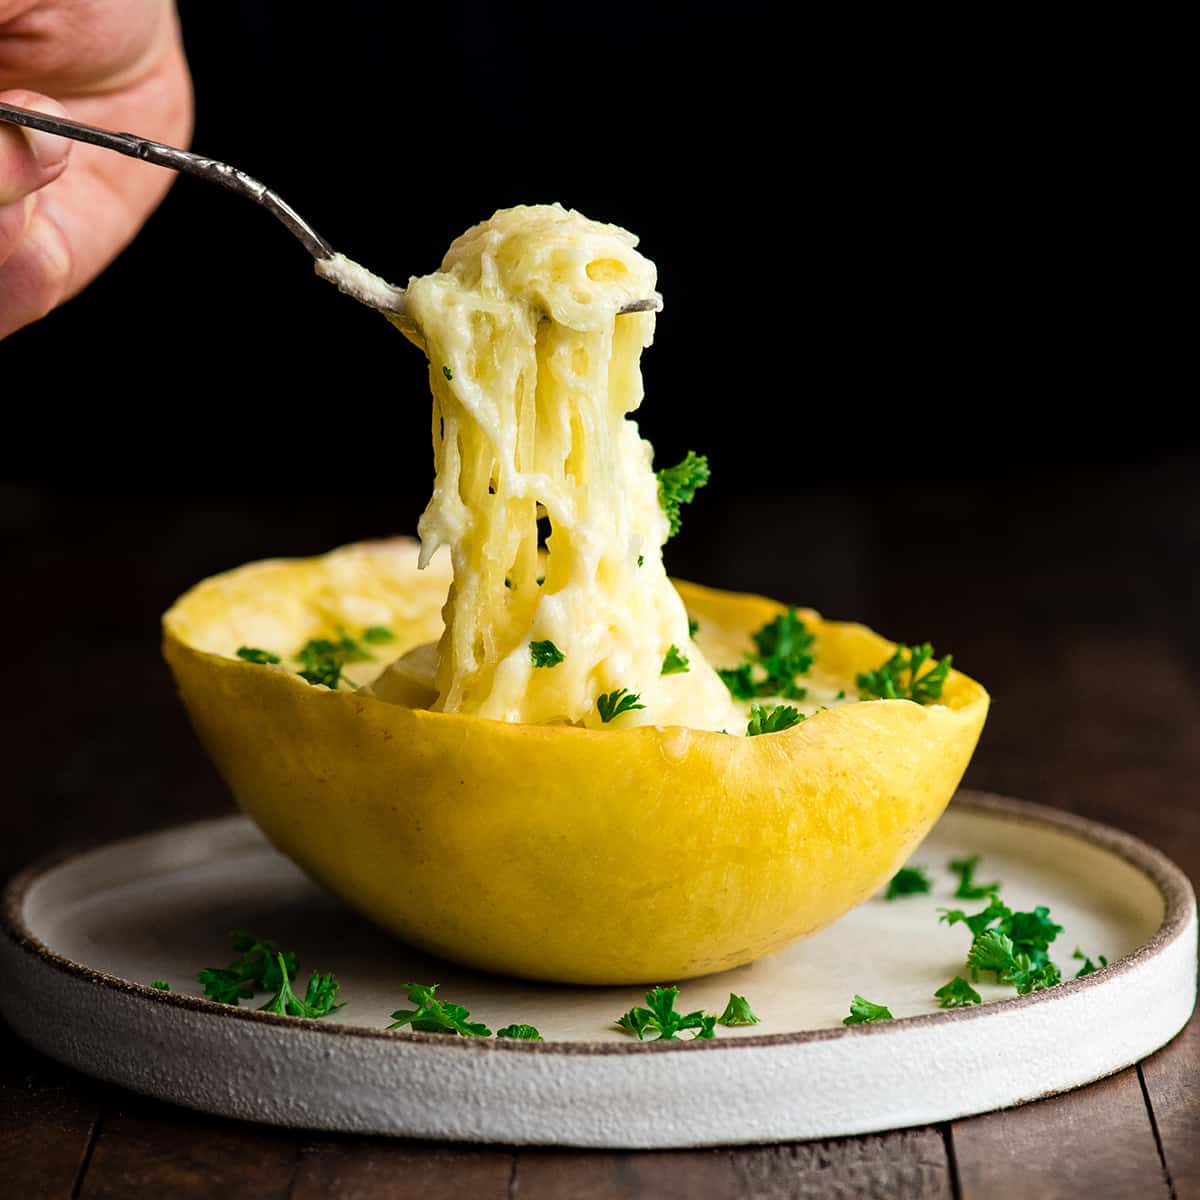
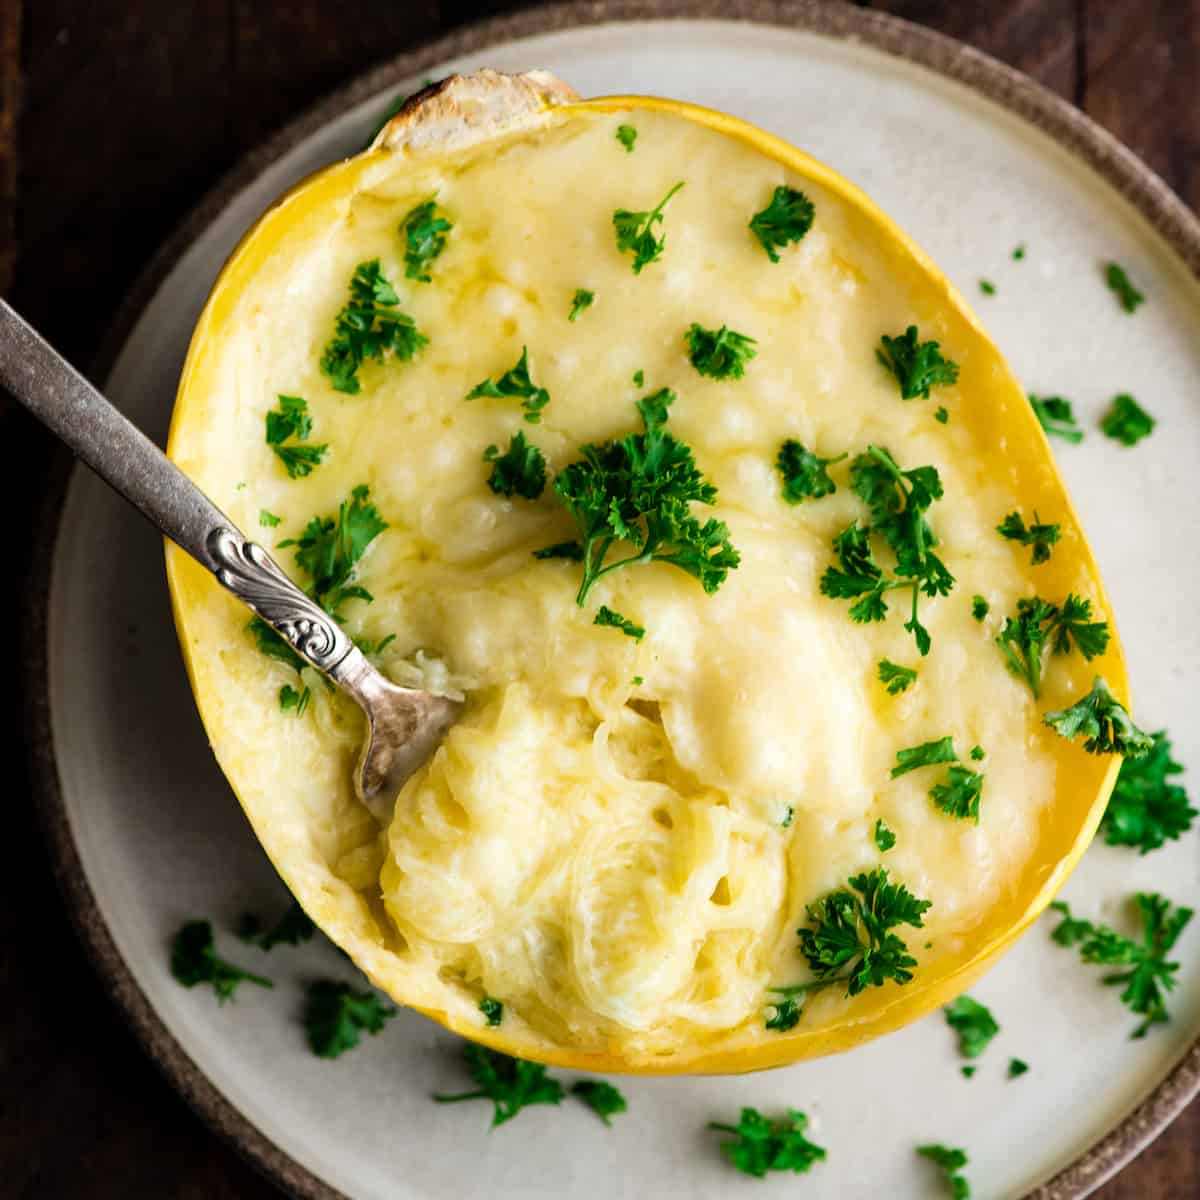
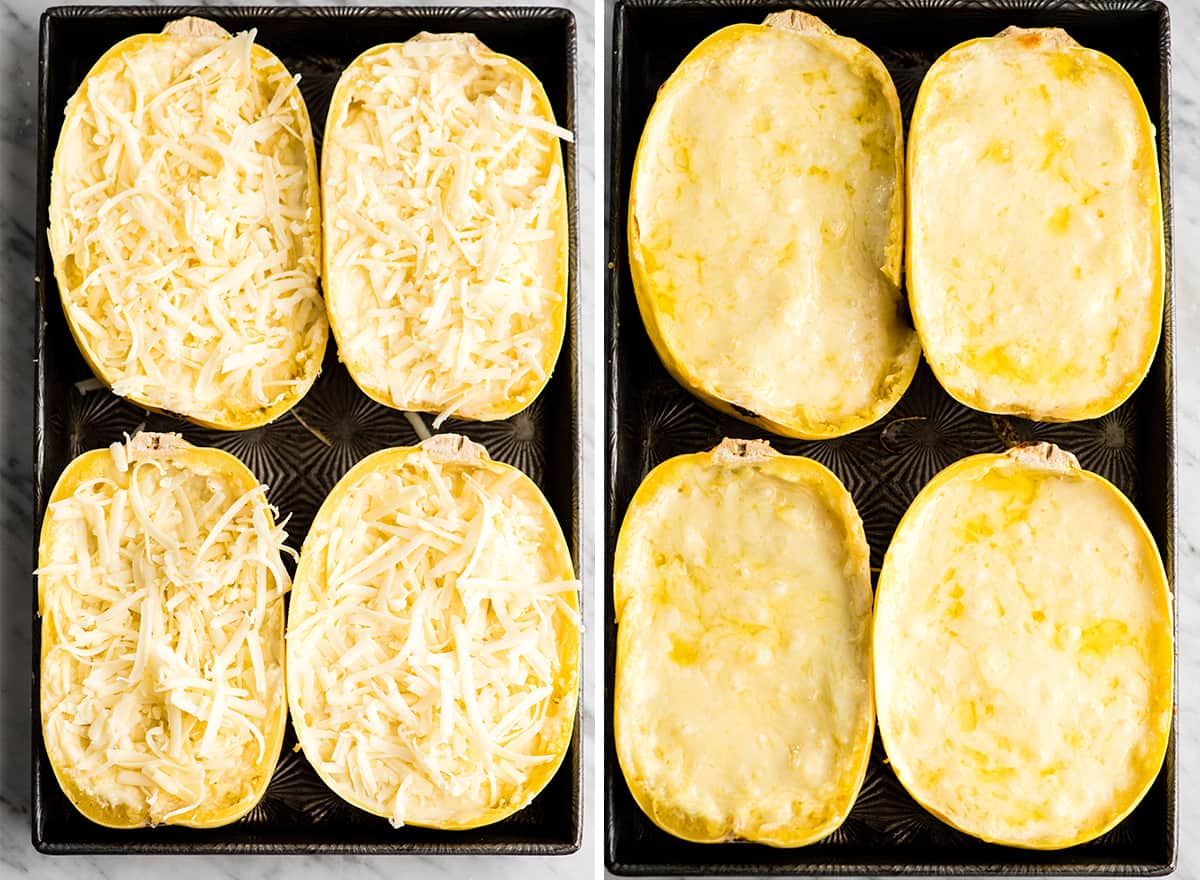
Add ½ cup of the cheese sauce to each of the four spaghetti squash halves – distributing it evenly. For the small spaghetti squashes I used (about 2 pounds each), I find ½ cup plus 2 Tablespoons sauce was the perfect amount to fill each squash-half and use all the sauce. However this amount will vary depending on the size of your squash. Then, use a fork to gently incorporate the cheese sauce into the shredded spaghetti squash. As you can see, the mixture should be thick and not at all runny. Next, place the cheesy spaghetti squash halves on a large baking sheet. Sprinkle some more cheese on top of each squash and then bake in the preheated oven until the cheese is melted. The longer you bake the Spaghetti Squash Mac and Cheese recipe, the firmer the cheese on top will be. Use your discretion and bake as long as it takes to reach the texture you would enjoy the most.
Serve
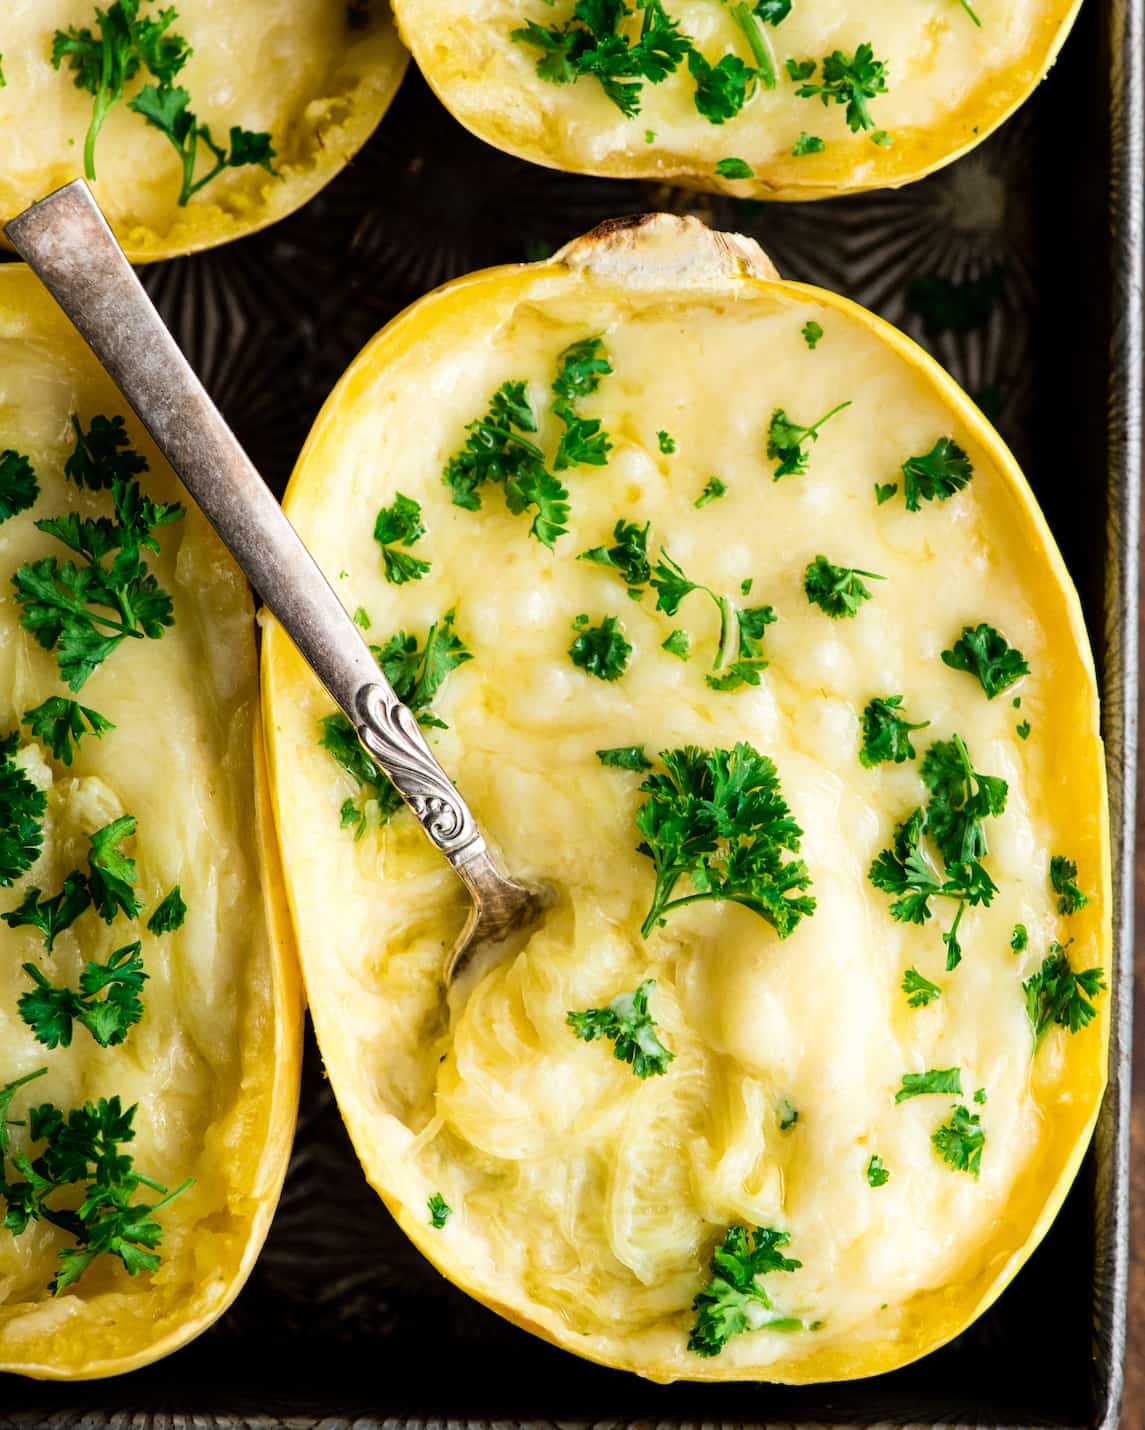
Serve plain or with a garnish of fresh herbs or parmesan cheese alongside your favorite dinner recipes, salads, etc. Here are some suggestions:
On the side of this balsamic pot roast (a family favorite)! Serve it with a salad like this kale salad or brussel sprouts salad. For a truly kid-friendly dinner, serve it with these healthy Sloppy Joes! Add some balsamic roasted veggetables! This oven-roasted broccoli pairs perfectly with this spaghetti squash mac and cheese! Balsamic roasted brussels sprouts taste amazing with this dish!
Store/Freeze
Store in an airtight container in the refrigerator for 3-5 days, or in the freezer for up to 1 month. Reheat in a covered baking dish in the oven set to 300 degrees Fahrenheit until warmed through. If you make and love our recipes, it would mean so much to me if you would leave a comment and rating! And don’t forget to follow along with us on Instagram, Pinterest, Facebook, and Youtube – be sure to tag @joyfoodsunshine and use the hashtag #joyfoodsunshine so we can see your creations!
![]()