I originally posted this recipe in September of 2016, but after re-testing it and gaining more knowledge about mooncake making over the last 5 years, we’ve updated the post with new tips, tricks, and insights as well as updated metric measurements!
What Are Mooncakes?
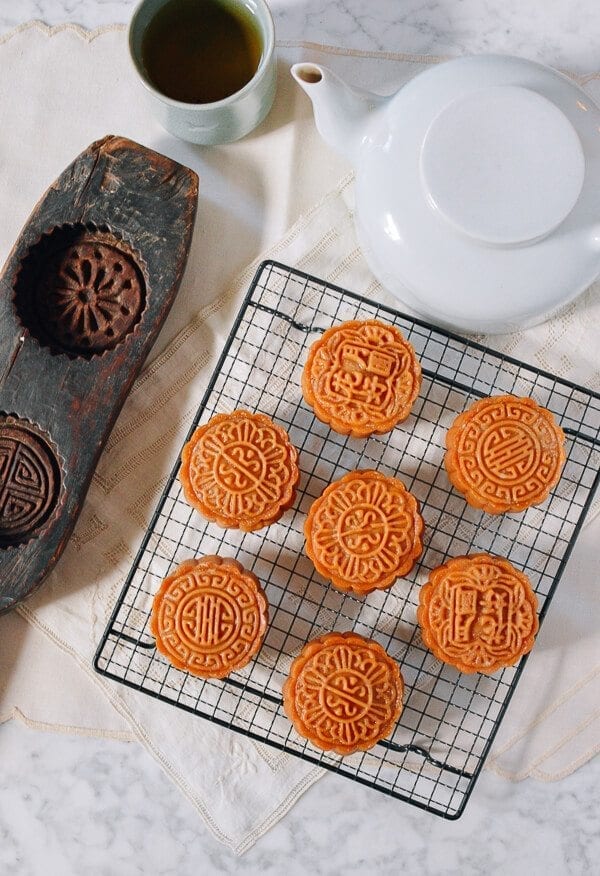
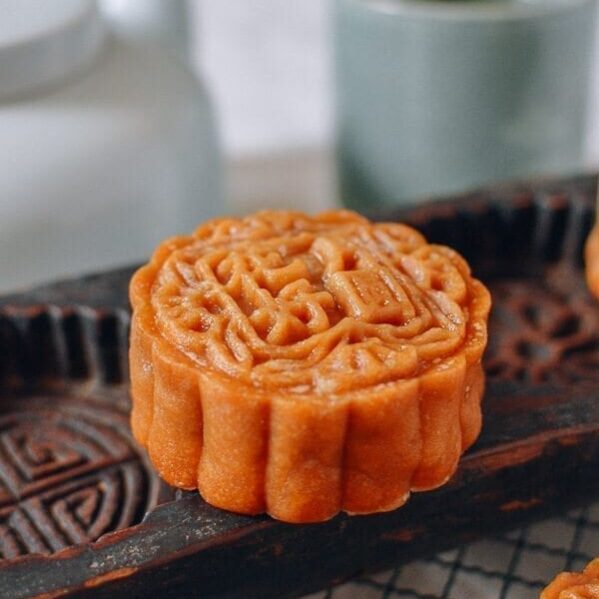
A mooncake is a Chinese pastry traditionally eaten around the Mid-Autumn Festival. The Mid-Autumn Festival is the second most important holiday of the year in China (after Chinese New Year/the Spring Festival). It’s a holiday for worshipping the moon for a bountiful harvest, giving thanks, and gathering with family. Mooncakes come in many shapes and sizes, with both sweet and savory fillings. Some (like these) are pressed into molds with intricate designs, while others can be made from flaky pastry.
Why You Should Make Your Own Mooncakes
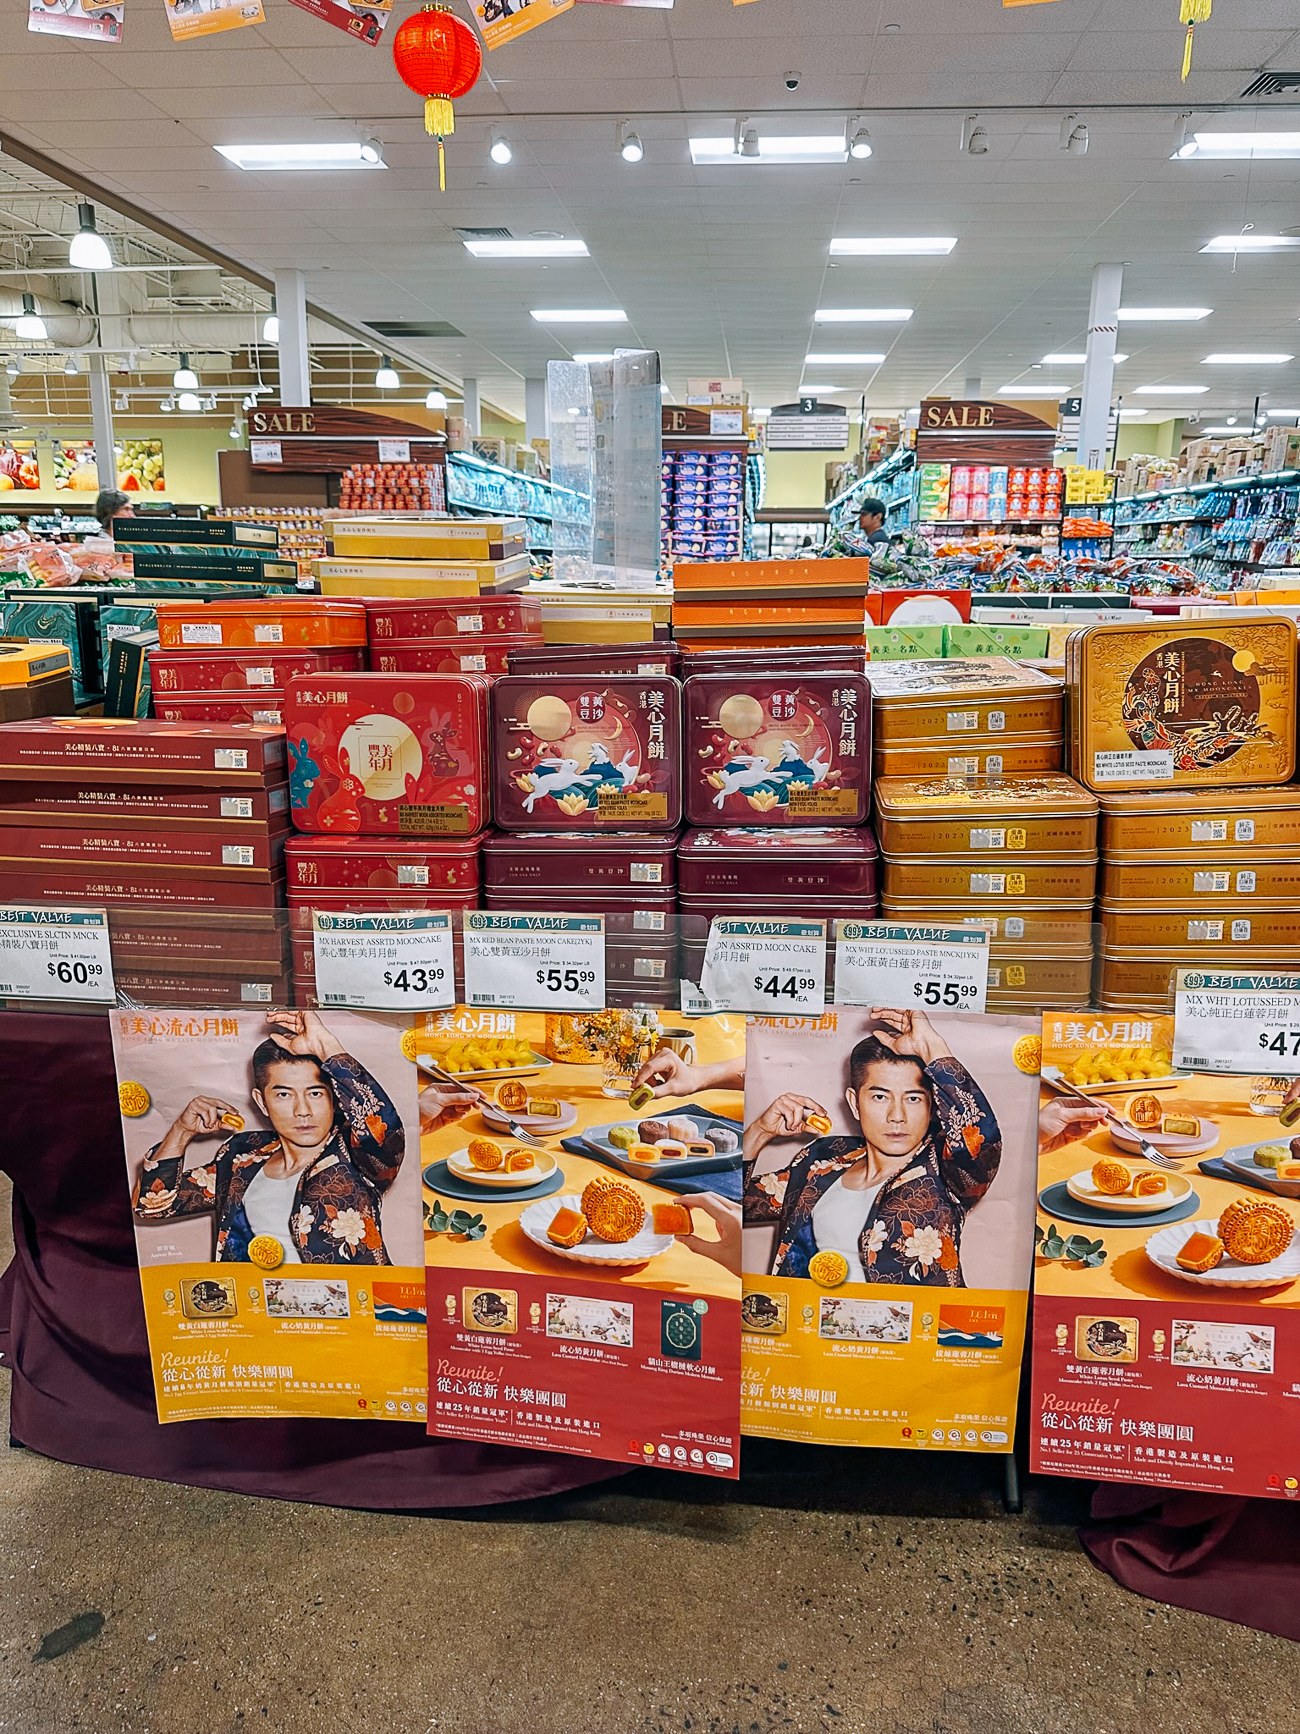
Okay, for some of you with super-human memories, you’ll remember that I messed up the folklore story for this holiday in the Savory Mooncakes post. Thanks to many knowledgeable readers (and no thanks to my mother), I am ignorant no more! Instead of talking about folklore, l want to focus on why exactly you should go through the trouble of making your own mooncakes. Firstly, for anyone who has purchased mooncakes before, you know a box of four typically starts at around $30-$40, and can go all the way to $50 or more! Prices vary by brand, fillings, and the number of salted egg yolks inside. Needless to say, it is a very expensive food item. All frugal Chinese spenders dispense with their daily logic and think to themselves, “Ohhhh, it’s only once a year, and it’s symbolic.” That’s how I usually talk myself into it, anyhow. Secondly, lotus seeds are expensive, to the point that more and more brands are adding white beans in large portions to help reduce costs. Of course, there is nothing wrong with using white beans, but what IS wrong is that the package still claims it’s a lotus seed filling! When you see a box of lotus mooncakes priced at around $20.00, beware! Lastly, but certainly not least: preservatives. Most (if not all) of the mooncakes on the market in the States come from China, Hong Kong, Taiwan, etc. Considering the ocean freight time plus the inland transit time, I am pretty certain that the mooncakes that you buy in stores were made at least two to three months prior and pumped full of preservatives. Ok, did I convince you to give this recipe a try yet? No? Here is one more reason: Sarah claimed that these homemade lotus mooncakes are the best mooncakes that she’s ever had. Homemade mooncakes are fresh, soft, and a lot more flavorful. My first experience with fresh mooncakes was during our three-year stay in Beijing. I was quite shocked with how superior the freshly-made mooncakes were compared with the store-bought ones that I’ve known all my life, and it had never crossed my mind that I could make them myself before that moment. Truly—TRULY—it’s time to find out what you’ve been missing.
A few important cooking tips to remember:
Finally, you may notice that our process photos are looking a bit…rough in this post. Sarah wasn’t home to photograph this process as I went through it, so I ended up taking most of the pictures. They may not be pretty, but they’re informative! You’ll find the step-by step instructions with photos below, along with the recipe card at the bottom of this post. Okay, let’s get started.
Lotus Mooncakes Recipe Instructions
Lotus Mooncakes Part I: The Syrup
You can buy this syrup online (search for “Lyle’s Golden Syrup“), but it’s so simple to make that I suggest that you save the $9. It’s also ideal for making ahead of time–you can store it in the fridge for months. The right consistency of the finished product is similar to honey.
½ pound granulated sugar (1 cup plus 2 tablespoons) ½ cup water Juice of ½ a lemon
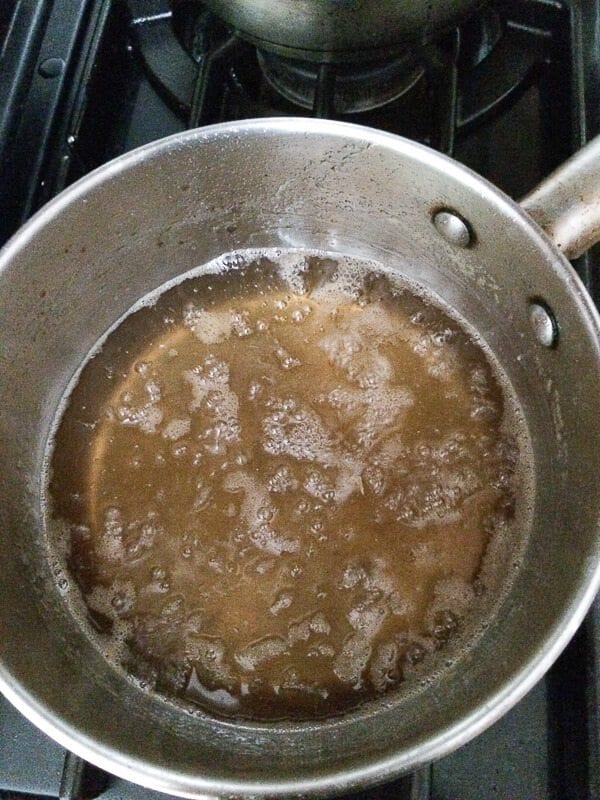
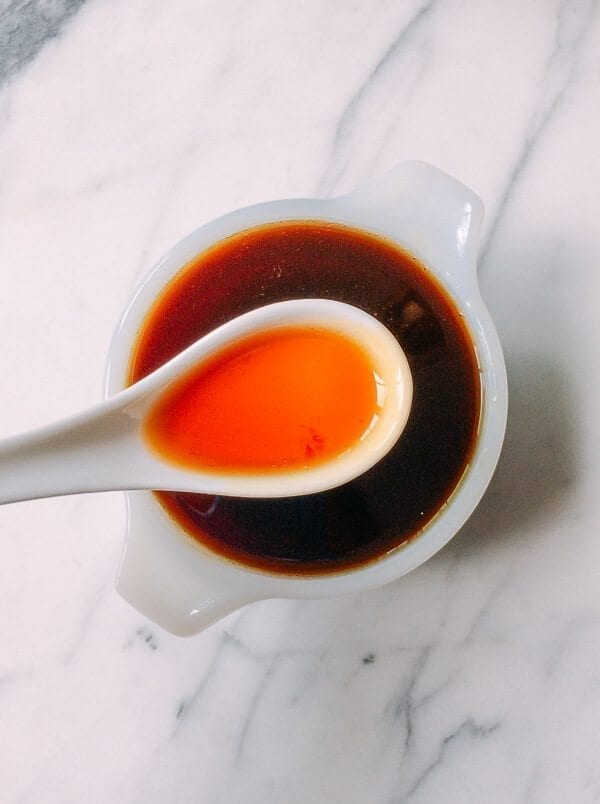
Heat the sugar and water in a saucepan over medium heat. Stir to dissolve the sugar. Once it’s boiled, add the lemon juice, stir, and immediately turn the heat down to low. Keep the lid off, and let the syrup simmer for about 60 to 70 minutes until the sugary liquid turns a light amber color. Do not stir during this time frame! By now, the liquid might look too watery, but it will thicken once cooled. Try not to overcook it, because it will become thick like caramel. (Just in case you do overcook the syrup, and it’s too thick, add a few drops of hot water to thin it out. Keep adding the hot water until you get the right consistency.) Now pour the sugary liquid into a heatproof container, and let it cool completely before storing it in the refrigerator. Side note: I used organic sugar, so my syrup is slightly darker in color compared with syrup made with regular granulated white sugar.
Lotus Mooncakes Part II: The Lotus Filling
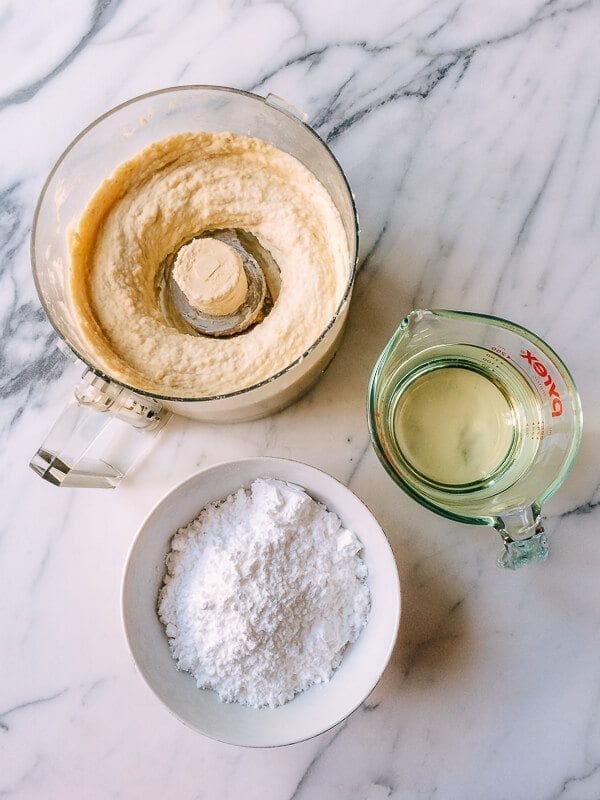
12 ounces dried lotus seeds (pre-halved is ideal if you can find it; we used whole) 4 to 4 1/2 cups water 1 2/3 cups powdered sugar (aka icing sugar or confectioner’s sugar) 1¼ cups peanut oil or corn oil 1/3 cup maltose
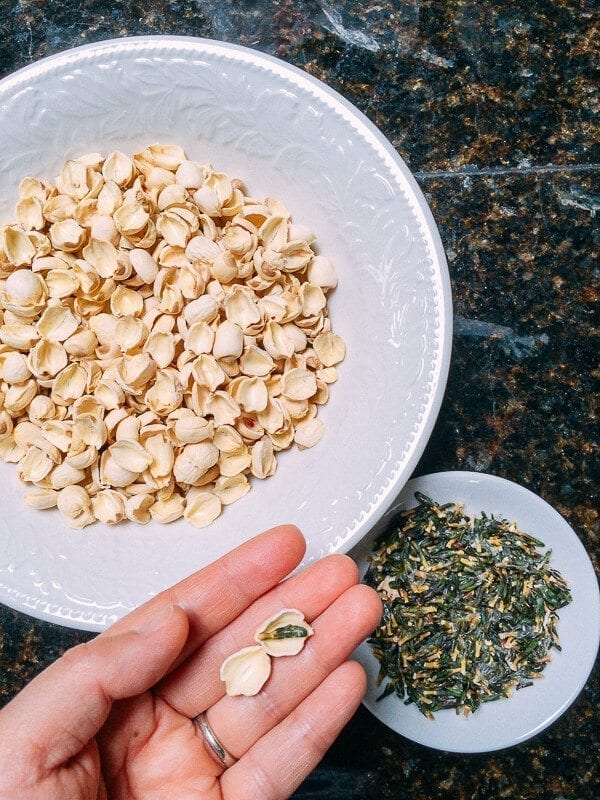
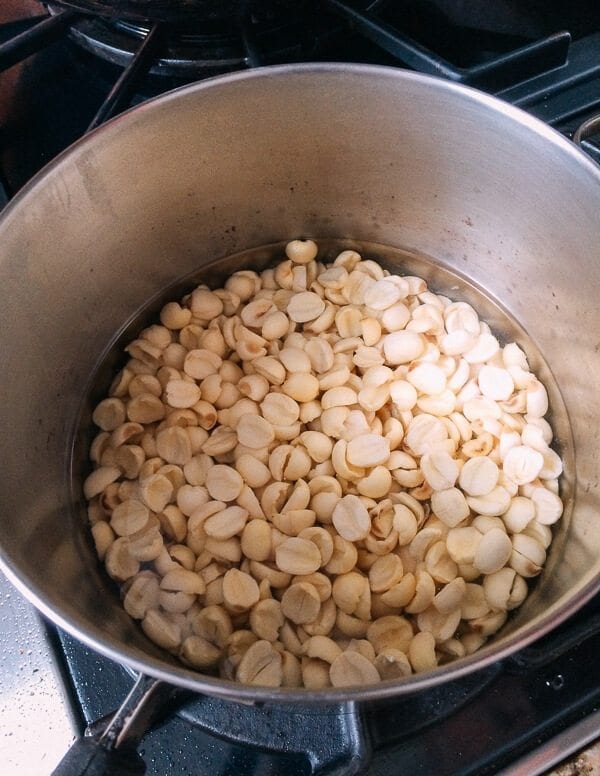
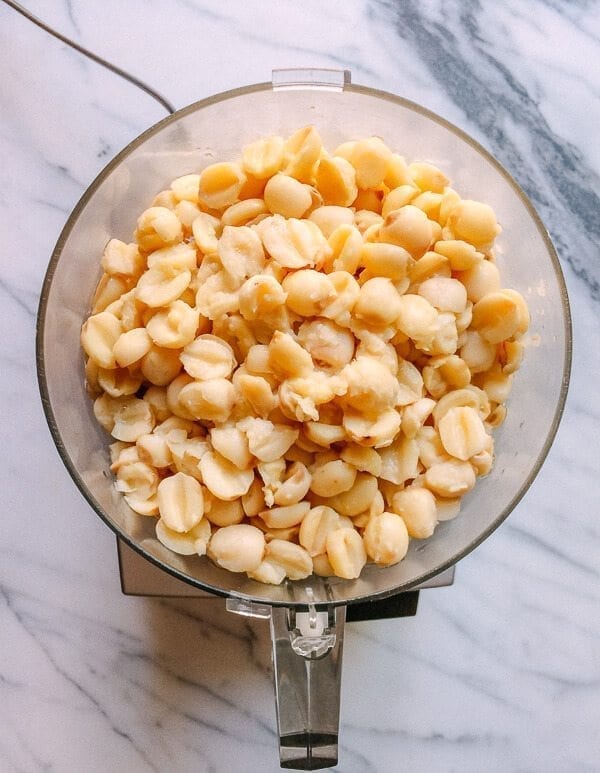
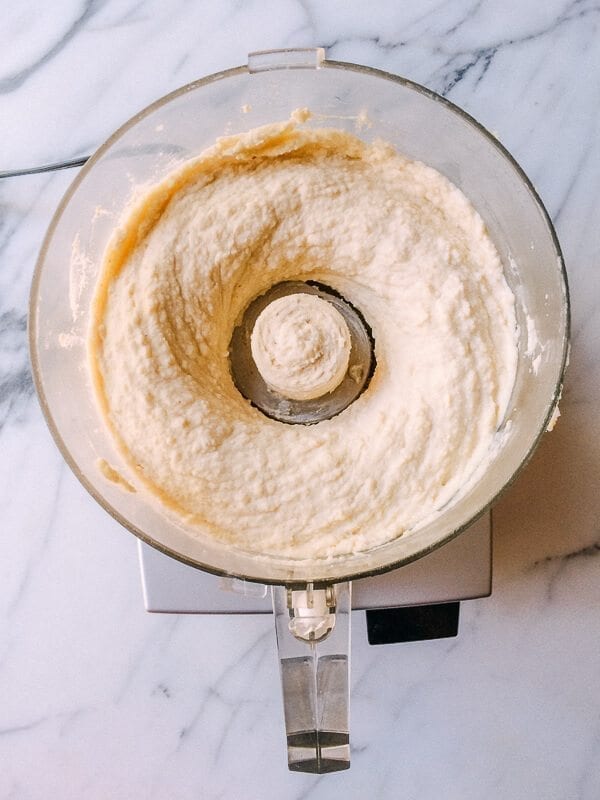
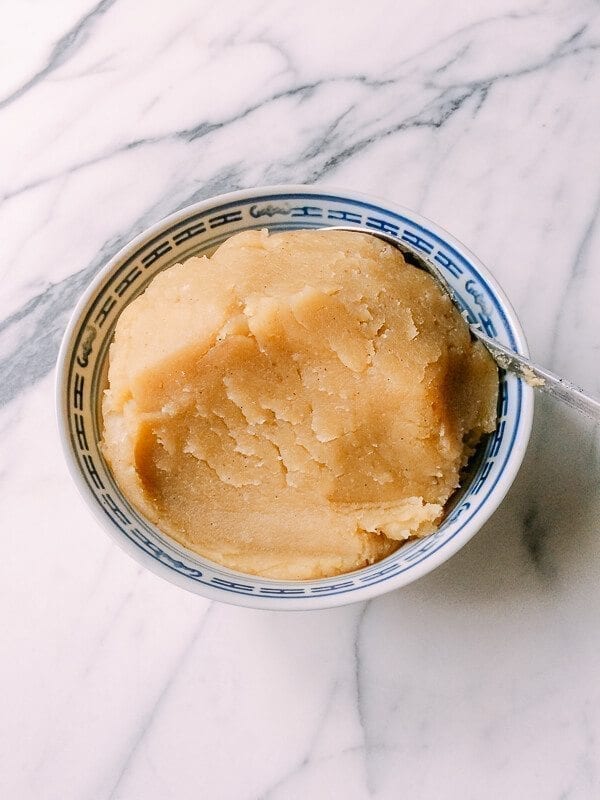
Using a butter knife, gently split the lotus seeds in half through the top opening. Remove and discard the green center, which is very bitter. Rinse them and transfer to a large bowl. Cover with at least 2 inches/5 cm of water, and soak them overnight. The next day, wash and drain the lotus seeds. In a pot, add the lotus seeds and 4 cups of water (the water level should be above the lotus seeds). Bring the mixture to a boil over high heat. Once the water reaches a boil, turn the heat to low, and let the seeds simmer for 30 minutes. It’s done once the lotus seeds are softened but have maintained their shape. Turn off the heat, let cool, and then drain the liquid in to a separate bowl. (Set this liquid aside.) In a food processor, puree the cooked lotus seeds (it’s best to do this in two batches). Slowly add some of the reserved cooking liquid until the puree is very smooth but not too runny (a hummus-like consistency). Transfer the lotus puree to a non-stick pan (or a well-seasoned cast-iron pan). Turn the heat to medium/medium-low (it shouldn’t be so high that it generates steam or smoke at any point). Stir/flip/fold the puree constantly using a silicone spatula for about 30 minutes to avoid crusting. During this process, add the oil in 3-4 batches. Then stir in the sugar in 3-4 batches. Lastly, add the maltose in 2 batches. When adding each batch of material, make sure the last batch was well incorporated (2-3 minutes) before adding the next batch. The lotus filling is done once the lotus paste is slightly firmer/can hold its shape. Let it cool completely before storing in the refrigerator in an airtight container. You can make this one day ahead of time, and I found that it’s easier to work with after chilling.
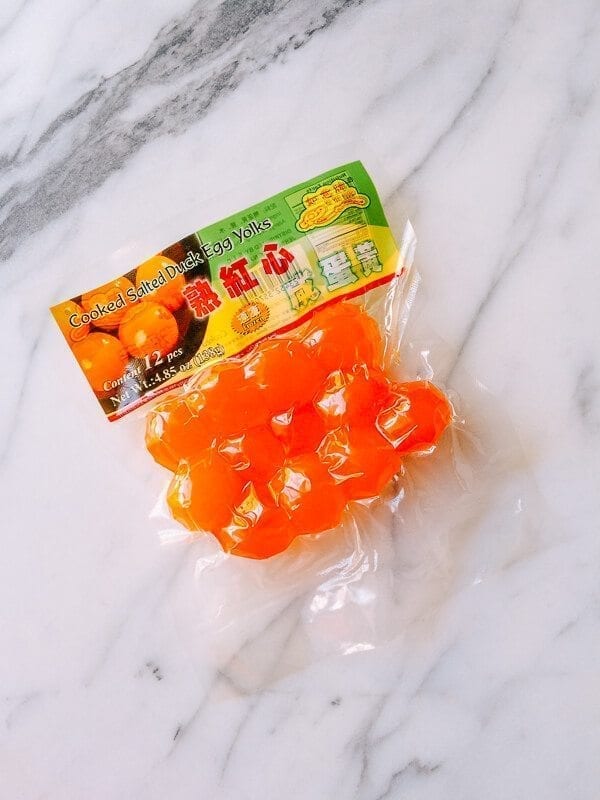
Lotus Mooncakes Part III: the Salted Duck Egg Yolk (it must be salted)
There are a couple of ways to go about preparing the salted duck egg yolk:
Lotus Mooncakes Part IV: The Dough
This part is the easiest! (I figured you’d be in need of a bit of good news at this point! Ha!)
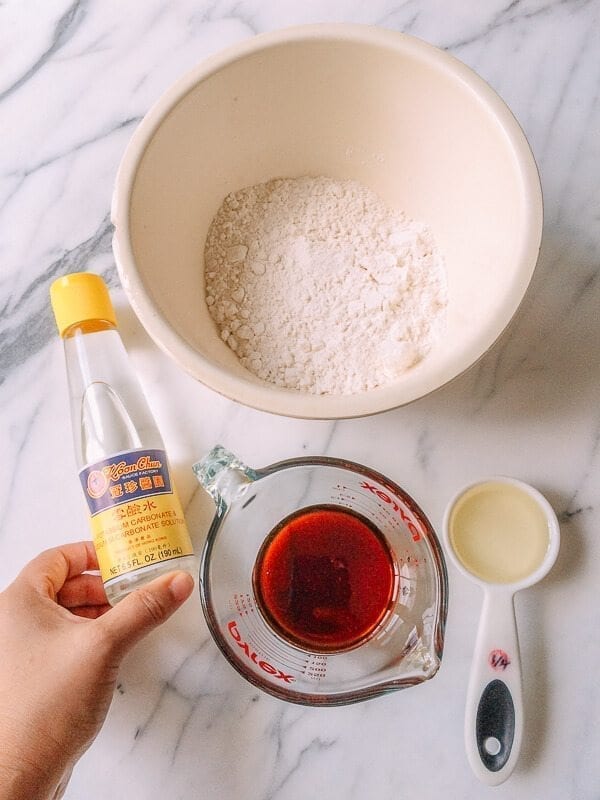
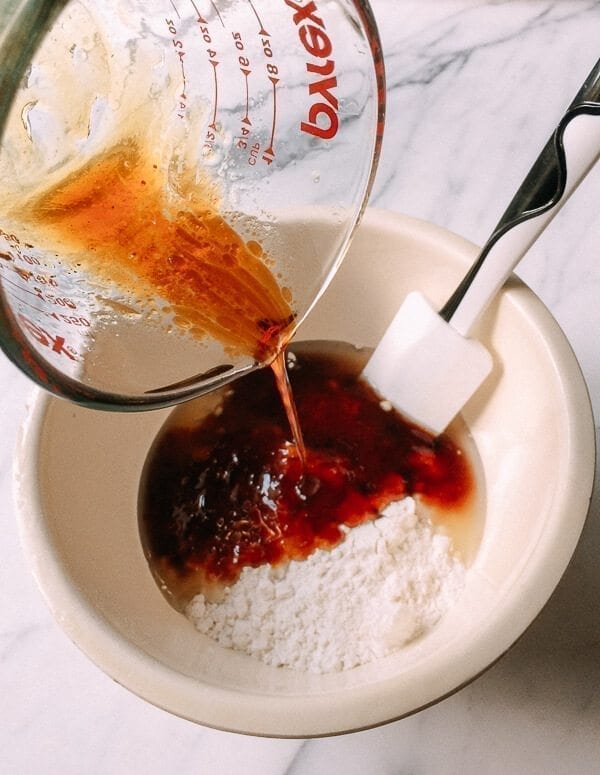
140 ml sugar syrup (that you made or bought) ⅓ cup peanut oil or corn oil 1 teaspoon lye water (available at your Chinese grocery store) 1 ⅔ cups flour (about 250 grams) and more for dusting
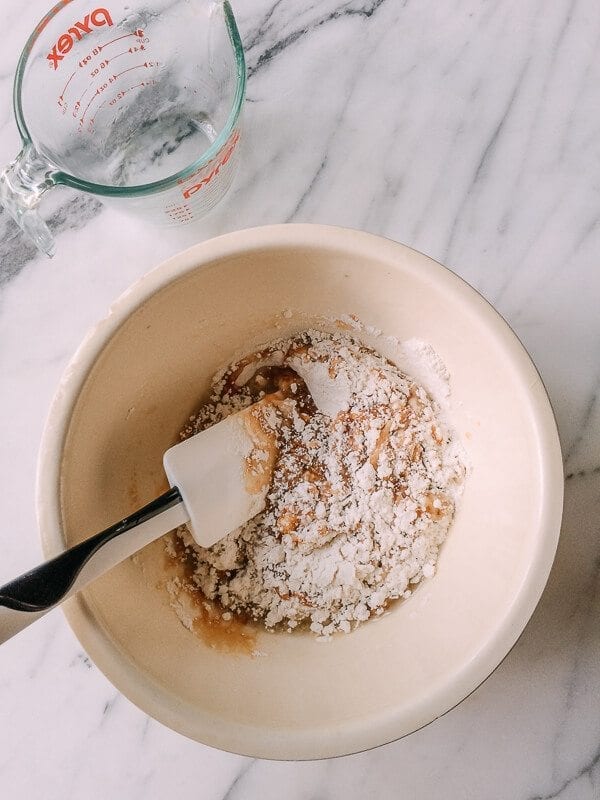
First mix the sugar syrup, oil, and lye water together. Then add the mixture to the flour, and use a rubber spatula to fold and combine everything into a soft dough. Do not overwork the dough. This step should only take about a minute or two. Cover the dough in an airtight container or with an overturned plate. Let it rest in the refrigerator for 1 hour. Chilled dough is much easier to work with. (Side note: you may also leave the dough in the refrigerator overnight if you’d like to make it ahead of time.)
Lotus Mooncakes Part V: Assembling the Mooncakes
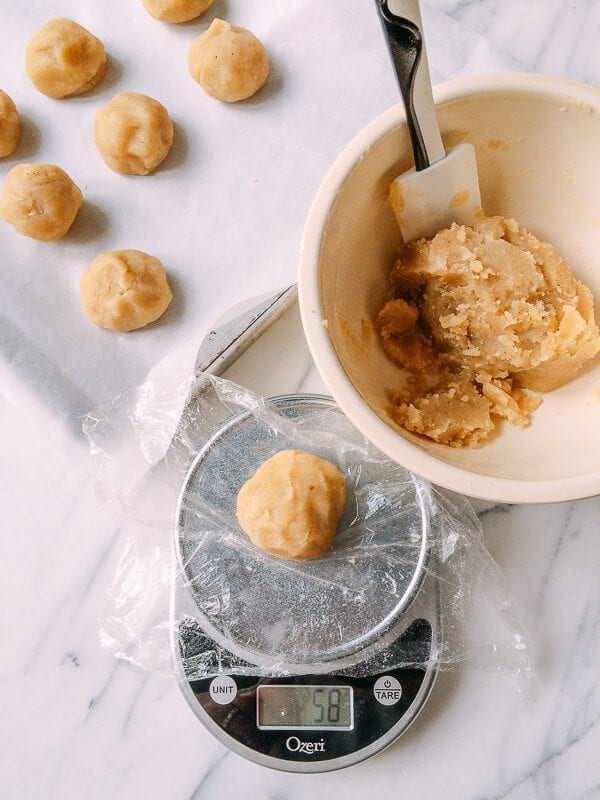
While the dough is resting, let’s start assembling the filling. My mooncake mold is marked 100 grams, which means each mooncake should weigh about 100 grams after assembly. Here’s the breakdown for each component, by weight, that I used:
Dough: 25 grams Salted Duck Egg Yolk: about 22 grams (I bought cooked salted egg yolks that come 12 in a pack) Lotus Filling: 58 grams if you are using the salted duck egg yolk; 70 grams if you are not using the salted duck egg yolk
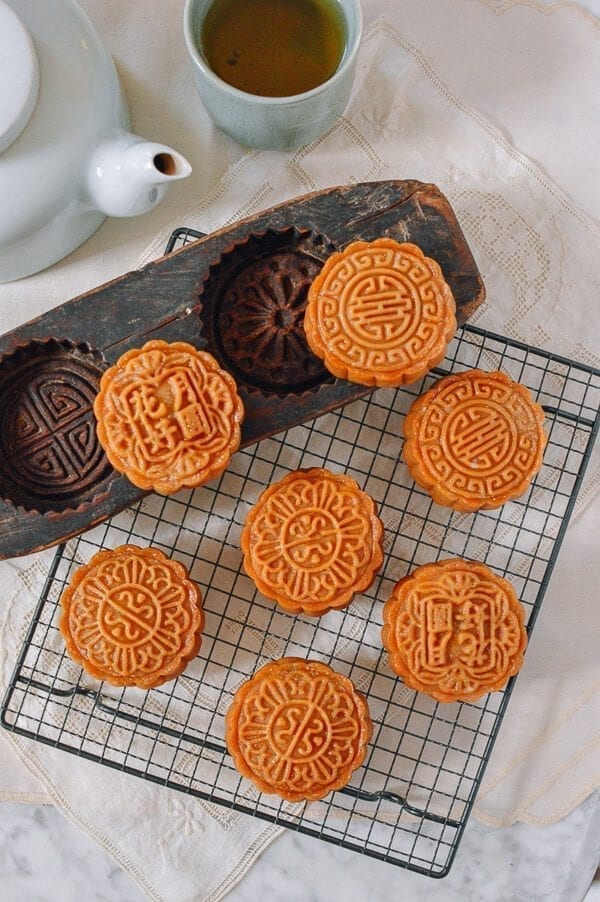
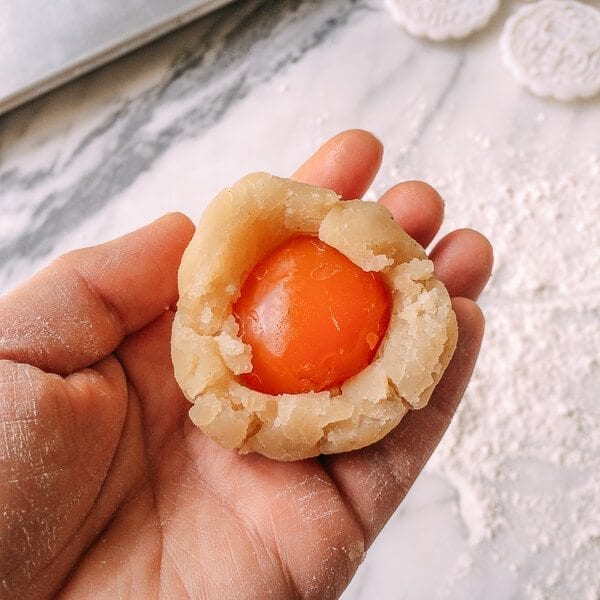
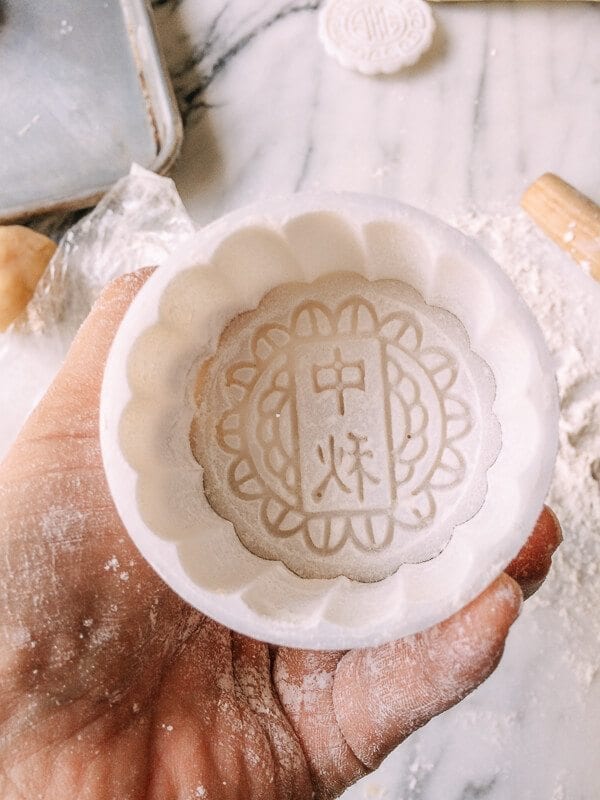
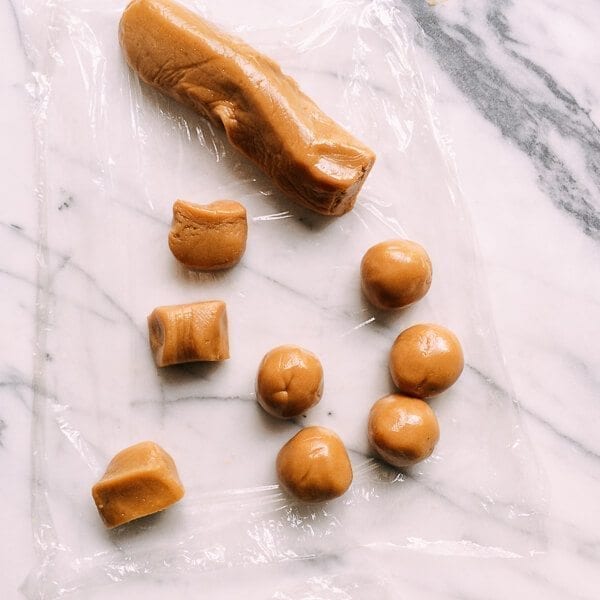
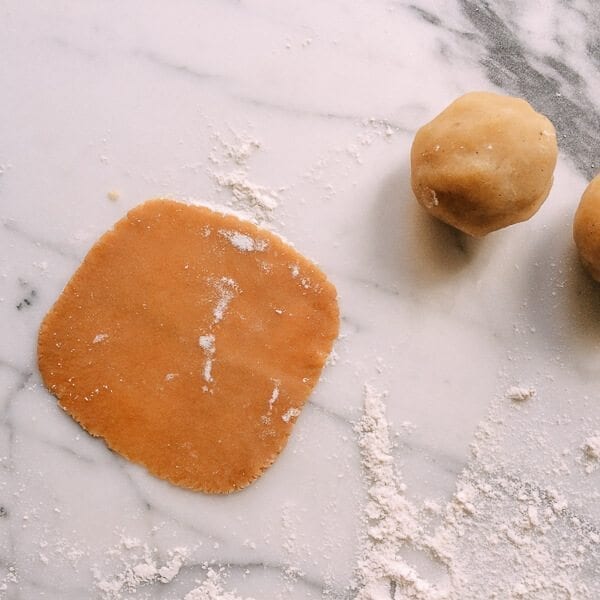
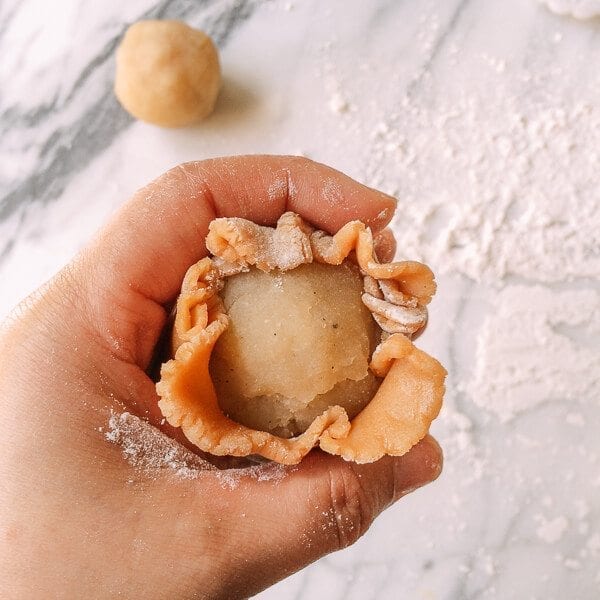
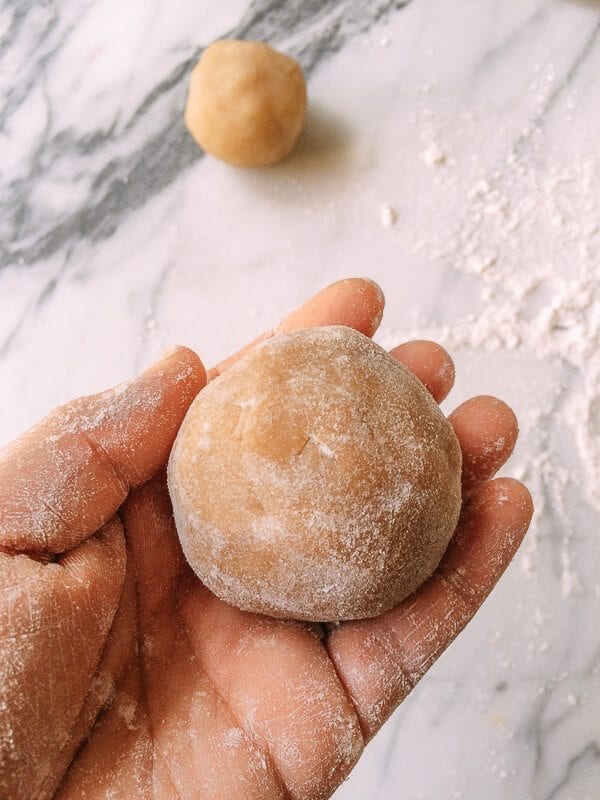
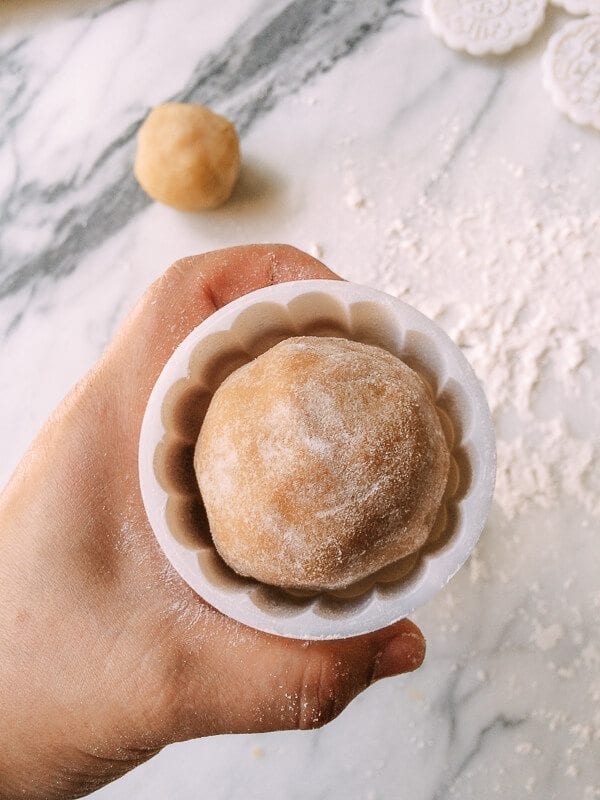
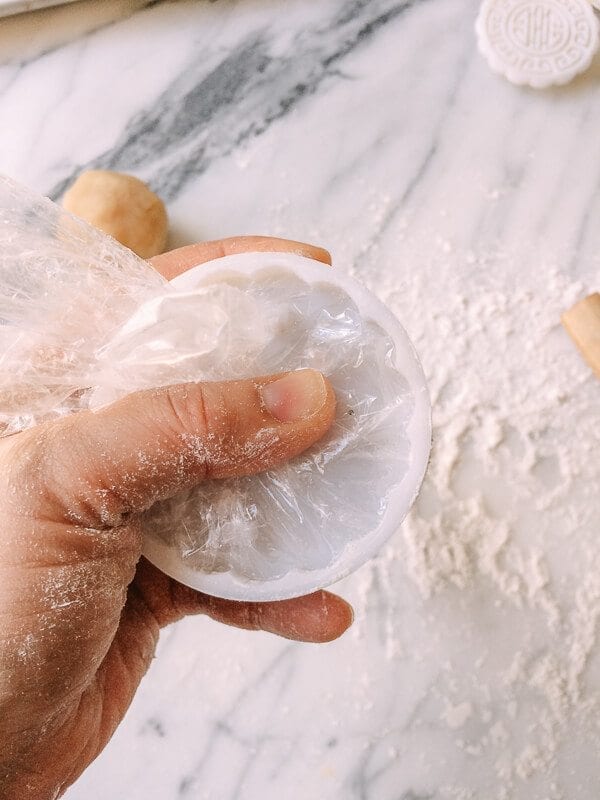
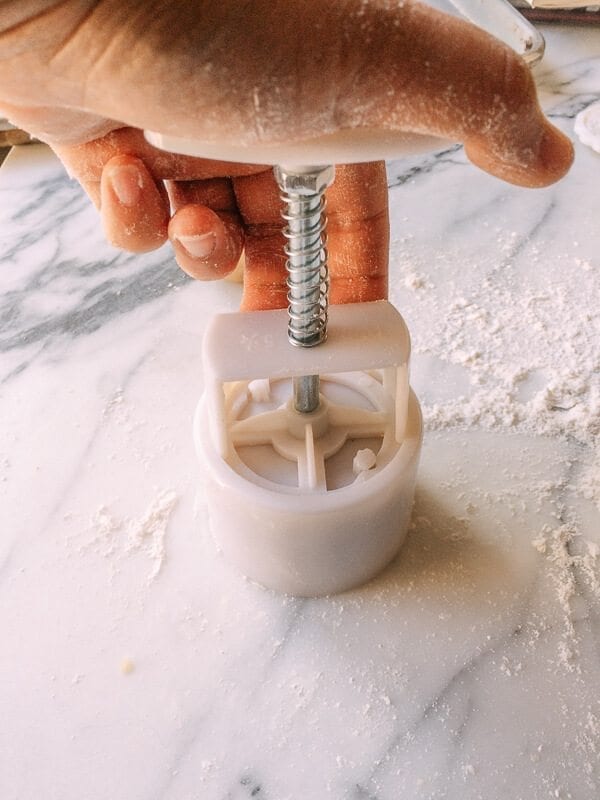
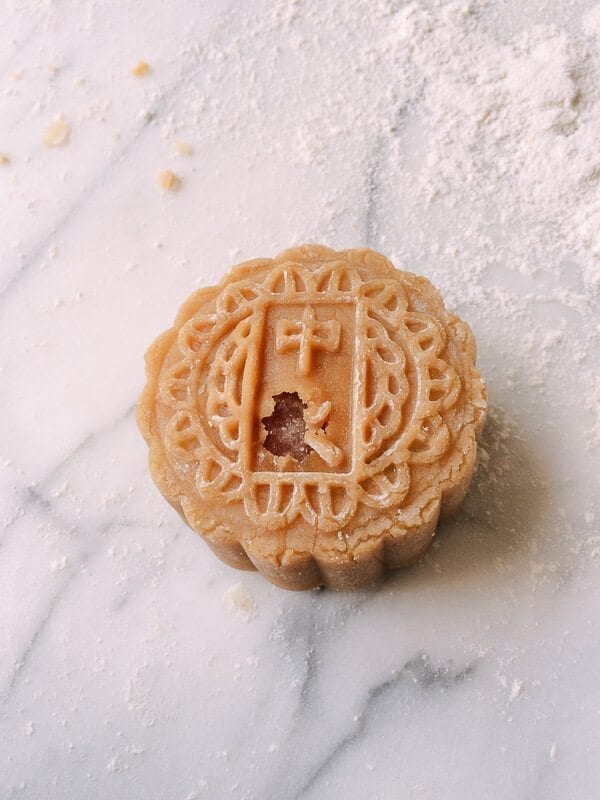
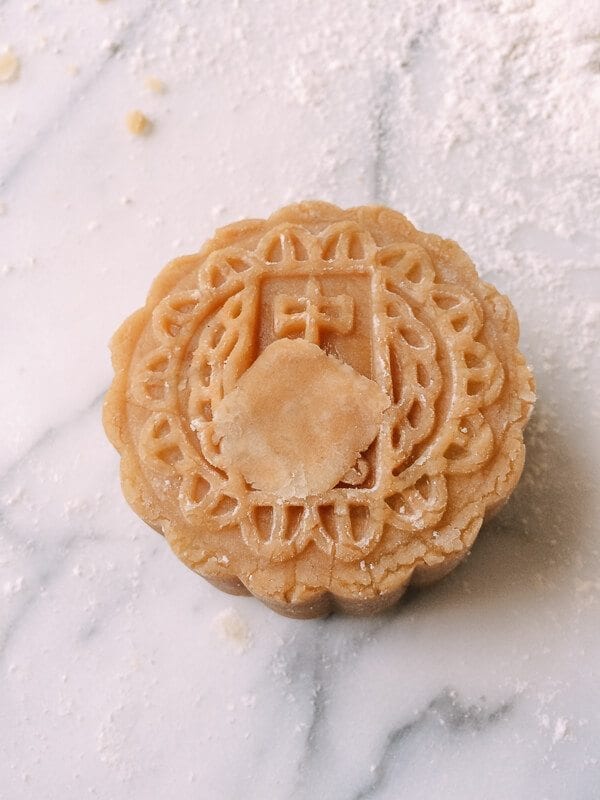
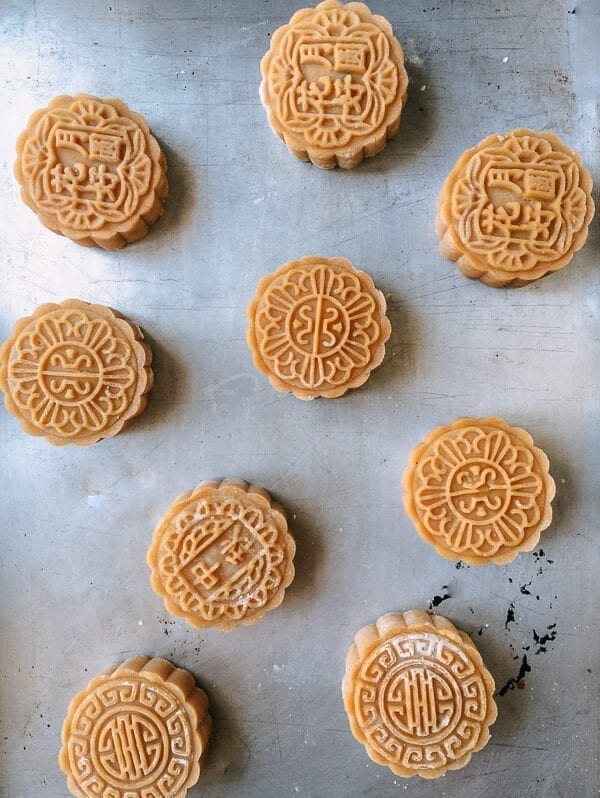
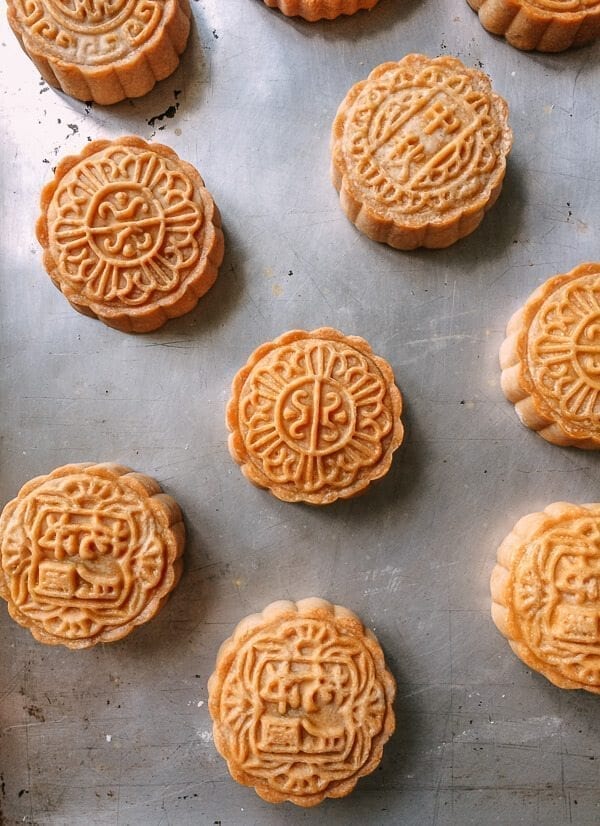
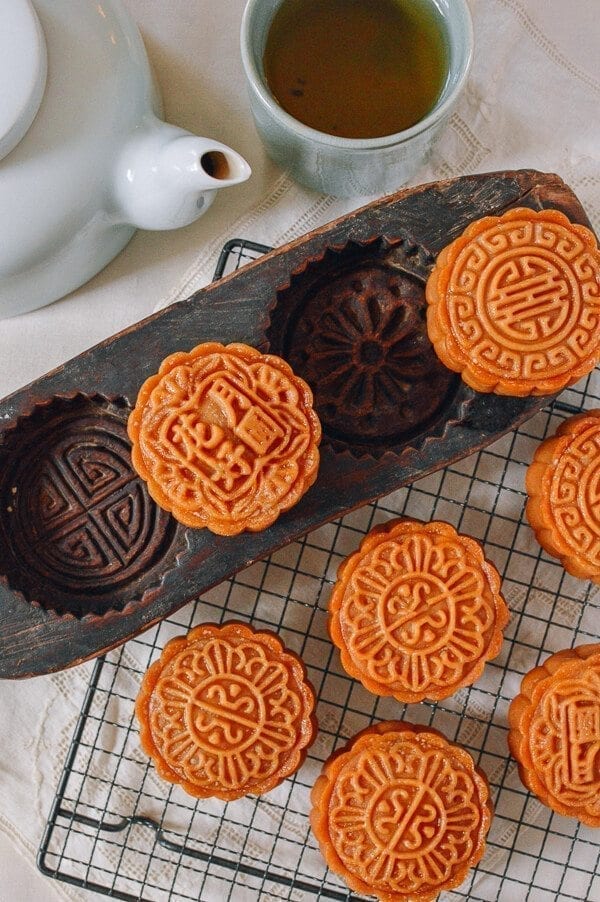
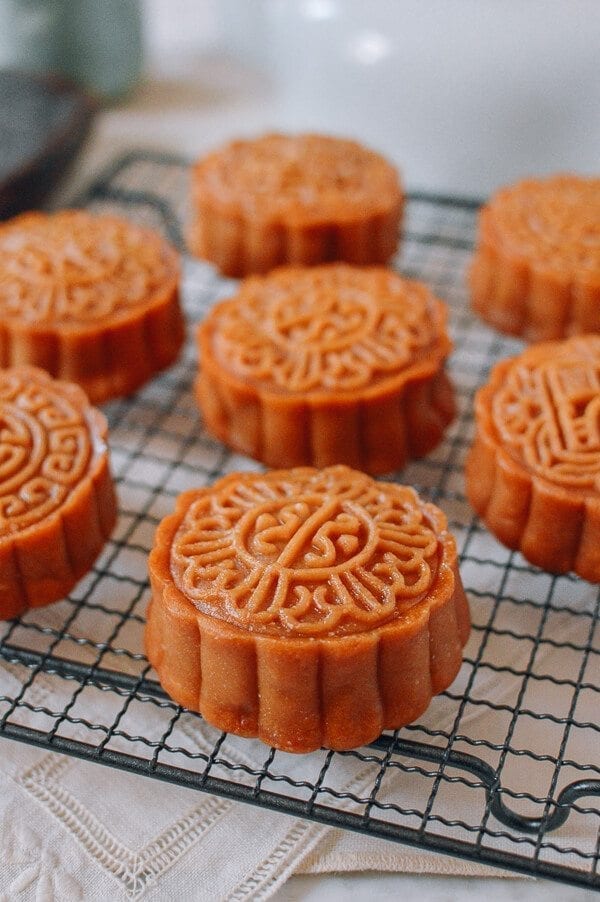
This recipe makes 18 mooncakes total: 12 mooncakes with salted duck egg yolks and 6 mooncakes without. Separately weigh out twelve 58g scoops of lotus filling and six 70g scoops of lotus filling. Shape each portion of filling into balls. Next, take one of the 58g lotus balls, make a deep well in the middle, and insert one salted duck egg yolk into the middle. Then close the top and re-shape it into a ball. Repeat for the remaining 11 pieces. It’s good to separate the “with” and the “without.” It’s also a good idea to put them back into the refrigerator, covered, until you are ready to assemble the rest of the mooncakes. Once the dough has finished resting, it’s time to prepare the mooncake mold. My mooncake mold came with four pattern plates. One plate should be attached to the mold itself and locked in place. Wrap another one with clear plastic, because we will use it to press the mooncake from the bottom;, Now dust the inside of the mold with plenty of flour and shake off the excess. You’ll need to repeat this process before pressing every mooncake to avoid sticking. Divide and weigh the dough into eighteen 25g pieces, plus 1 smaller dough ball for scraps/mending, which I will get to. Shape each piece into a ball. It’s also best to keep most of the dough balls in the refrigerator while assembling and only take out a couple pieces at a time. Lightly dust the dough balls with flour. Take one dough ball and roll it out on a lightly floured surface into a 4-inch/10 cm round. Put one piece of filling in the center. Carefully lift it up and turn it upside down, and gently press out the air bubbles around the lotus ball, without breaking the dough. Now turn the opening facing up, and slowly press the dough together to close the opening, keeping the distribution of the dough as even as possible. The dough feels like Play-doh, so it’s easy to break, but it’s also easy to squish back together. These instructions might sound confusing, but follow along with the pictures and keep in mind that the chief goal here is to close the dough around the filling without capturing air inside. Now lightly dust the assembled ball with additional flour. Place it inside the mooncake mold with the mold opening facing up. Now press in the bottom piece (with the clear plastic-wrapped plate that you prepared). With some pressure, gently press it inward until it stops giving. Quickly sit the mold down, and press the mooncake out with the top pressure bar. The bottom piece will come out no problem, but use your other hand to VERY GENTLY guide the mooncake out of the mold. When and if a small piece of dough gets stuck and does not come out, get a small piece of the “scrap”/“mending” dough to patch up the area. Then clean the mold and dust it well with flour again. Then gently flatten all sides of the mooncake to make it smaller, so it can go back in the mooncake mold for re-shaping. Use slightly more flour for dusting if this becomes a persistent issue. Place the mooncakes on a baking sheet as you make them. Repeat until you’ve assembled all 18 mooncakes. Note that they will not change size during baking.
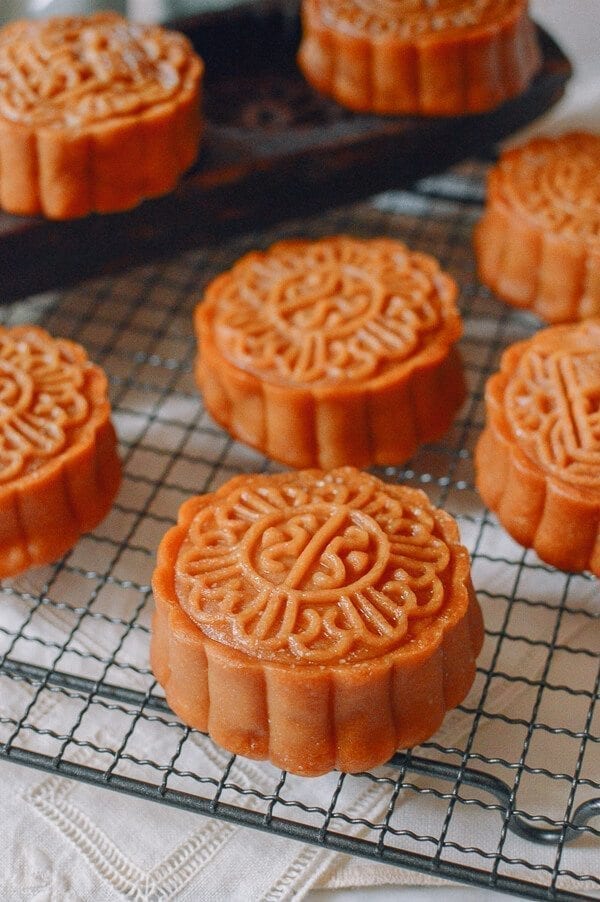
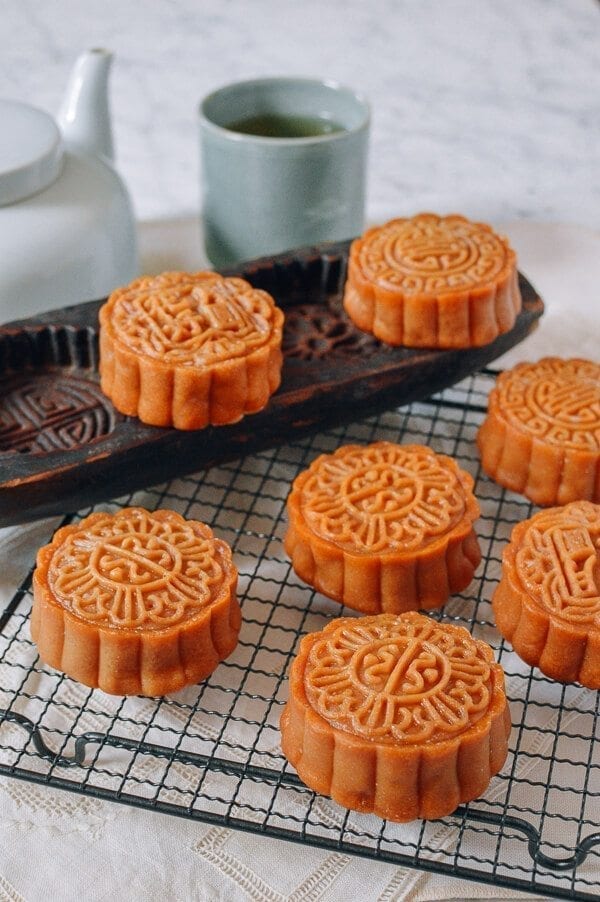
Lotus Mooncakes Part VI: Baking the Mooncakes
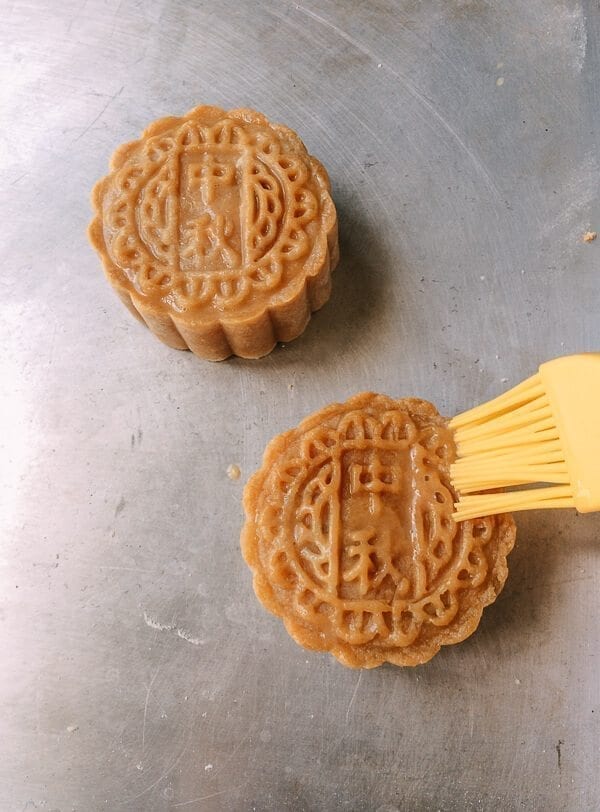
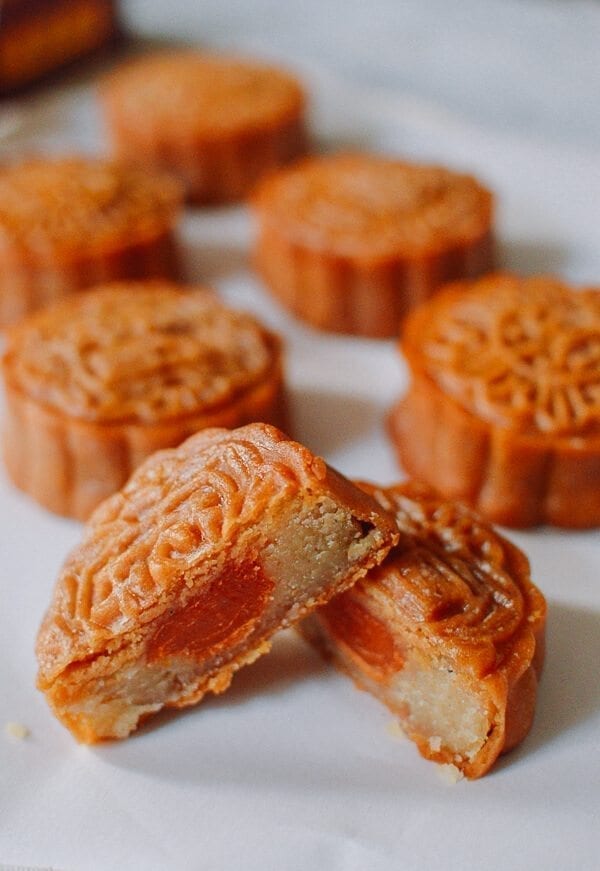
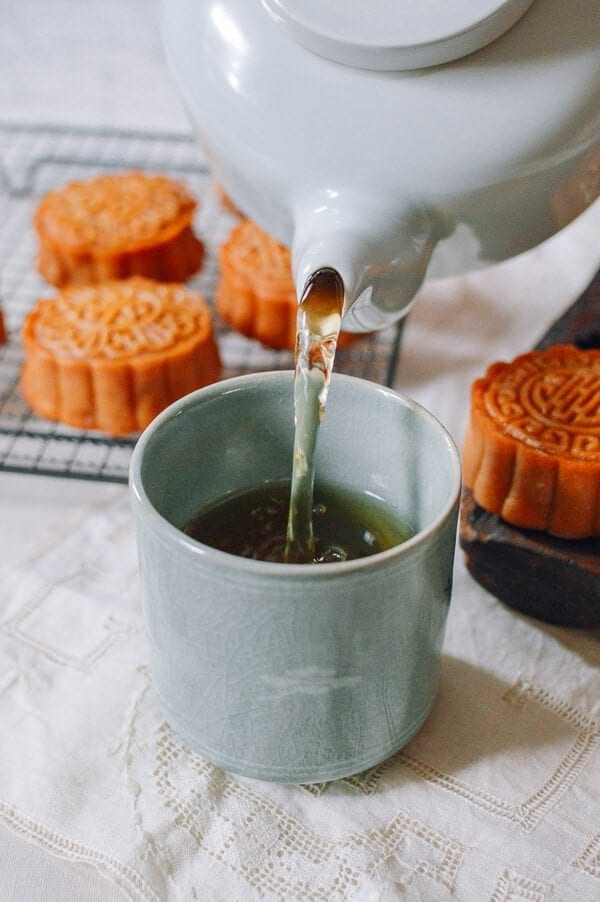
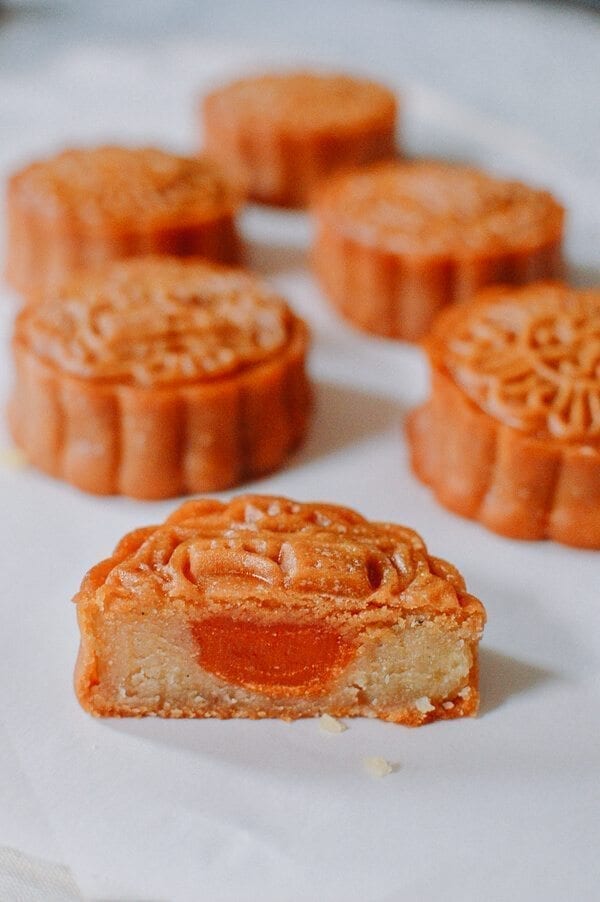
1 egg yolk 3 tablespoons water
Preheat the oven to 325°F/160°C when you are almost finished assembling the mooncakes. Once the oven is preheated, gently mist the mooncakes with a food-grade spray bottle (if you have one) filled with water. But since I didn’t have one, I just used my fingers, and it worked fine! Dip your fingers into a bowl of water, and fling the water on your fingers onto the mooncakes a couple of times. This prevents the dough from cracking. Then, immediately put the mooncakes in the oven and bake for 5 minutes. (Remember to set the timer!) Now prepare the egg wash by whisking the egg yolk and water together. After the mooncakes have been baking for 5 minutes, take them out of the oven and immediately lower the oven temperature to 300°F/150°C. Now lightly brush each mooncake with egg wash, and put them back in the oven. (Ignore the silicone brush in these photos. We’ve found that natural bristle pastry brushes work better for this step, as they don’t cause egg wash to pool in the crevices of the mooncakes.) Bake them for another 15 minutes and remember to set the timer. When the time has elapsed, take them out and let them cool completely. When the mooncakes first come out of the oven, the dough will look dry rather than shiny. This is normal. Cool them completely. Once fully cooled, store the mooncakes in an airtight container for 1-2 days, and the outside will get that nice shiny sheen that you recognize and love. After this last step, any uneaten mooncakes can be kept in the refrigerator for a week or up to 10 days. Better yet, give them out as gifts to your family and friends! They will be so impressed! (Then show them this recipe, so that they can be REALLY impressed.) These lotus mooncakes are definitely a labor of love, but we think they’re worth it. The most exciting part is cracking one of these lotus moon cakes open: They’re lightly sweet and delightfully crumbly, just like a good mooncake should be. The salty bite from the egg yolk goes really well with the sweetness of the dough and the filling. We like having our lotus mooncakes with a cup of hot tea. Happy Mid-Autumn Festival!