Shrimp preparation is something I learned during my days working as a kitchen man prepping and processing food. Along with cutting vegetables and meats, cutting and boiling lobster, I peeled shrimp. A whole lot of shrimp. Of all different sizes, types and quality levels.
Tips on Buying Shrimp
1. Buy Frozen Shrimp
Of course, when buying seafood, you’re looking for freshness. However, I would say that unless you have a very trusted fishmonger or seafood shop that sources fresh, never-frozen shrimp, buy shrimp from the frozen section of your grocery store! Always check labels for any additives – “shrimp” should be the only ingredient. While it may sound counter-intuitive, frozen shrimp are often fresher than the shrimp you see laid out on ice at the seafood counter. That’s because they are flash frozen once, and generally stay frozen until they hit supermarkets. The thing you’re looking to avoid is shrimp that has been thawed and sitting out for days, or shrimp that has been refrozen and thawed multiple times. Ultimately, it’s hard to know how long the shrimp at the seafood counter has been out, and it’s even harder to know how many times it’s been frozen and thawed.
2. Choose Shell-on Shrimp & Peel Them Yourself
There are a dizzying number of options when it comes to selecting shrimp. You can buy them with the shells on, or shrimp that have already been peeled and de-veined. I like to buy shrimp that are still in the shell, but with the heads removed. The exception would be if you’re cooking traditional dishes that require whole shrimp with the head still on, such as our Cantonese Salt and Pepper Shrimp or Judy’s Shanghai Shrimp Stir-fry. But generally, the less processing required before the shrimp were flash frozen, the better. I think you’re ultimately getting a fresher product. Peeling shrimp is generally pretty easy, and I’ll show you how to do it in this post as well.
3. Consider the Dishes You’re Making When Selecting Shrimp Size.
Shrimp vary widely in size––even farmed shrimp. You may have noticed different numbers on the packages of shrimp at the grocery store––like 16/20, 21/25, or 31/35. These numbers are called the “count,” which is the number of shrimp per pound. The lower the numbers, the bigger the shrimp. The higher the numbers, the smaller the shrimp. When choosing a size, consider what dish you’ll be making. Some dishes require large shrimp, while some are more flexible. A recipe will usually indicate what size shrimp are required. Check those recommendations, but the ultimate decision is yours! Another thing to note is whether the shrimp will be cooked with the shell on or off. When we cook shrimp recipes with the shell on, we like to choose shrimp with thinner shells, avoiding varieties with thicker shells like tiger shrimp.
Here are a few more general tips for buying shrimp:
How to Peel Shrimp
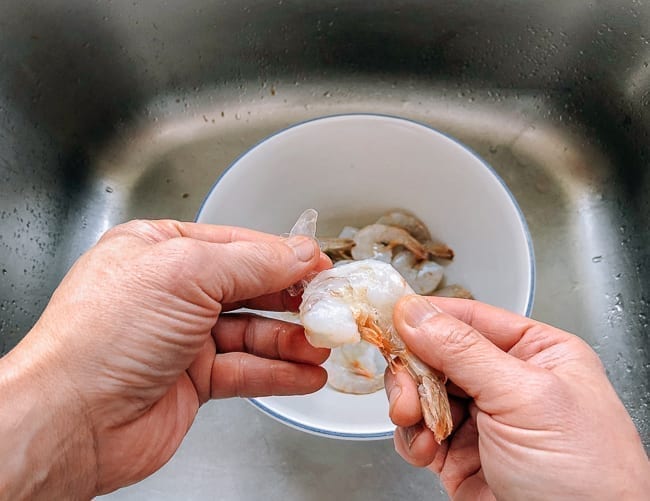
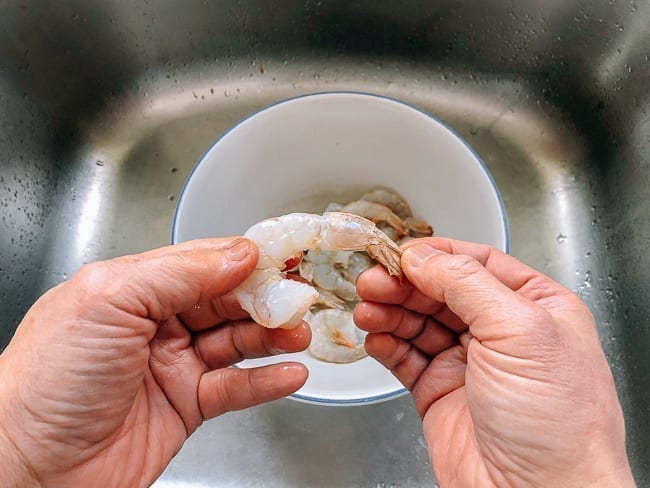
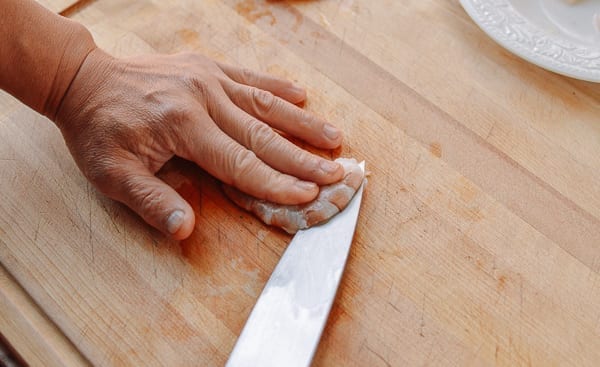
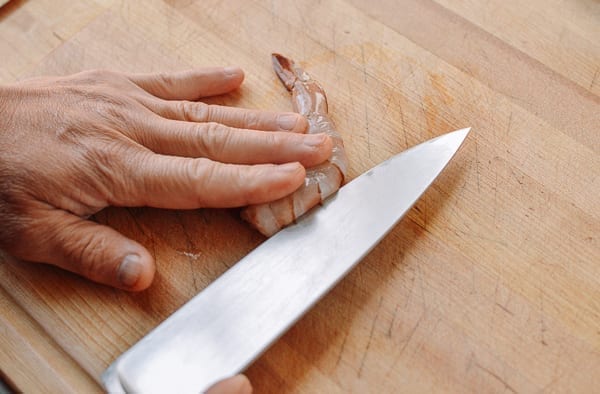
Buying shrimp in the shell requires a little more work, but generally gets you the freshest shrimp in my opinion. Here’s how to peel them. With one hand, grip the lower part of the shrimp with one hand and start farthest away from the tail to peel the shell and legs off.
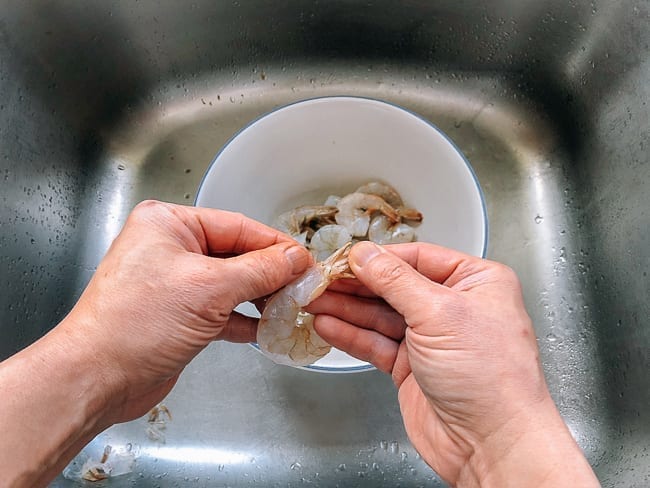
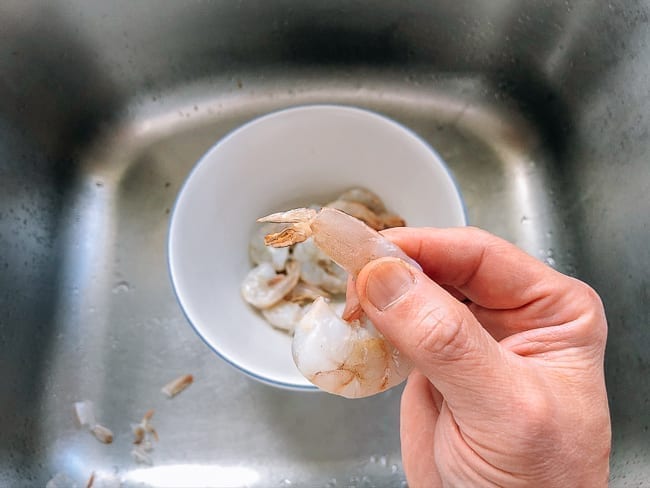
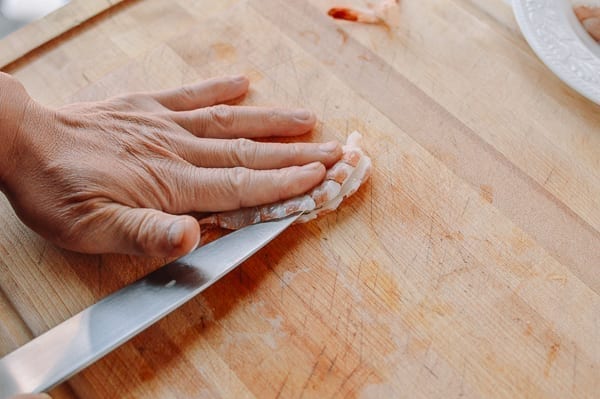
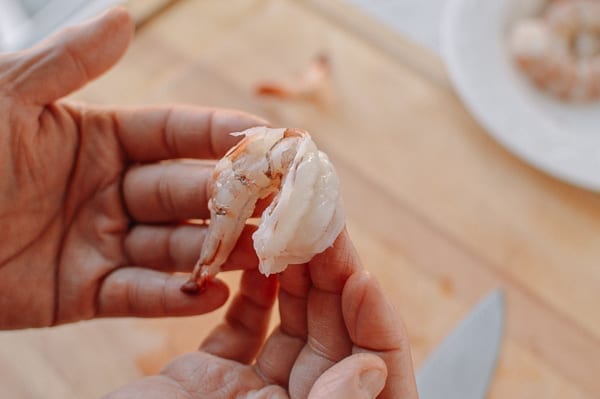
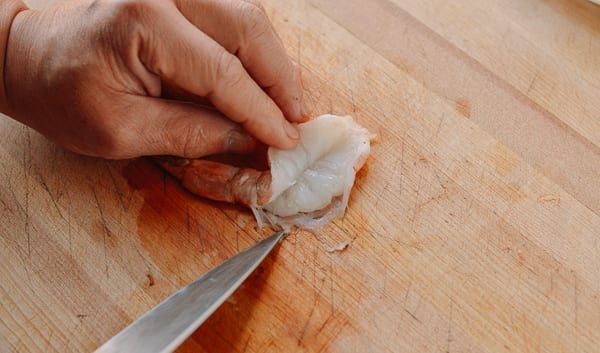
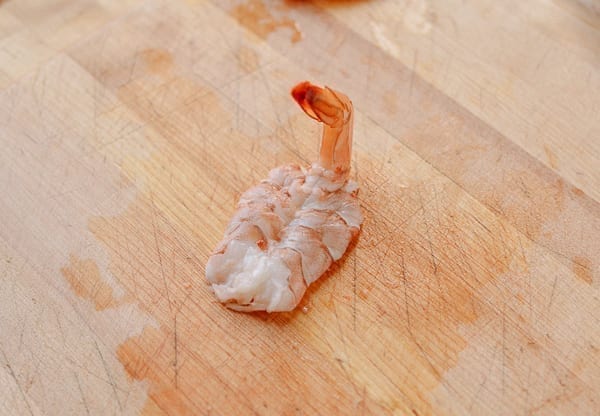
Take care when you get to the tail, since you may have to split the tail shell and gently pull it out to leave the tail meat intact.
Like anything else, practice makes perfect. I got pretty good at it when I had to peel 10 pounds of shrimp a day during busy seasons! If the shrimp are especially fresh or have thin shells, they can be slippery, which makes them harder to peel. The answer? A little vinegar! Dilute 1 tablespoon of vinegar in a cup of water, and splash it over the shrimp. The vinegar cuts through the slimy coating and makes it much easier to remove the shell all the way down to the tail. Oh and I almost forgot, shrimp shells and shrimp heads are both great for making shrimp stock! See our Shrimp Étouffée and Shrimp Pad Thai, where we make shrimp stock as part of the recipe.
How to Prepare Shrimp with Heads
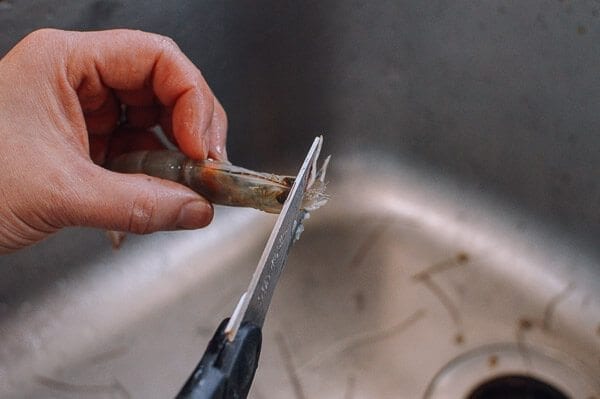
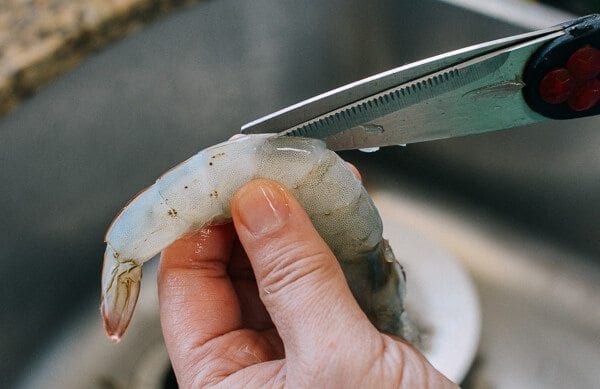
In recent times, eating shrimp with the heads on has become increasingly popular and normalized in Western countries like the U.S. Of course, when it comes to Asian cuisine, people have been cooking and eating whole shrimp for a long time! Here’s how to prepare whole shrimp, if you’d like to leave the heads on. Using kitchen shears, trim off the sharp pointy part at the top of the head.
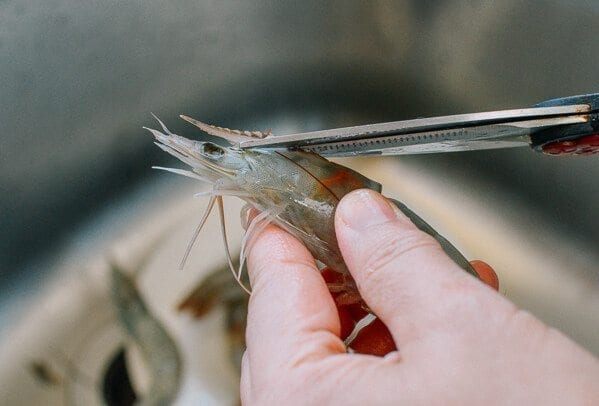
Here is a different angle. Trim that pointy barb at the top of the head––it wouldn’t be fun biting into that! At this point, you can decide if you want to leave the eyes or remove them.
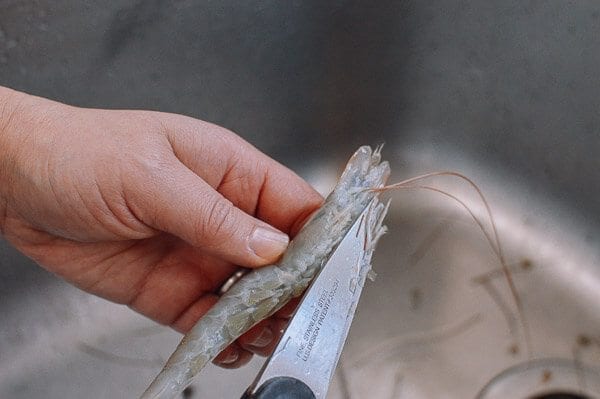
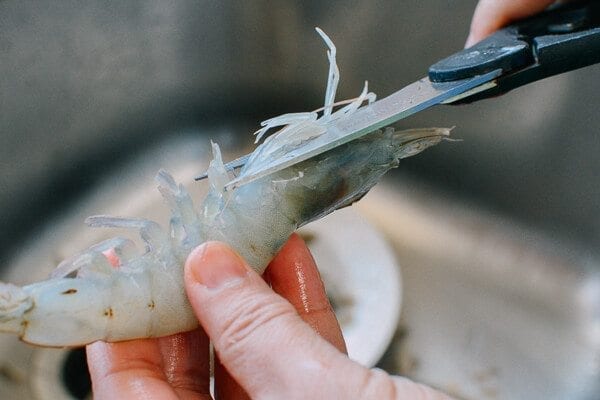
Trim off the shrimp legs and the long antennae, running the scissors along the underside of the shrimp.
Another angle:
Make a small cut on the back of the shrimp shell to expose the sand tract.
Then devein the shrimp by using a toothpick to carefully expose and pull it out, without damaging the shell. If you miss part of the sand tract, make another cut to pull it out.
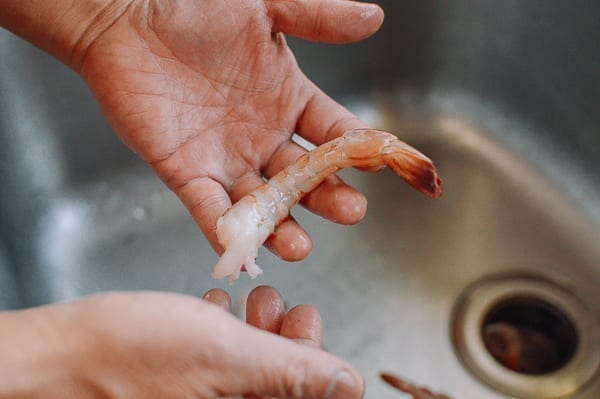
Rinse the shrimp thoroughly, drain, and pat dry with a paper towel. Done!
Can You Eat Shrimp Shells?
This is a common question for people when trying Chinese shrimp dishes with the shells still on. The answer depends on your personal preference, as well as the type of shrimp you have. Some varieties have thicker, harder shells that are tough to eat, while others have naturally thinner shells. It also depends upon how the shrimp are cooked. Flash fried or deep fried shrimp are good examples of when you can eat the shells––almost like potato chips. Cooking the shells at high heat really brings out the shrimp flavor, and those crispy shells are delicious (at least I think so!).
You could also just suck all the flavor/sauce out of those shells before discarding them. The same is true for eating shrimp heads. It’s an Asian thing! Recipes that use whole shrimp with heads on:
Salt and Pepper Shrimp Shanghai Shrimp Stir-fry Typhoon Shelter Shrimp Steamed Shrimp with Glass Noodles, 2 Ways
Marinating Shrimp: A Chinese Restaurant Technique
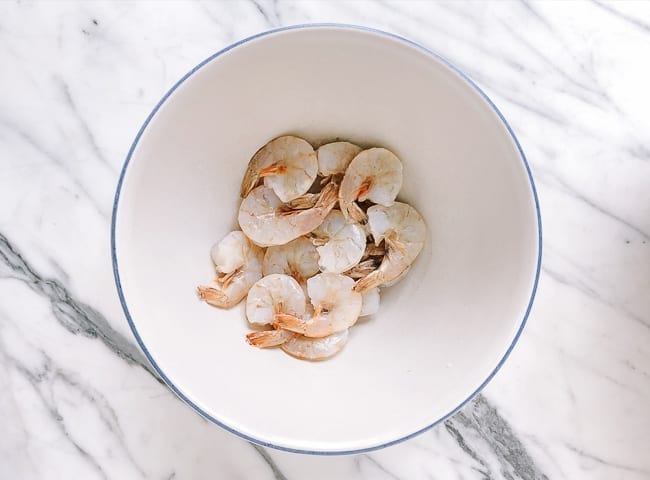
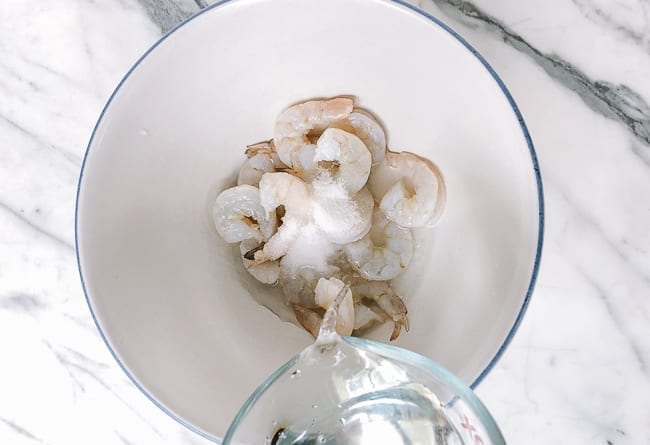
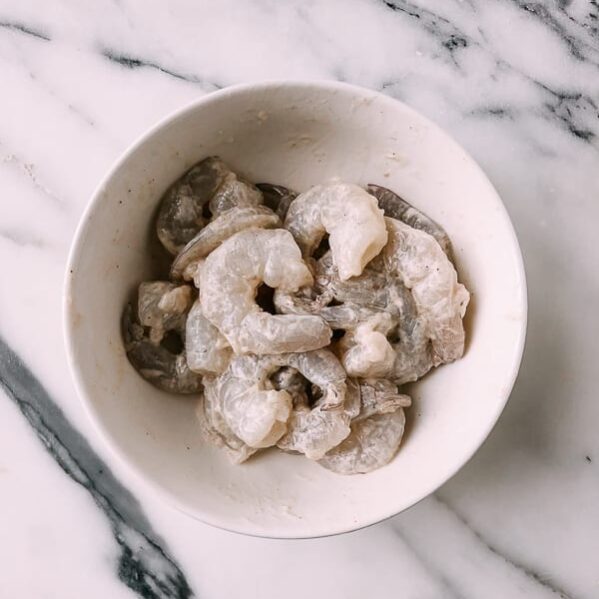
Like any ingredient, the fresher your shrimp are, the less you have to do. High quality fresh shrimp need little or no treatment, aside from removing the shell (if desired), de-veining, and giving them a quick rinse in cold water. In addition to this simple preparation and cleaning, there are marinating techniques you can use to ensure you have delicious, fresh-tasting shrimp. This technique is encouraged if you feel the shrimp smells a little shrimpy, or if it’s been sitting a little too long in your freezer. If they’re not the freshest, you can salvage it with this marinating process using a mixture of sugar, salt, baking soda and ice cold water. Have you ever wondered how at Chinese restaurants, the shrimp always seems super crunchy? This is the secret! Place your shelled and cleaned shrimp in a large bowl.
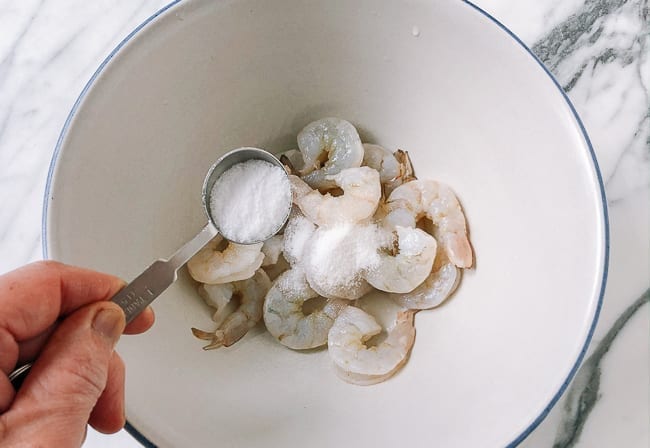
And add sugar, salt and baking soda. Gently massage these ingredients into the shrimp. (Scroll down to the recipe card for exact measurements, depending upon how much shrimp you have to marinate.)
Add ice water and some ice to the bowl, and stir everything together. Let your shrimp sit for 1 to 2 hours, or even overnight in the refrigerator.
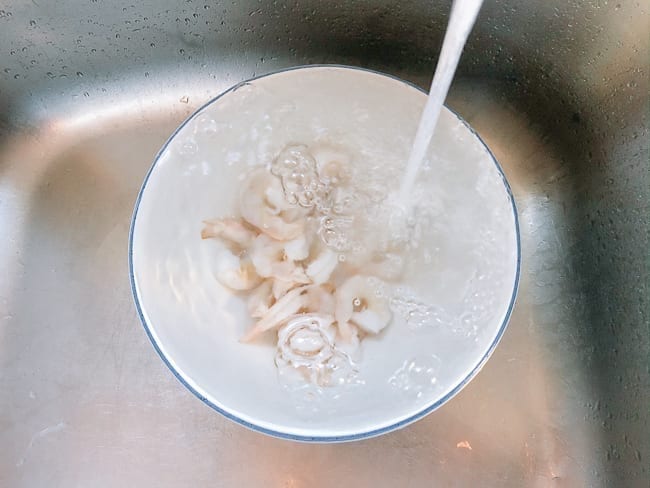
When you’re ready to use the shrimp, run cold water into the bowl and gently stir the shrimp. Pour the water out. Repeat this twice to remove excess salt, sugar and baking soda.
Pour into a colander to drain. Your shrimp are ready to go!
How to Velvet Shrimp
We’ve talked about velveting techniques when it comes to preparing chicken for stir-fry, preparing beef for stir-fry, and how to velvet pork for stir fry. So if you’re wondering whether you need to velvet your shrimp before stir-frying, the answer is that it depends. You can choose to add oil, cornstarch and water to lightly coat your shrimp and keep them moist. Some cooks do it religiously. Others velvet shrimp if it is anything less than super-fresh and skip velveting and cook the shrimp as-is to preserve the fresh taste and texture of the shrimp. You can also add marinade ingredients like sesame oil, clear rice wine (mijiu), or even a little bit of oyster sauce. Let’s just say, we’ll leave velveting up to the discretion of the chef.
How to Butterfly Shrimp
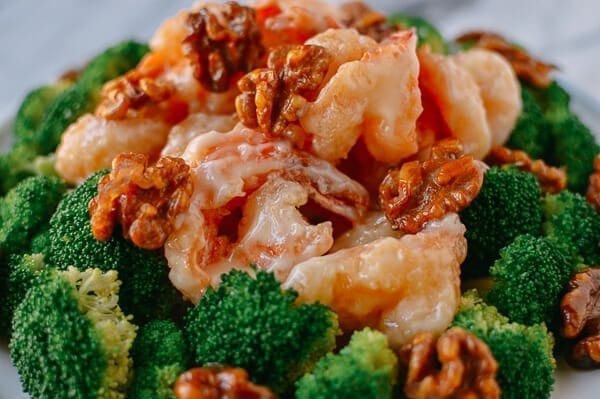
Butterflying shrimp from the back gives you the best and most attractive results for stir-fries. For eating convenience, it’s best to remove both the shell and tail shell, though the tail can be left on for presentation (we’ll talk about both methods below). Some examples of using this classic preparation method are in our Shrimp with Broccoli and Walnut Shrimp.
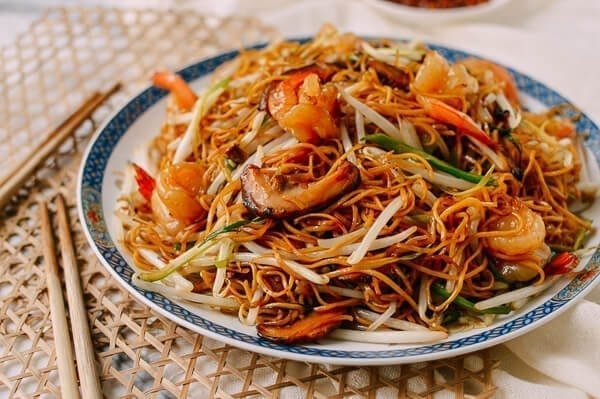
Recipes where we have left the tails on include, Vegetable Noodles With Shrimp and Hong Kong Style Shrimp Chow Mein.
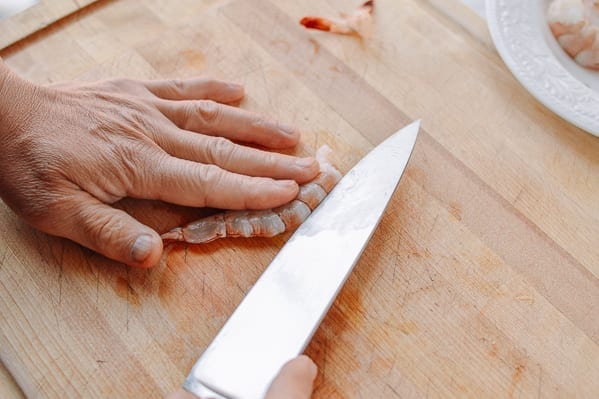
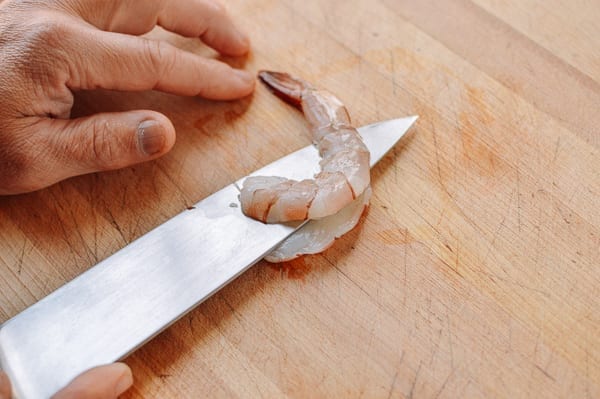
If you’ve purchased pre-shelled, deveined, and butterflied shrimp, you can cut the backs slightly deeper so the shrimp open up and have a nice shape after cooking. This also allows them to better hold onto any sauce in the dish! Here’s the basic method for butterflying peeled shrimp: After peeling the shells, place the shrimp on its side, and use a sharp knife to cut the back of the shrimp down to the tail.
Although a deep cut makes the shrimp look nice when cooked, make sure you don’t cut too deep. About halfway through the shrimp is plenty.
Stop when you reach the tail, and you can remove any sand tract you find. Once all of them have been butterflied, give the shrimp a quick rinse in cold water, and drain in a colander.
Your shrimp are now ready for any stir-fry or Chinese shrimp dish requiring a light deep fry. Your shrimp will open up beautifully when cooked.
More Ways to Butterfly Shrimp (With the Tail On)
The method you choose for how to prepare shrimp depends on how you’re going to cook it. There are other techniques for butterflying shrimp, depending upon the recipe and the presentation you’re trying to achieve. In this section, we’ll show you a few butterflying techniques we’ve used and seen in restaurants over the years. In all of these methods, the tail is still on the shrimp. For the following methods, your shrimp should be headless with the shells still on, but make sure they are not deveined with the backs cut open.
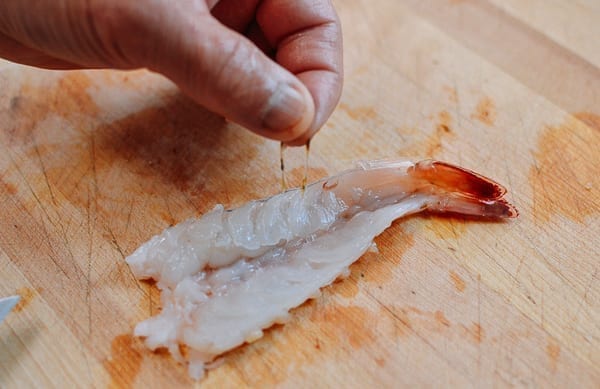
Peel the shrimp, only leaving the small segment of shell that connects to the tail. If you like, you can scrape the tails to remove the liquid inside them, which really results in a superior presentation.
It also reduces water content if deep frying, which reduces oil splatter. I learned this from a sushi chef, while watching him prepare shrimp for shrimp tempura.
1. Full Length Butterflying
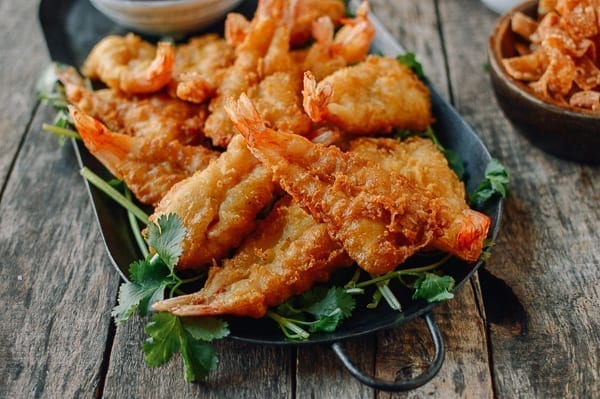
This technique is used in our Fantail Shrimp and Butterfly Shrimp with Bacon recipes. For this butterflying technique, the back of the shrimp should be intact, since it will hold both sides of the butterflied shrimp together.
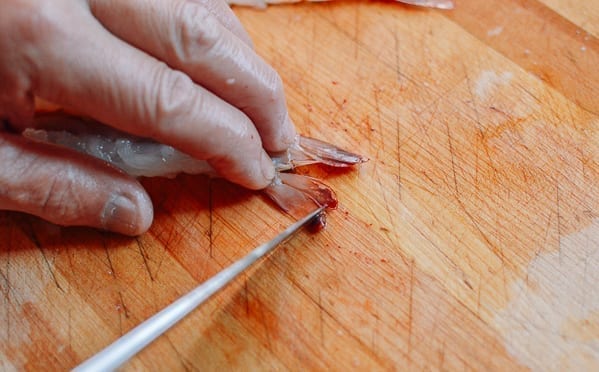
Place the shrimp on its side with its underbelly facing you. Holding the shrimp with one hand, use the tip of your knife to split the tail shell. Next, use a steady, yet light pressure to push the knife into the shrimp, splitting it evenly down the middle until it just reaches the back of the shrimp. Make sure you stop before cutting through the back flap of the shrimp!
Next, be sure to remove any sand tracts and give the shrimp a quick rinse if needed.
Pat the shrimp dry on both sides, and they are ready to go.
2. The Front Butterfly
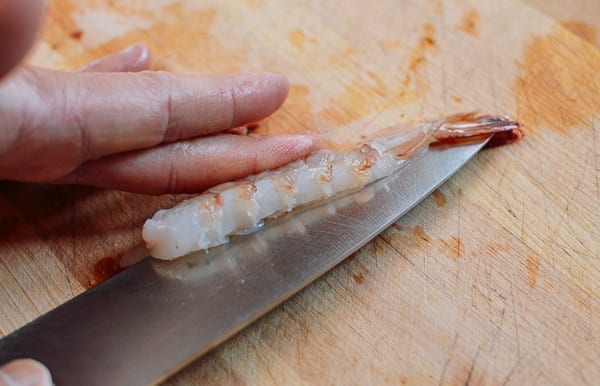
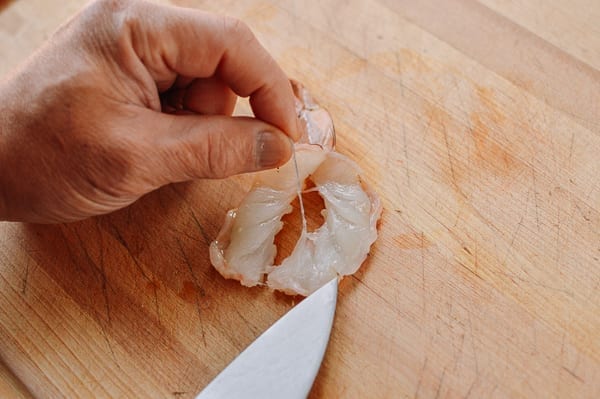
The only difference between this front butterfly method and the last method (full length butterfly) is that you don’t split the tail. This is a great technique for stuffed shrimp, as it has a nice concave shape that’s perfect for holding any stuffing of your choice. Place the shrimp on its side with its underbelly facing you. Slide the knife through the underbelly without cutting through the tail shell, splitting the shrimp in half.
Open up the shrimp, and place it flat with the tail upright.
3. The Back Butterfly
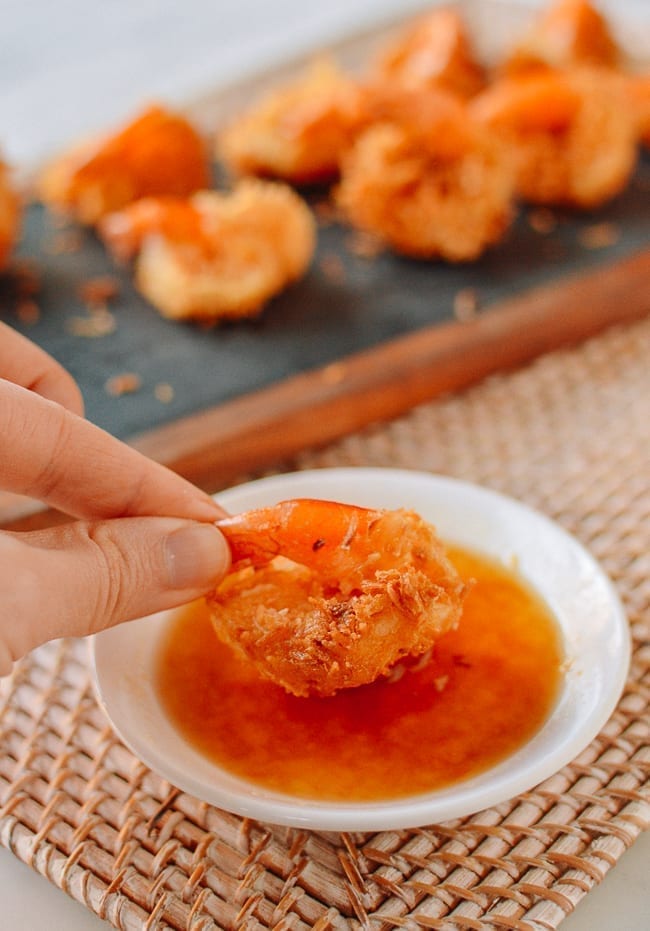
Butterflying shrimp from the back with tail on is a great technique for making baked shrimp or fried shrimp. It has an inviting presentation, and allows you to grab the shrimp by the tail to gobble it up. It also creates a larger surface area for breadcrumbs or batter. We use this butterflying technique in our Coconut Shrimp recipe. People just can’t get enough of that popular appetizer!
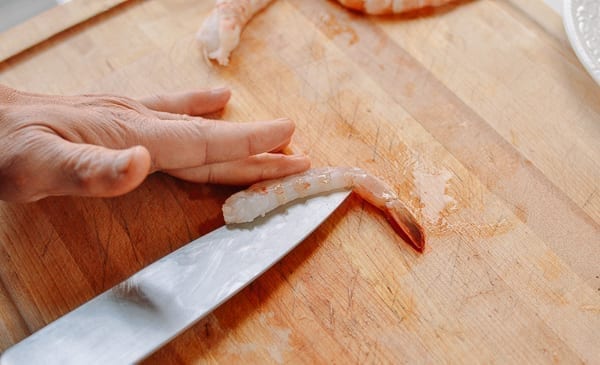
This is similar to the basic butterflying technique for peeled shrimp that I showed in the last section, except we’re cutting farther through the shrimp, and the tail shell is left intact. Place the shrimp on its side, with its back facing your knife. Slice evenly through the back of the shrimp.
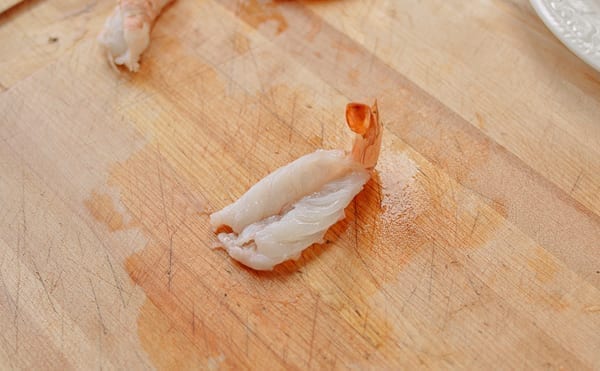
Once the back is split open, you can easily remove the sand tract.
Now your shrimp is ready for your recipe!
4. Split Butterfly
This method involves splitting the shrimp all the way through, rather than leaving some if it intact to hold the two halves together. I learned to split shrimp while working in restaurants, where we would use the method for steaming or broiling. We’d split extra large shrimp (size 10) and arrange them on a metal platter for broiled shrimp scampi. I remember there were 6 shrimp to an order, neatly arranged on a metal platter, topped with garlic, clarified butter, salt, and paprika. At the table, the server would slide the shrimp from the sizzling plater onto a bed of yellow rice and sprinkle it with fresh parsley. Start splitting the shrimp from the back as you would for “the back butterfly” method.
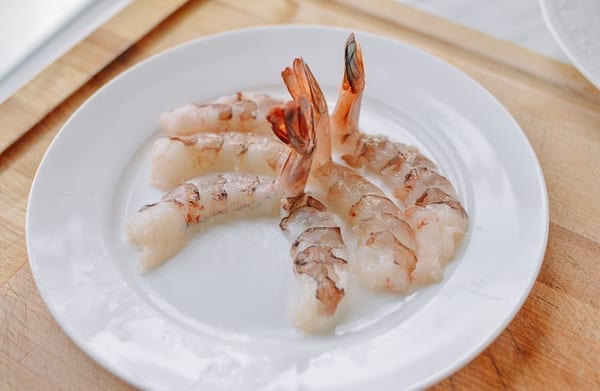
Except instead of stopping before you slice through the other side, continue splitting the shrimp all the way through, stopping at the tail shell. Remove the sand tract.
And arrange the shrimp with the two halves laying flat and the tails upright.
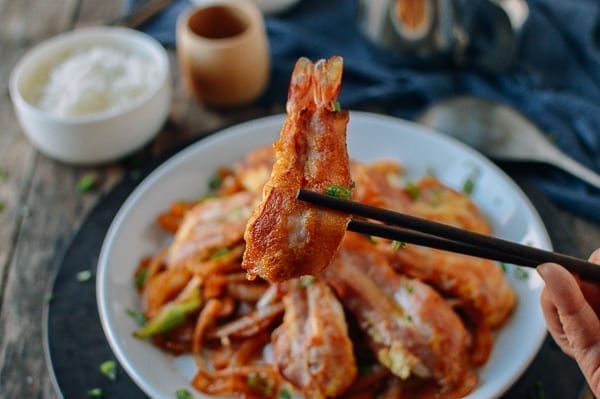
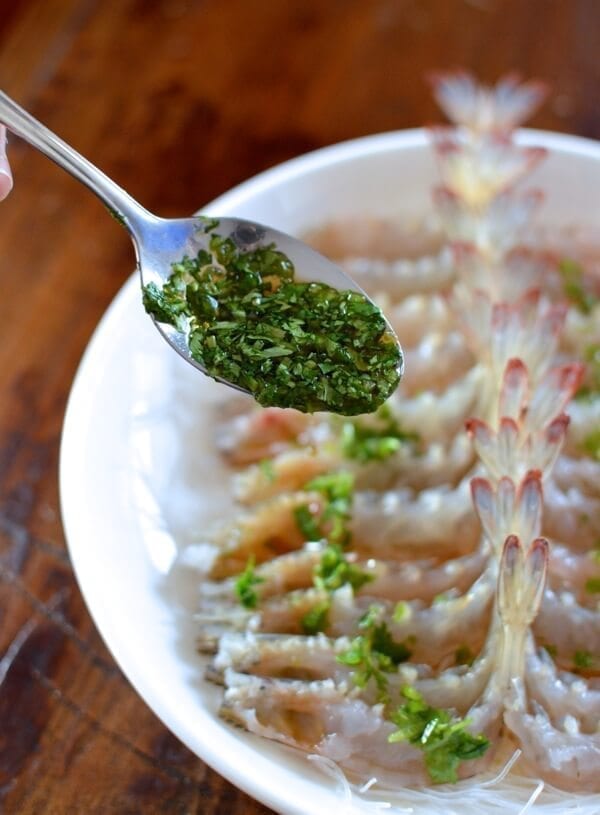
Below, you can see how we split shrimp and arranged them on a plate for steaming.
This is from our recipe for shrimp over glass noodles. For the full recipe, see our post, Steamed Shrimp with Glass Noodles – Two Ways.
We hope you’ve enjoyed this comprehensive post on how to prepare shrimp for cooking. Let us know if you have any questions in the comments below!