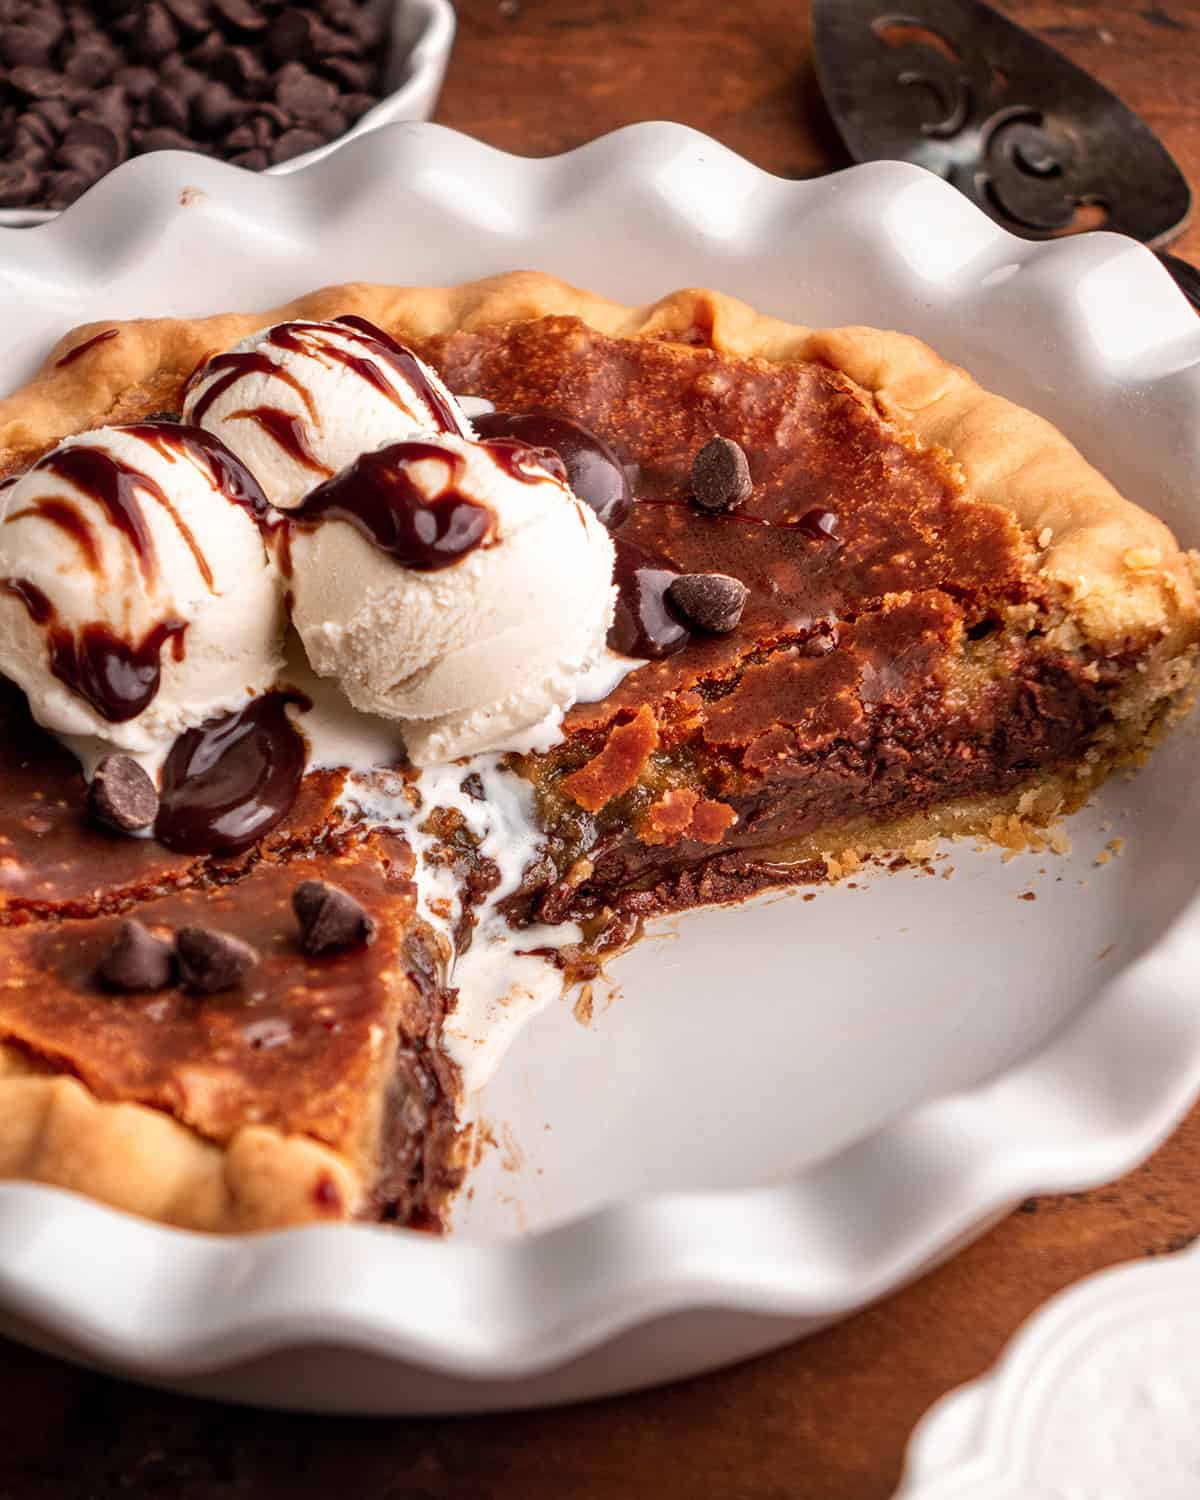
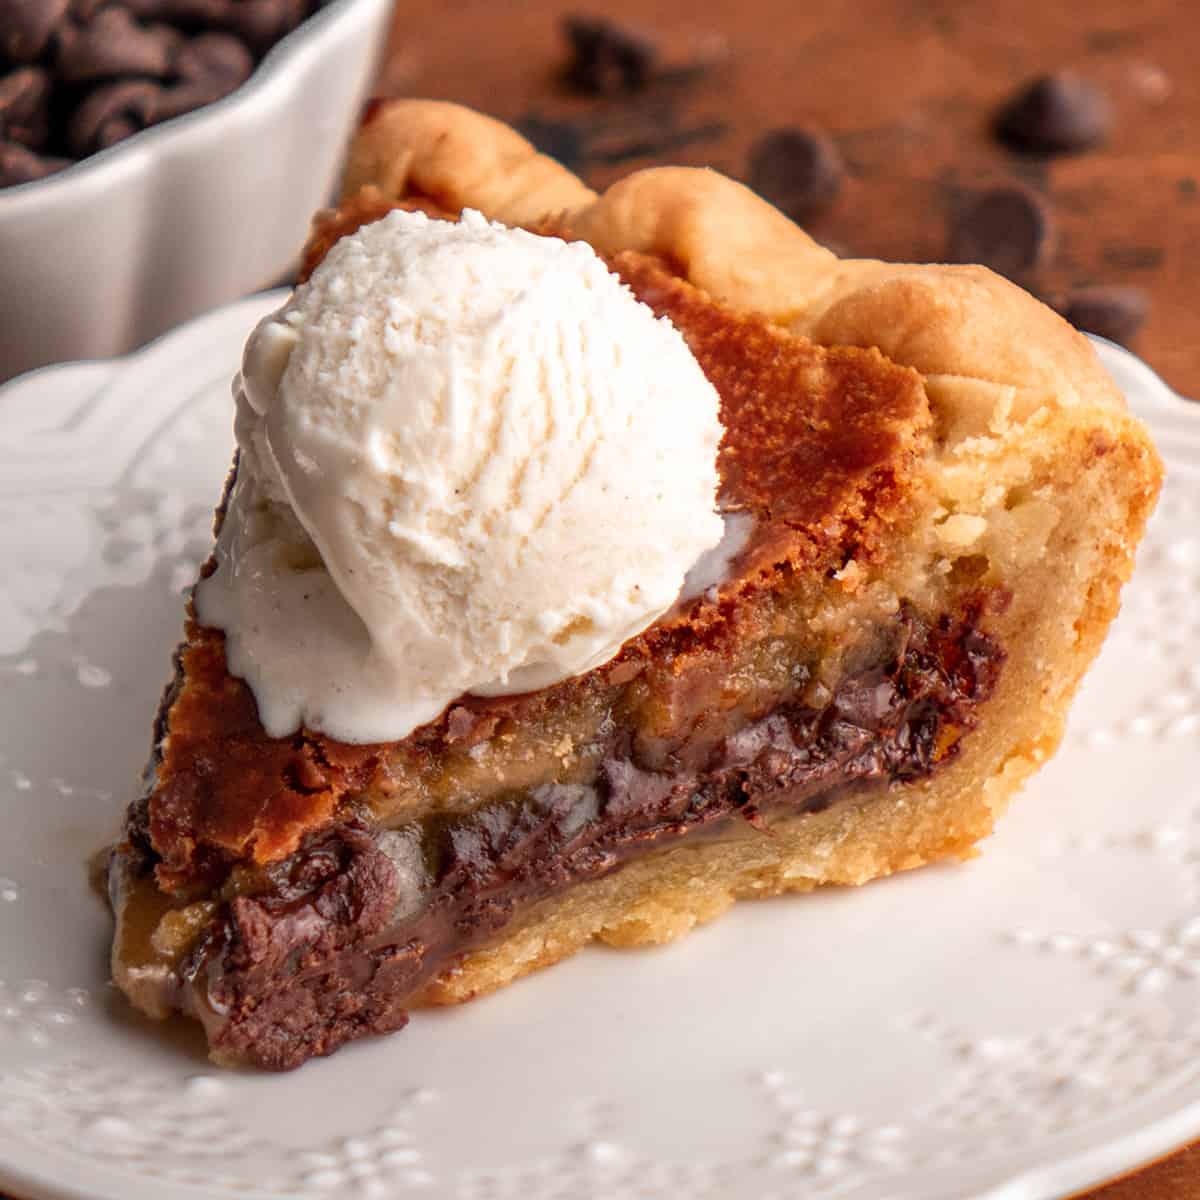
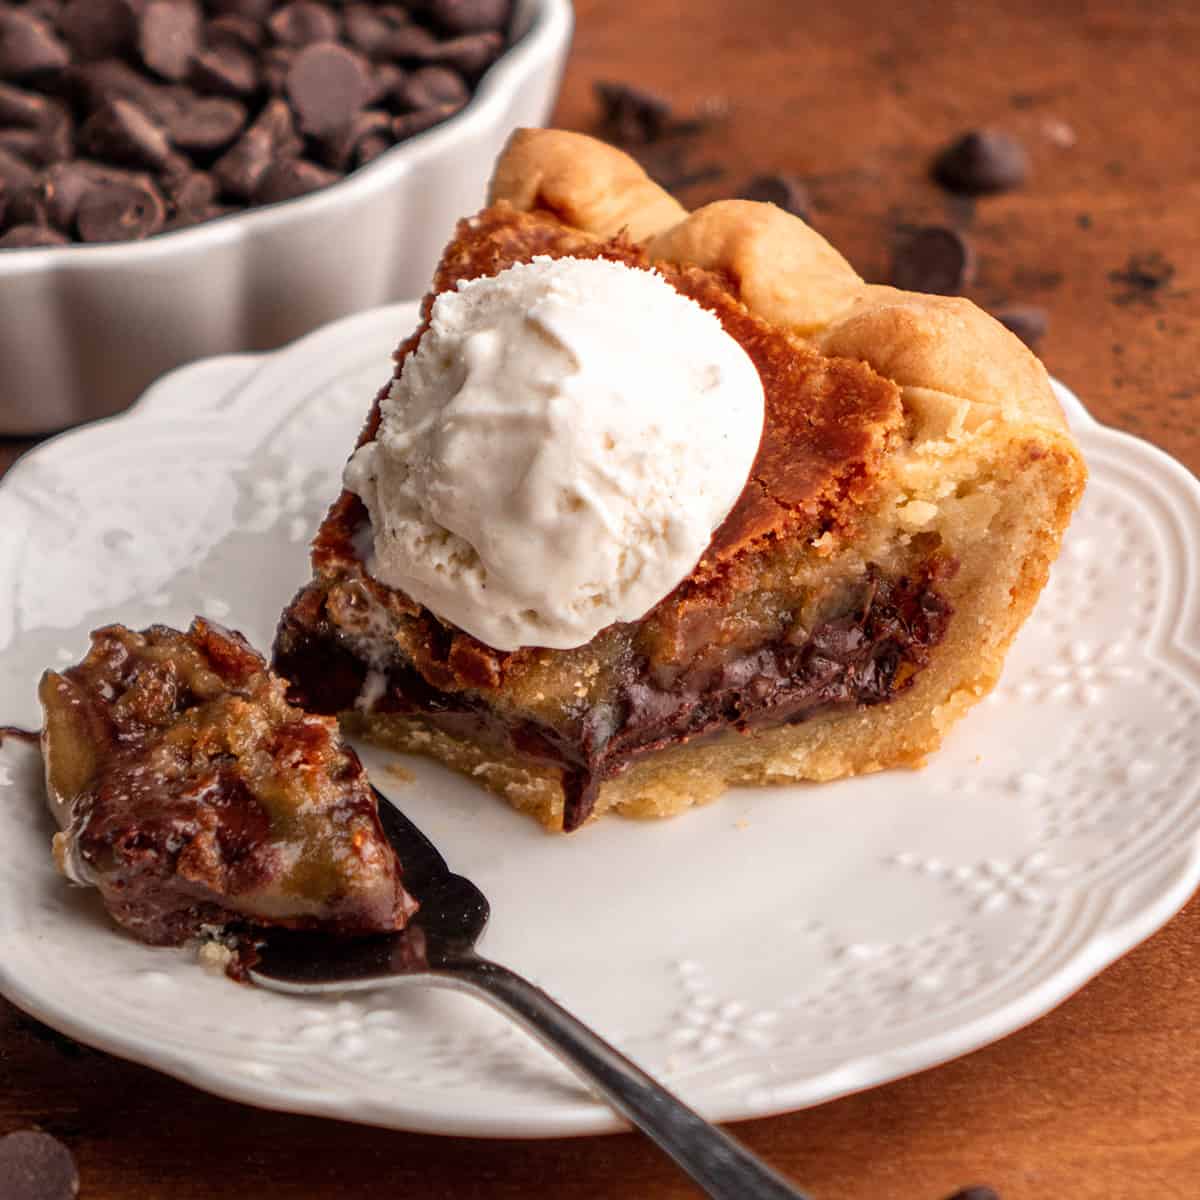
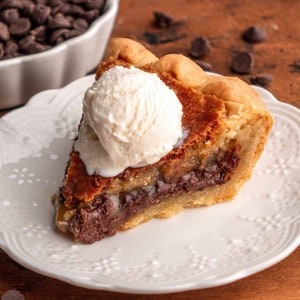
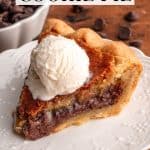
Posted Oct 13, 2023 In this recipe – pie and chocolate chip cookies join forces to make this irresistibly chocolate chip cookie pie (known to some as toll house pie). A gooey chocolate chip cookie filling is baked in a buttery pie crust for an absolutely show-stopping treat. Serve it warm with homemade vanilla ice cream or a dollop of whipped cream for true dessert nirvana.
Cookie Pie: Ingredients & Substitutions
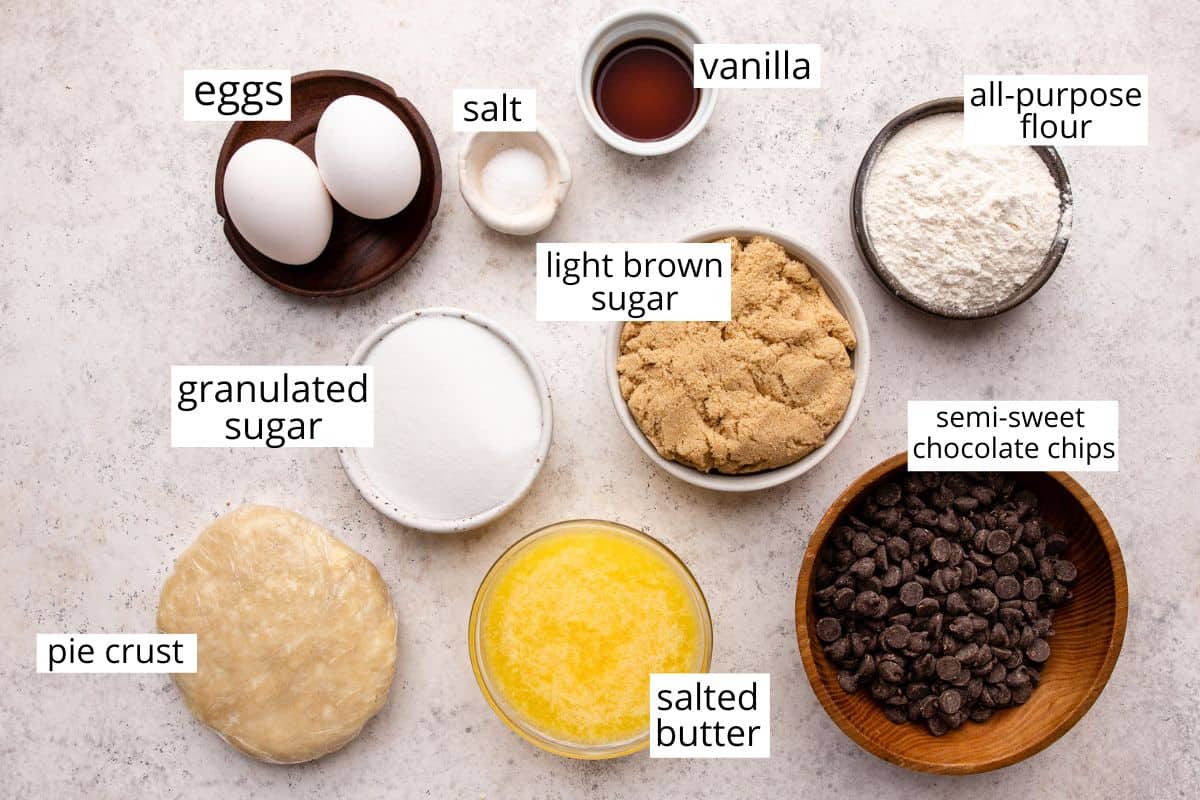
For notes on the pie crust ingredients, check out this butter pie crust used in this recipe. You can also use a store-bought pie crust with great results. Eggs. I don’t recommend substitutions for the eggs. Granulated sugar. White sugar or organic cane sugar are both great choices. Light brown sugar. For a richer, molasses taste use dark brown sugar. Pure vanilla extract. Vanilla bean paste or the seeds of 1 vanilla bean can be used in place of extract. Salted butter. Unsalted butter is a great choice, I just suggest increasing the salt by 1/4 teaspoon. All-purpose flour. Use gluten-free all-purpose baking flour to make the filling gluten-free. Semisweet chocolate chips. really any variety of chocolate works, milk, dark, semisweet, discs, chopped chocolate bars, etc.
How to Make Cookie Pie
Let’s walk through the steps of this recipe together, and don’t forget to watch the video.
Make the pie crust
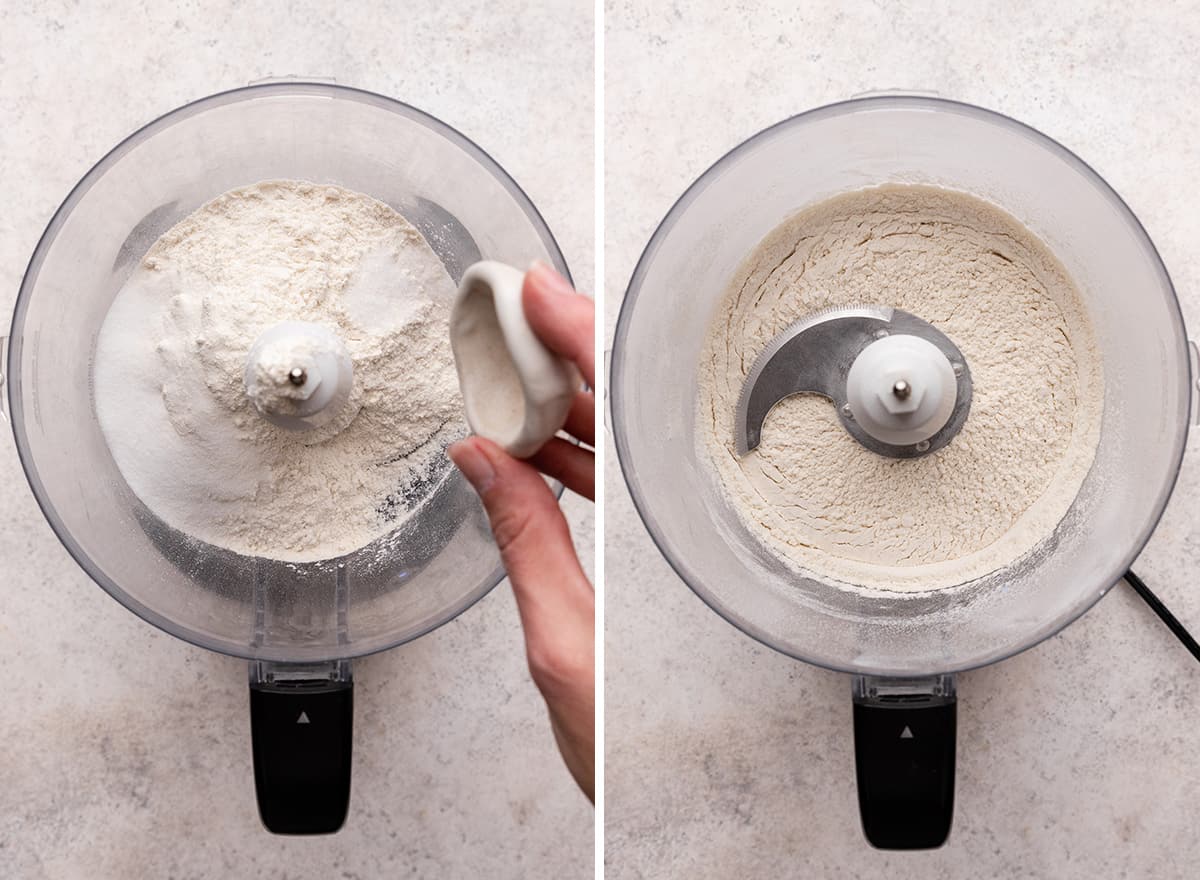
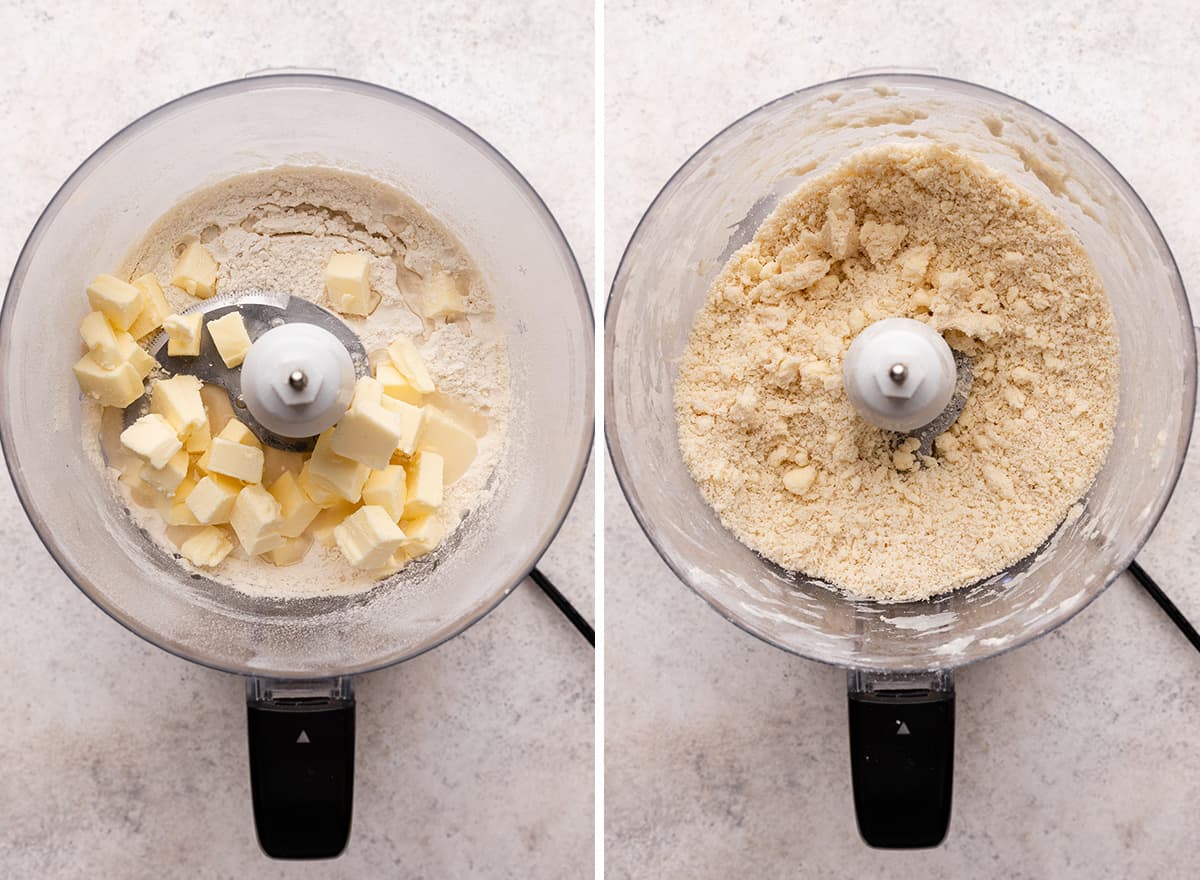
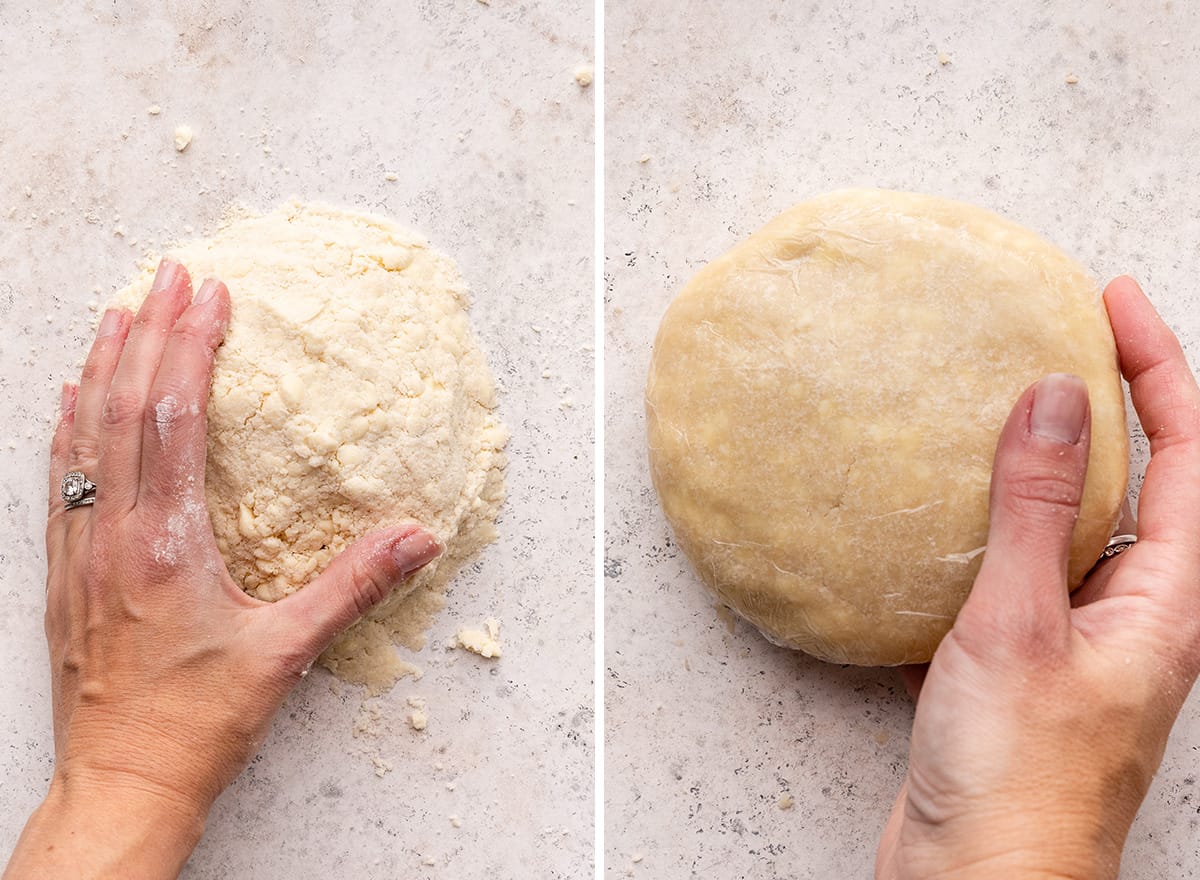
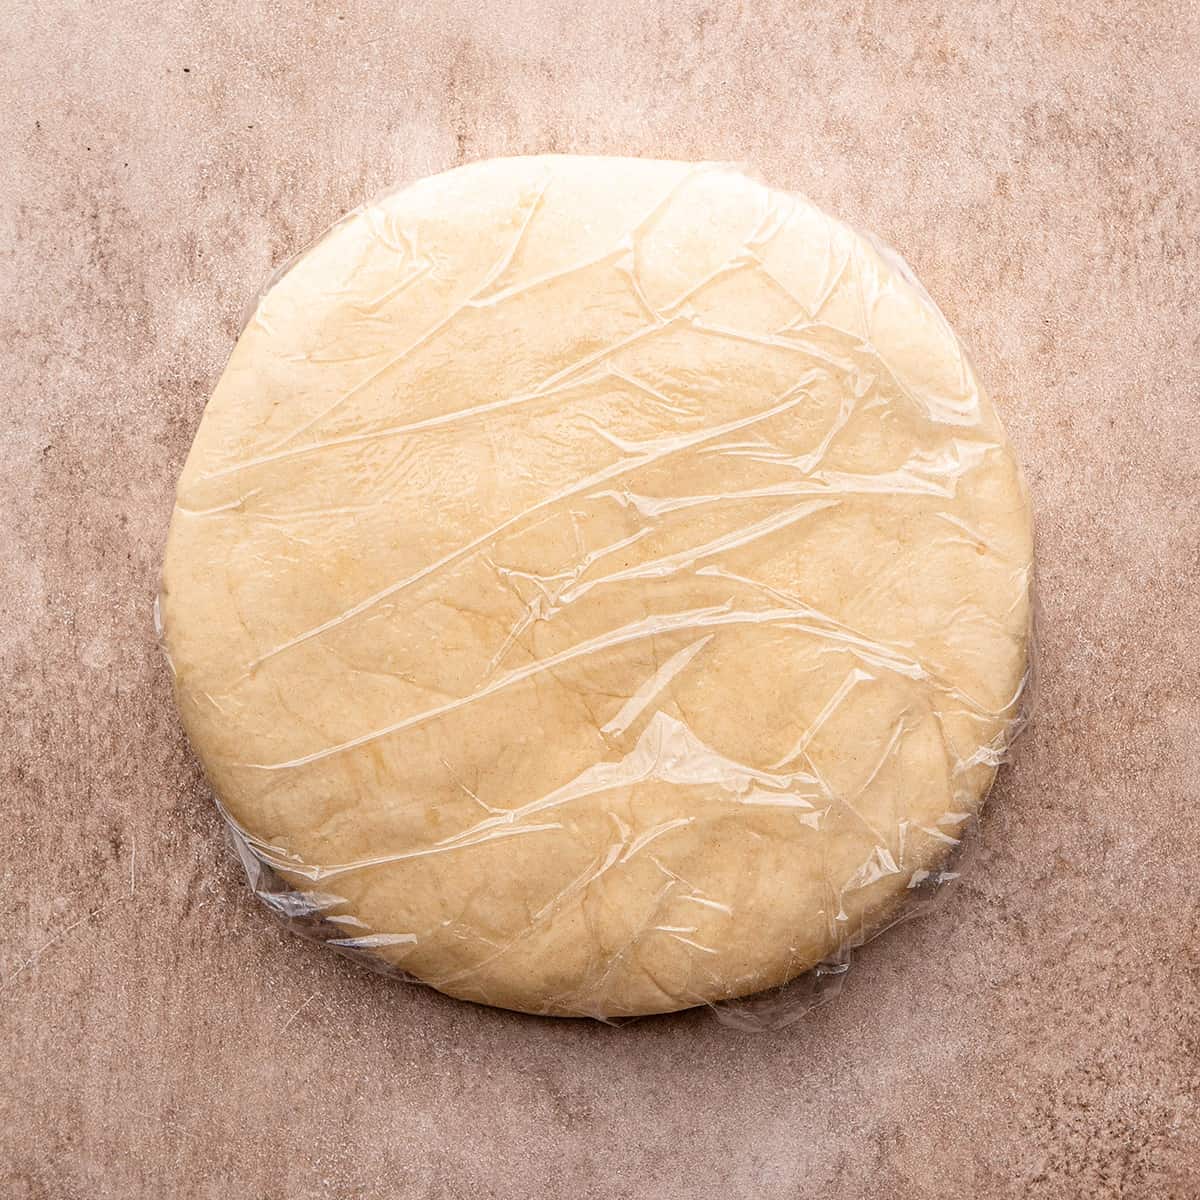
If you are not using a store-bought crust, you must begin by making the pie crust because it has to chill for at least 1 hour in the refrigerator. I often prepare the crust a day in advance. Begin by combining flour, salt and sugar in the container of a food processor fitted with the “S” blade, pulse to combine. Then, add the butter and ice water and process until the ingredients start to stick together. Next, dump the dough out onto a large surface and gather together and form a flat round disc. Then, wrap the dough in saran wrap and let it chill in the refrigerator for 1 hour. You can also make the dough in a bowl by hand using a pastry cutter, fork or your hands to cut in the butter and add the water.
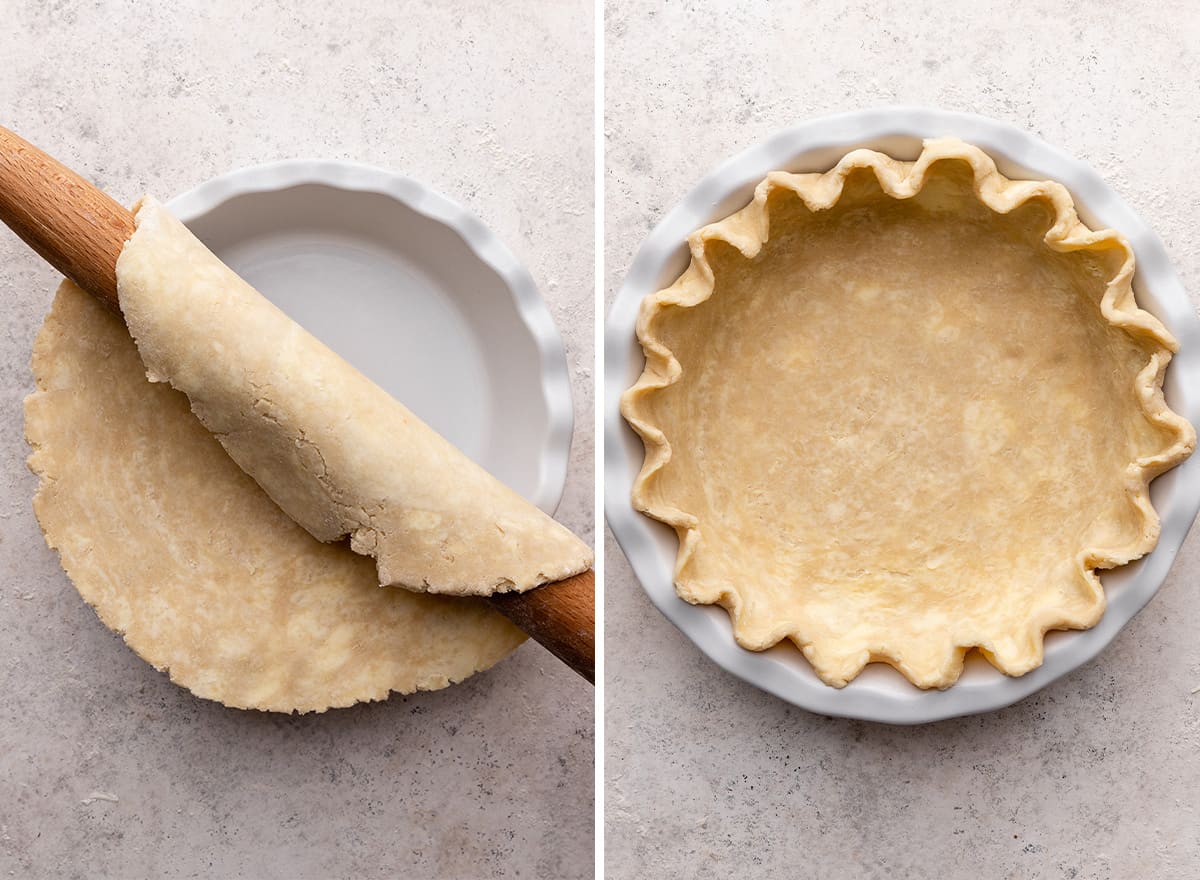
Roll out the Pie dough
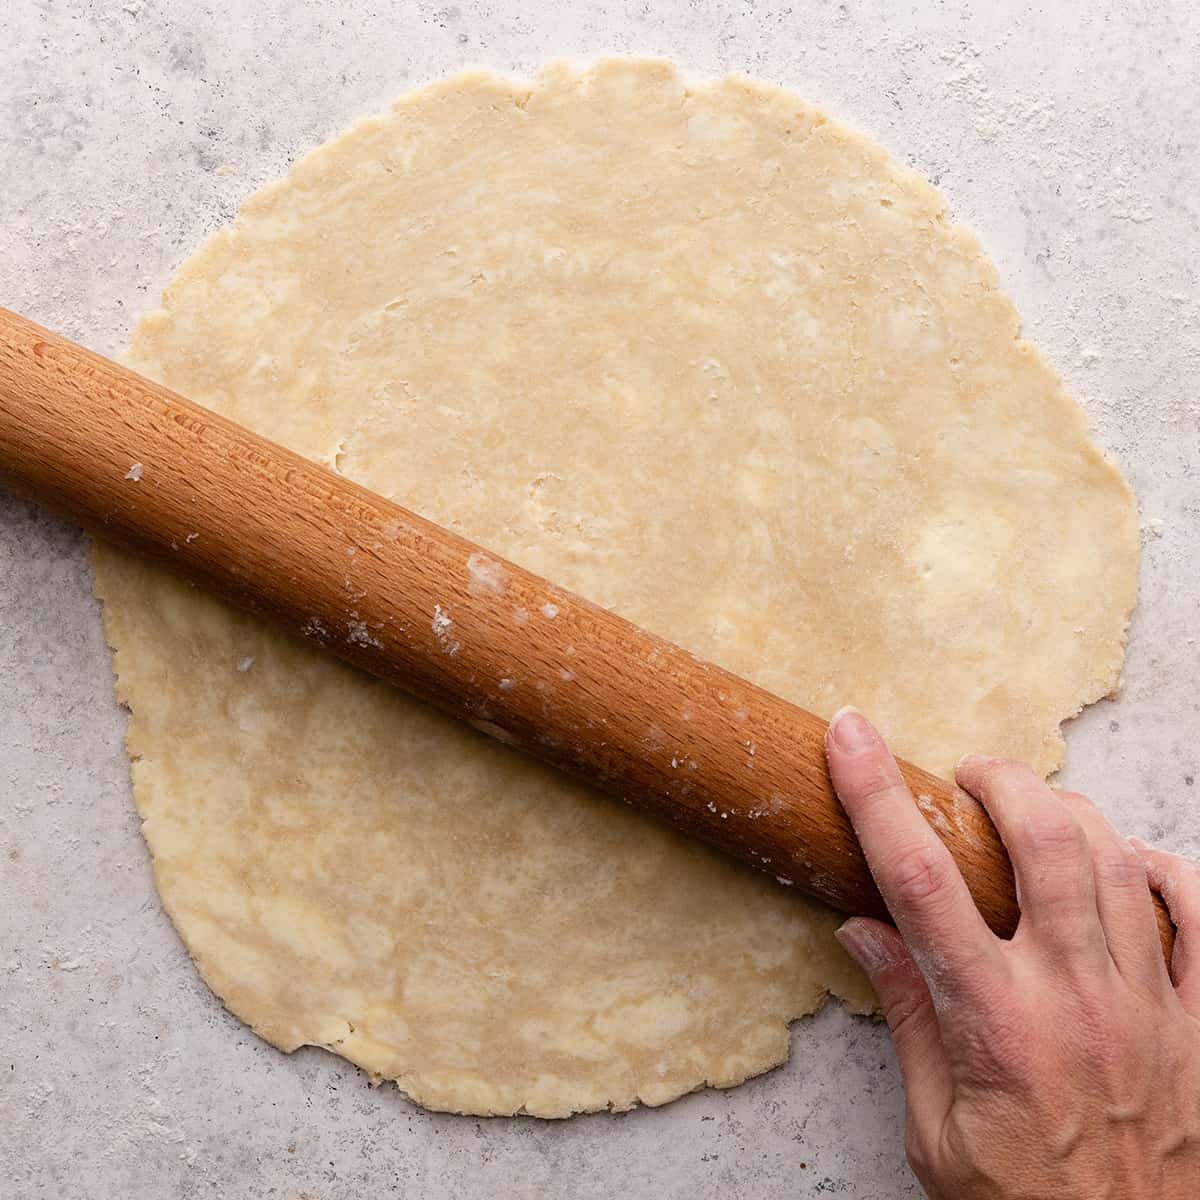
After the crust has chilled and you are ready to bake the pie, remove the dough from the refrigerator and roll it into a circle, about ¼ inch thick. Then, gently place the crust into pie plate and crimp the edges. Put the formed crust into the refrigerator to chill while you make the filling.
Make the cookie pie filling
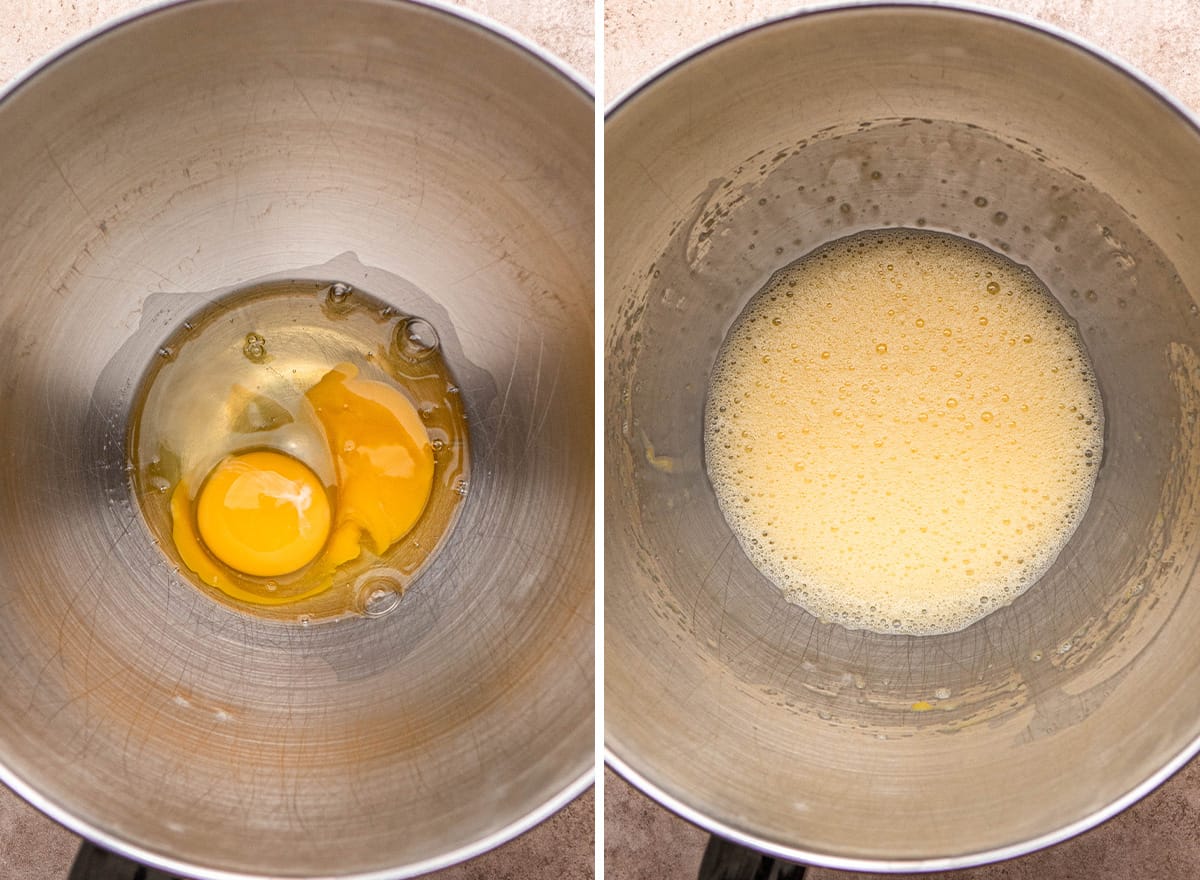
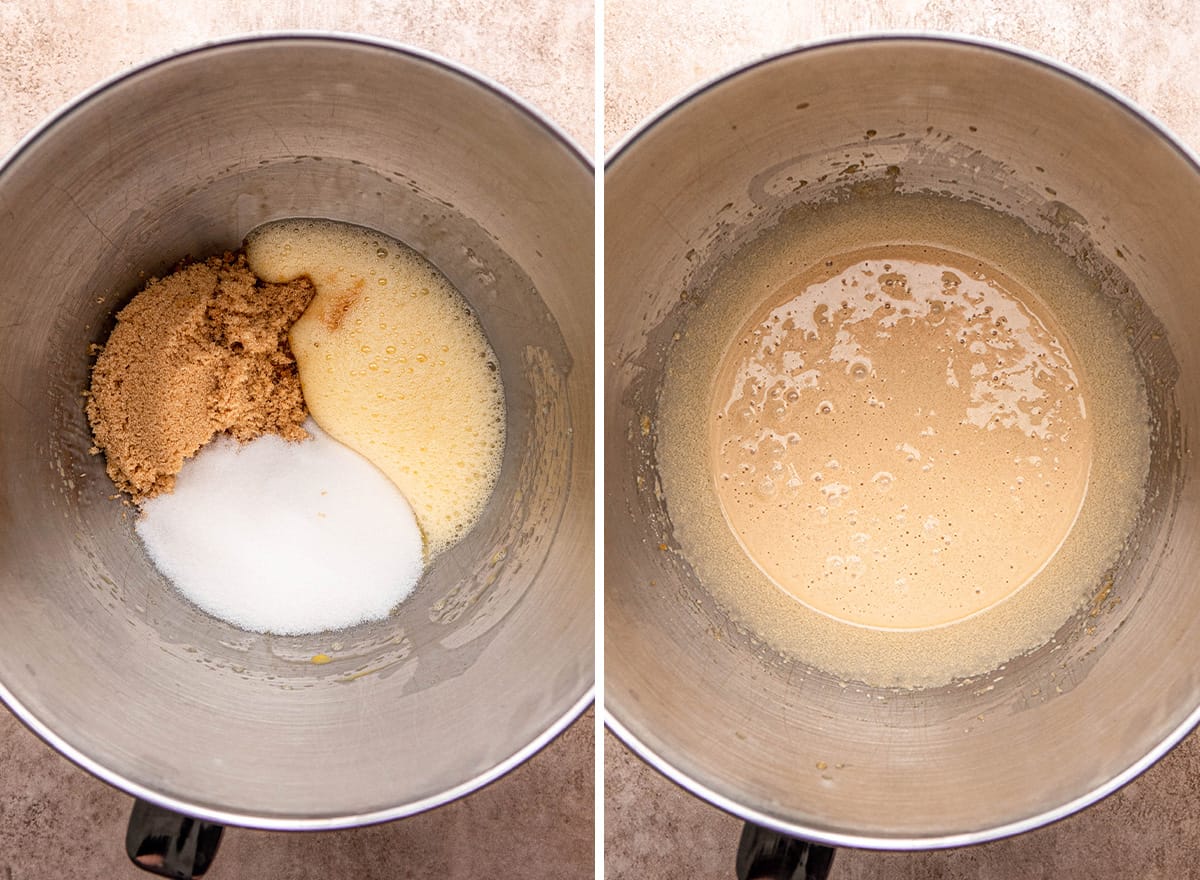
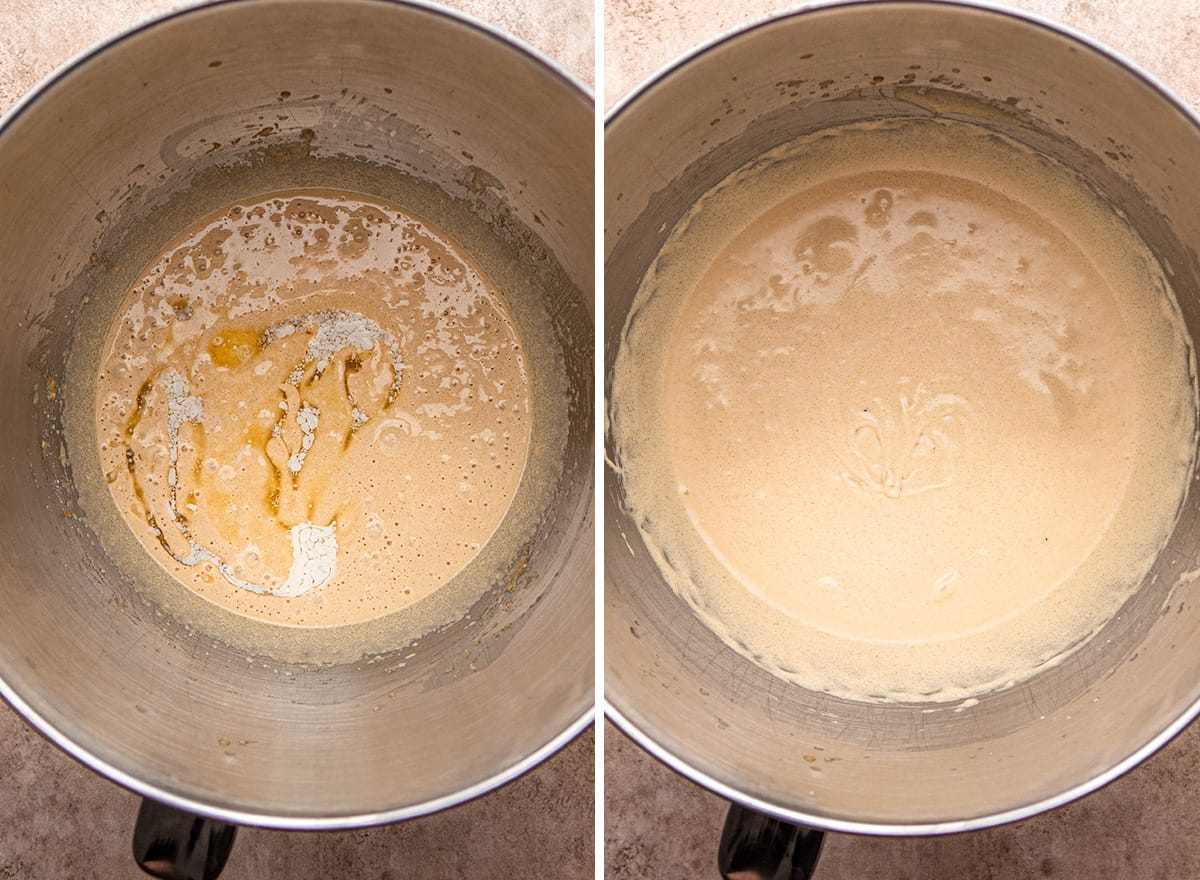
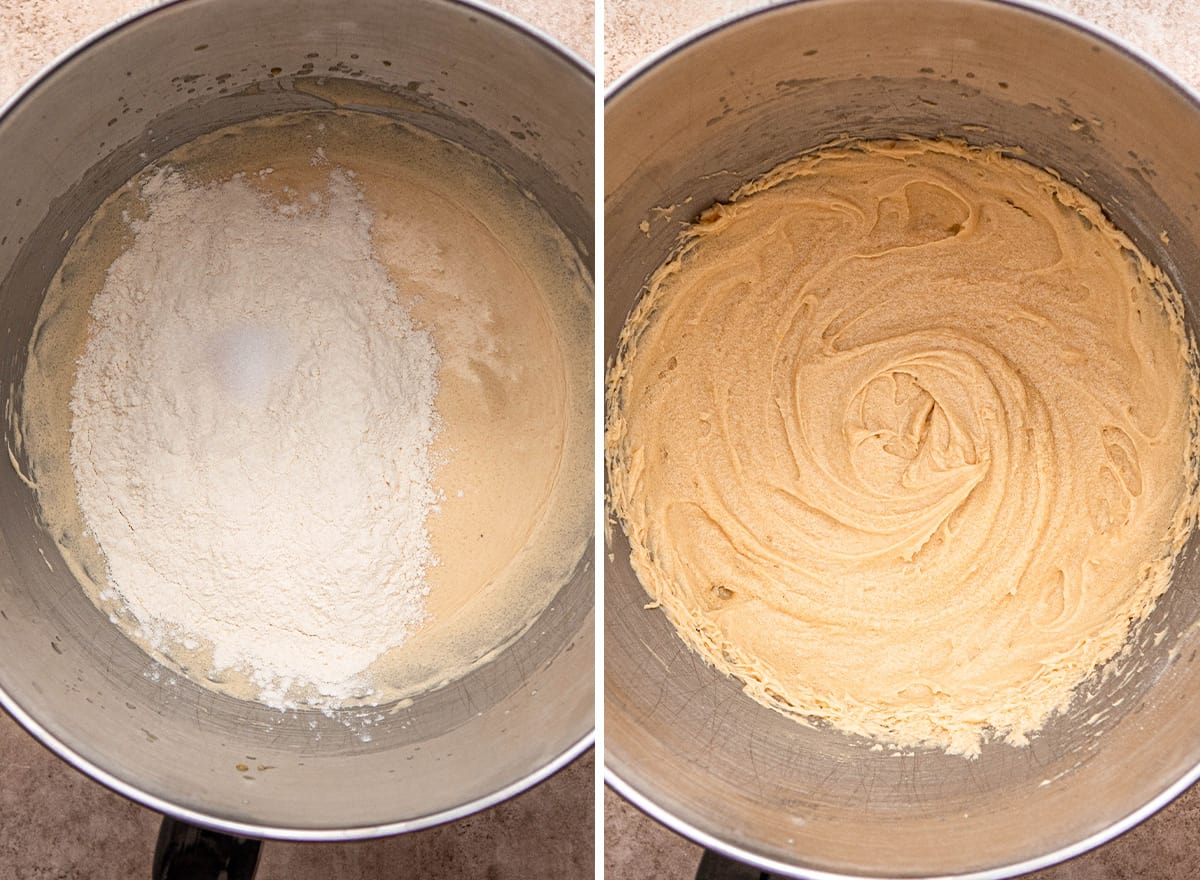
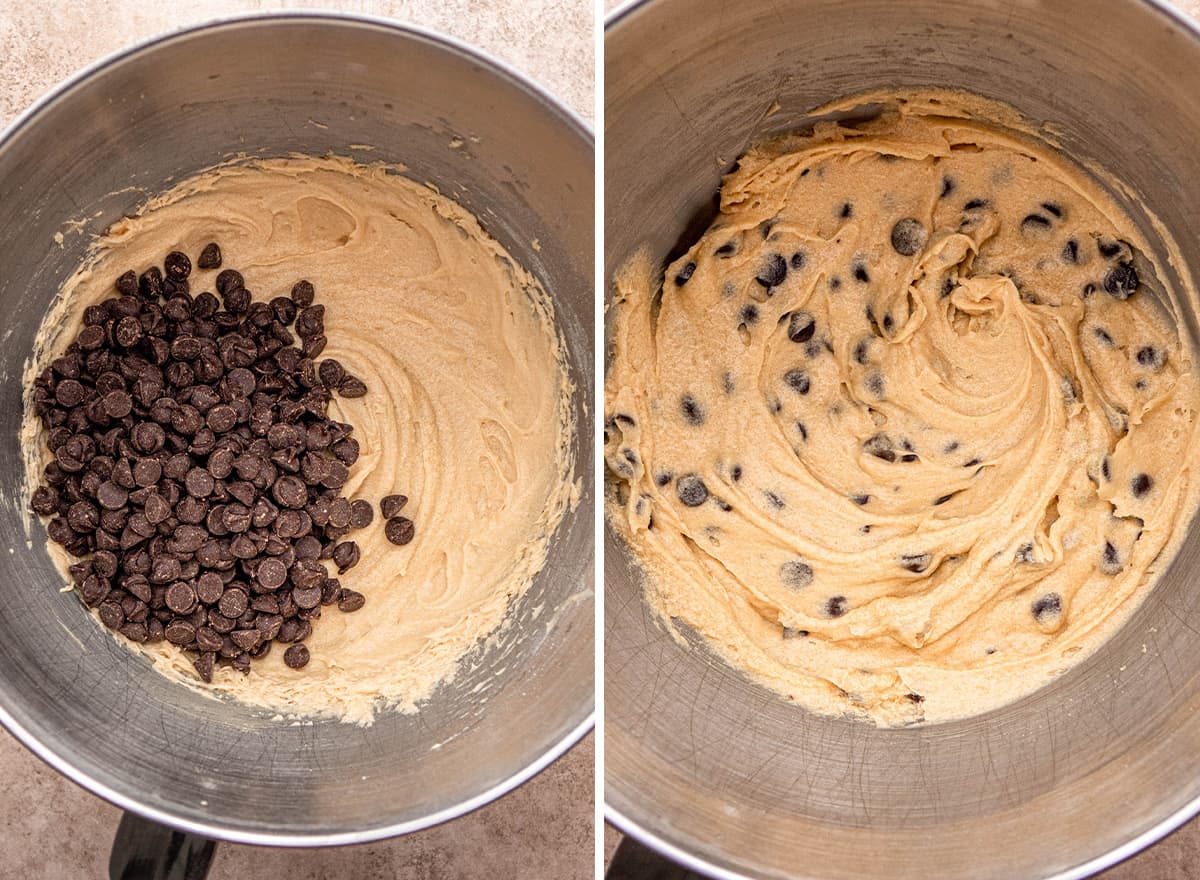
Once the crust is prepared, it’s time to make the filling! Begin by using a Use a standing mixer fitted with the wire whisk attachment or a handheld mixer to beat the eggs for 1 minute, or until light and foamy. Then, add the vanilla, brown sugar and white sugar and beat for 2 minutes. Next, beat in the melted butter until smooth. Then, add the flour and sea salt and stir beat on medium speed until combined. Finally, stir in the chocolate chips until they are evenly distributed throughout the batter.
Assemble & Bake
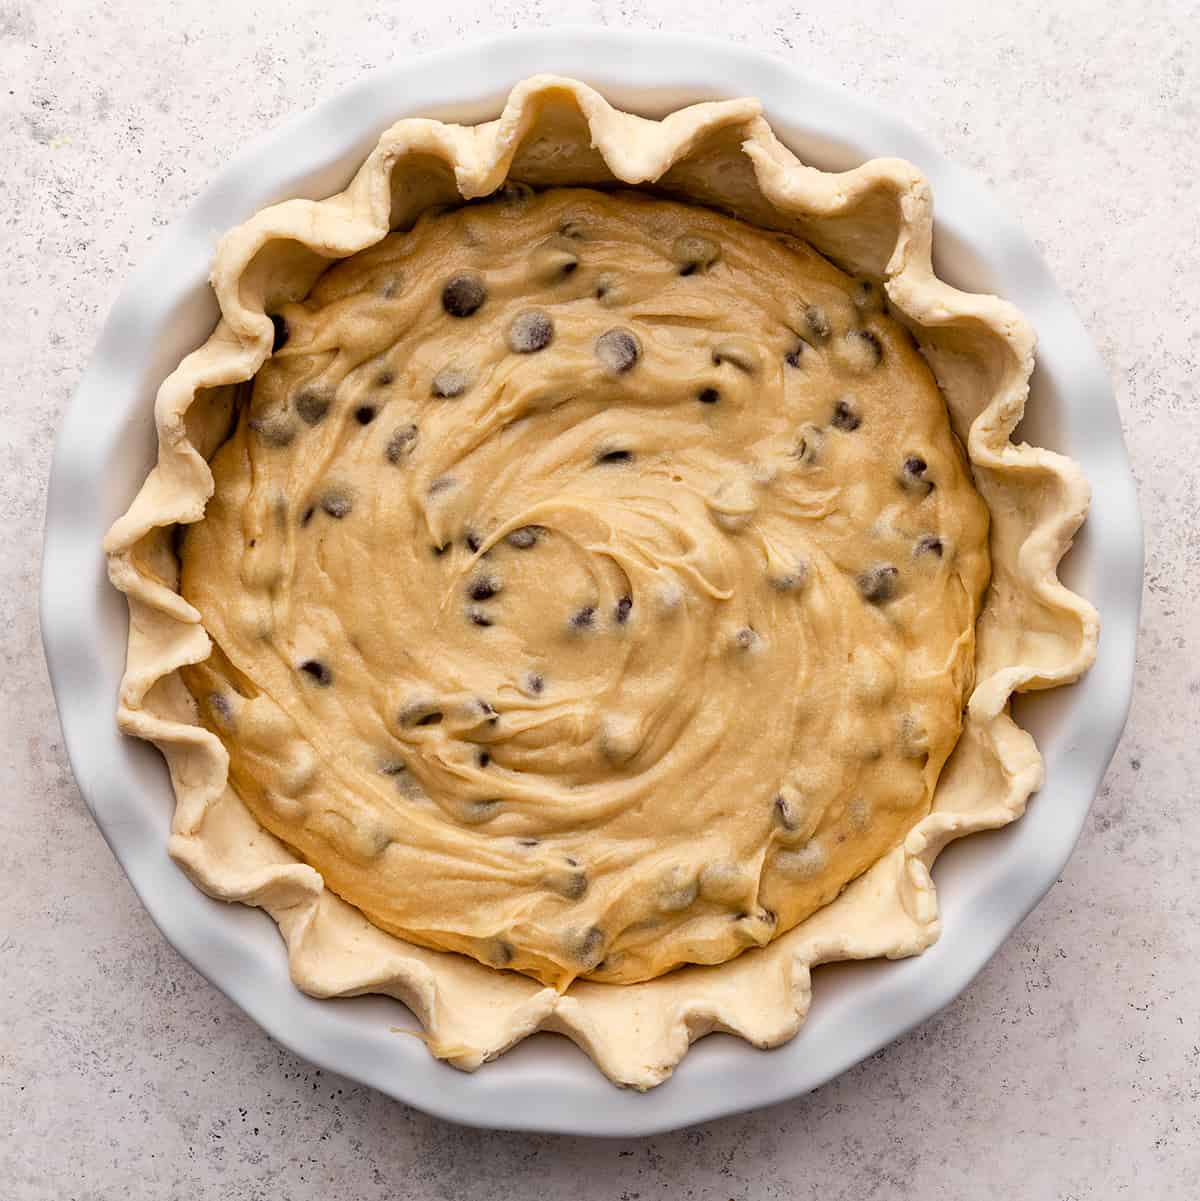
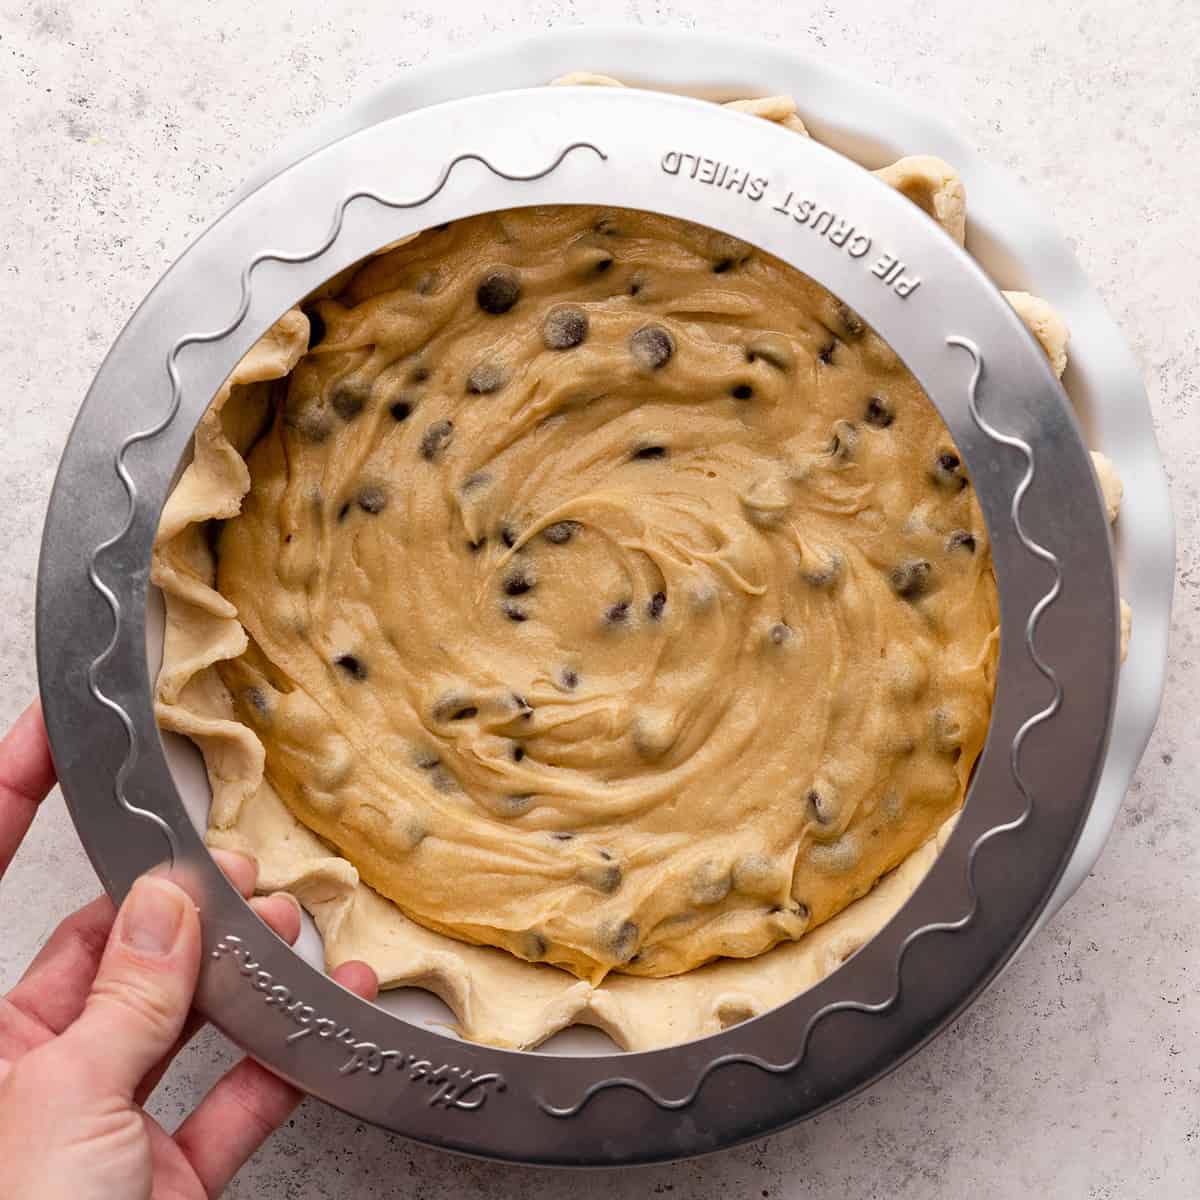
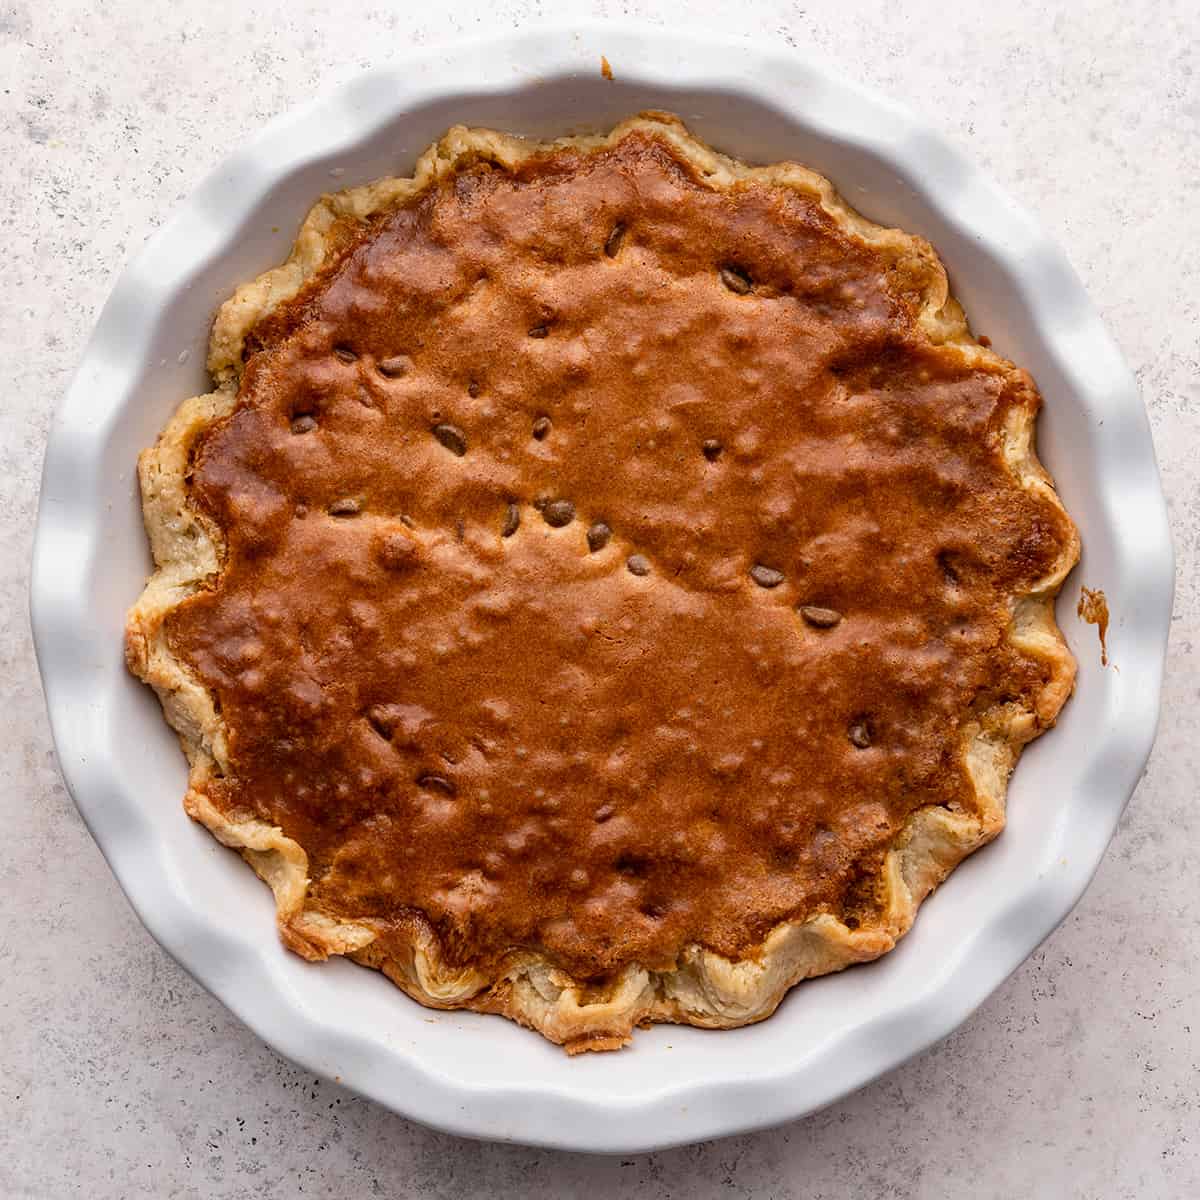
Pour the cookie pie filling into the prepared pie crust. Then, place a pie crust shield around the outside of the pie (or line the outside of the pie with foil to cover the crust). Bake the chocolate chip cookie pie on the bottom rack in the preheated oven for 45-50 minutes, or until the pie is set and just barely wobbly (a cake tester inserted in the center will come out clean). Remove the pie crust shield in the last 5-10 minutes of baking if the crust isn’t lightly browned yet.
Serve
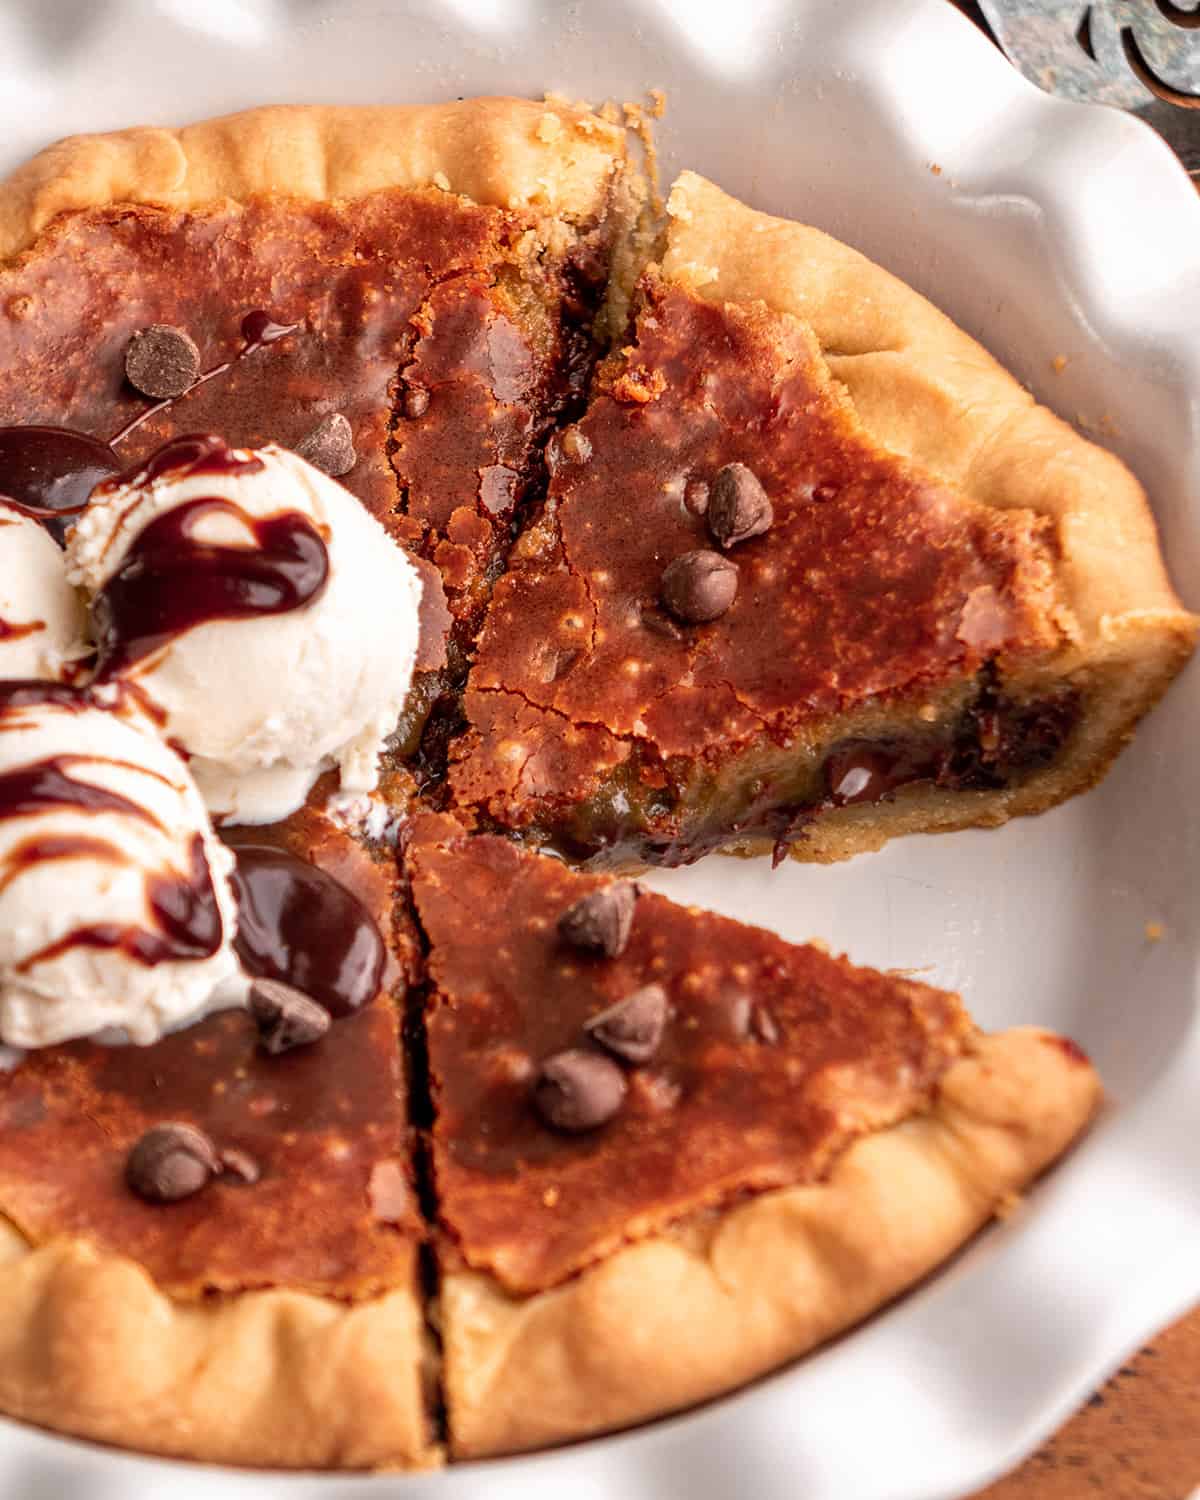
Let the pie cool and serve slightly warm with vanilla ice cream. If it seems a little jiggly when it first comes out of the oven, rest assured that it firms up as it cools.
Store/freeze
Store leftovers in an airtight contianer in the refrigerator for up to 5 days, or in the freezer for up to 2 months. Reheat in the microwave or in the oven set to warm to restore the freshly baked gooey texture! If you make and love our recipes, it would mean so much to me if you would leave a comment and rating! And don’t forget to follow along with us on Instagram, Pinterest, Facebook, and Youtube – be sure to tag @joyfoodsunshine and use the hashtag #joyfoodsunshine so we can see your creations! The links in this post are affiliate links, thank you for supporting JoyFoodSunshine.
![]()