With multiple hypotheses… Testing different variables… Many observations noted in my handy dandy recipe notebook (which is now conveniently stained with pakora batter)… We ran out of funding (boneless chicken, gram flour, coriander, you name it) several times during the research trials, and I had to apply for renewed funding (asking the husband to keep popping to the Pakistani grocery store). But you know what? It was ALL worth it because not only did I get the recipe for The BEST Chicken Pakora EVER, but I now I FINALLY UNDERSTAND THE SCIENCE BEHIND IT ALL! I’m going to dive right into this - I have SO much to share with you guys! But not in that cliché, food blogger-y ‘My grandmother used to serve chicken pakoras under the guava tree in my home village in 1964’ way - this post is FULL of useful tips, tricks and explanations behind WHY this recipes GIVES 🤌🏼🤌🏼🤌🏼🤌🏼. If all that information is not your thing and you just want the darned chicken pakora recipe, feel free to jump to the recipe and get to the meat (pun very much intended).
💕 What makes a good chicken pakora?
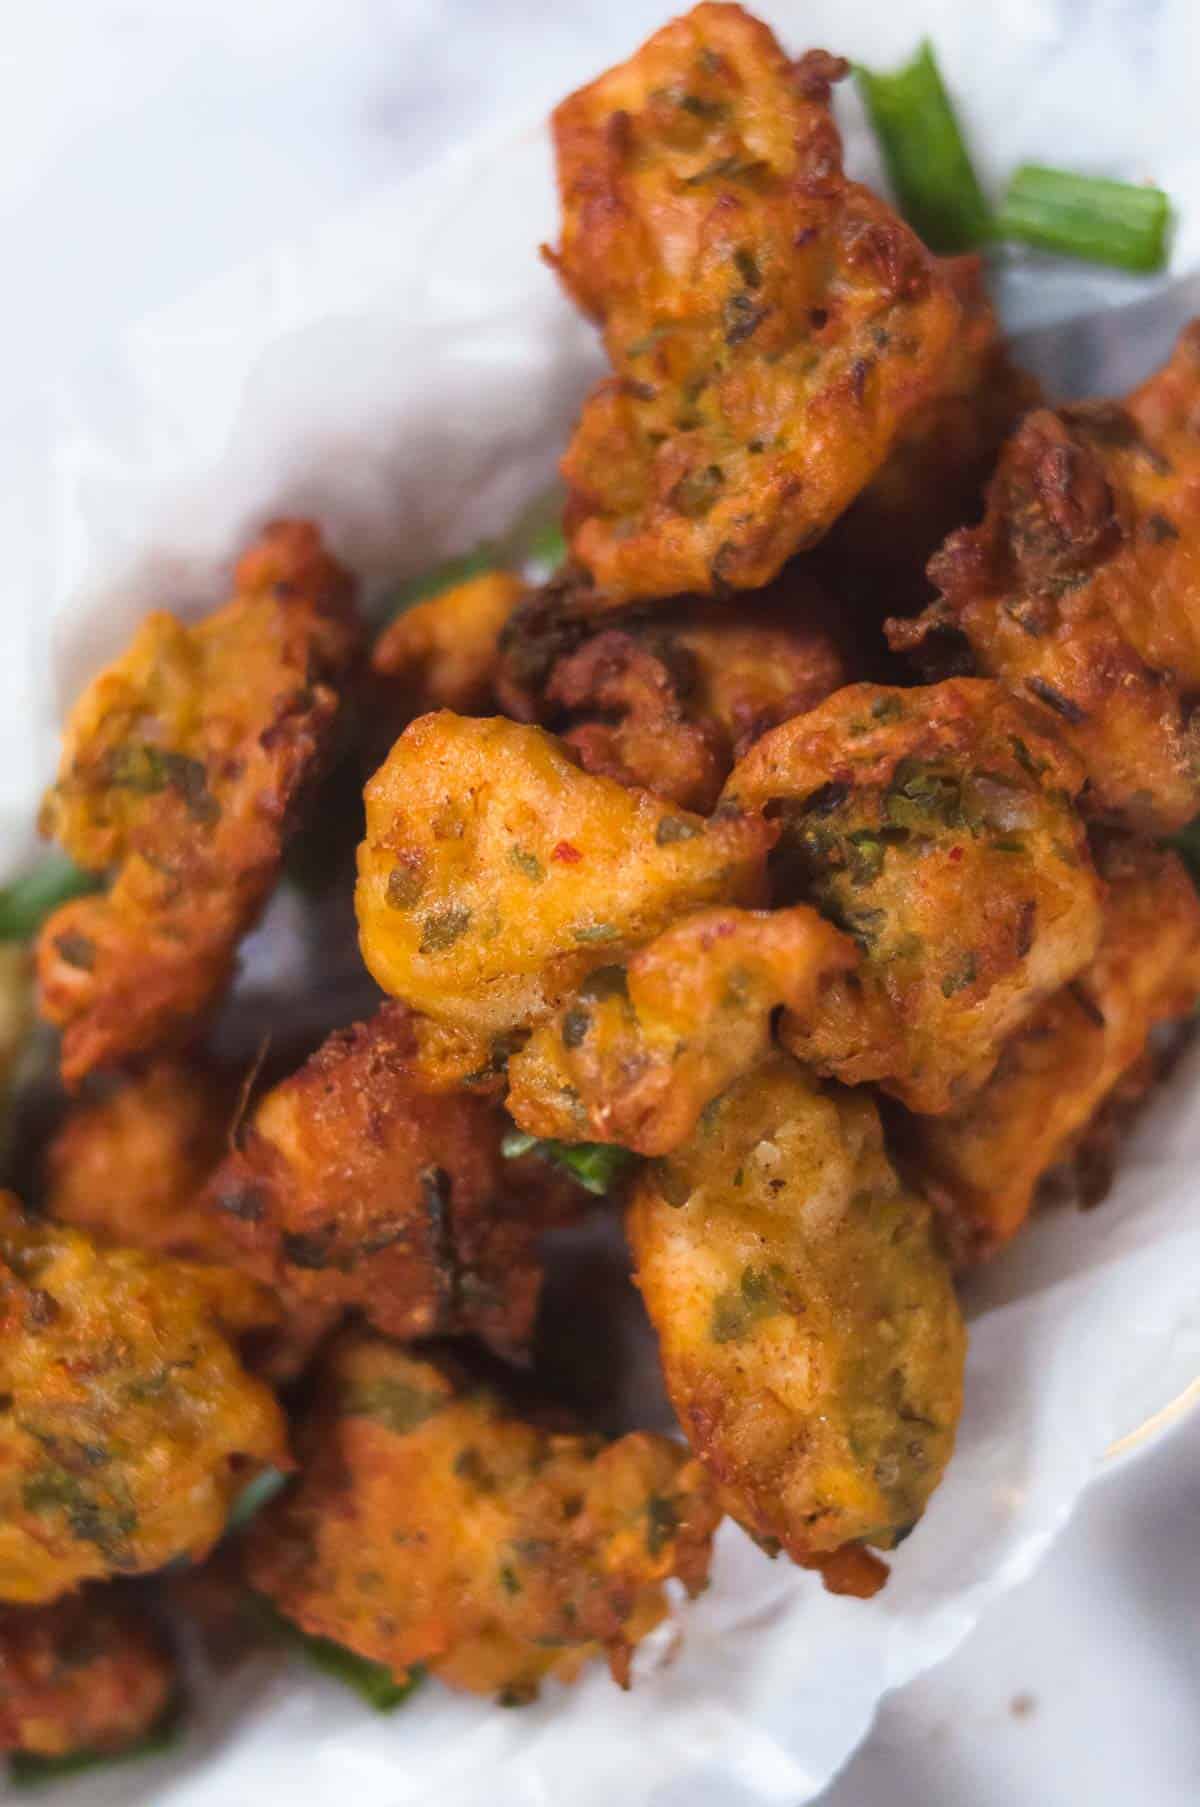
I’ve had a number of chicken pakoras in the past and have also tried my hand at making them plenty of times too. And mostly, I’ve been left disappointed with either a soggy coating, tough and dry chicken, lacklustre flavour… you name it. So what did I do? Some sort of obsessive maniac awoke in me, compelling me to trial A LOT of different batters to try and find the elusive chicken pakora that is…
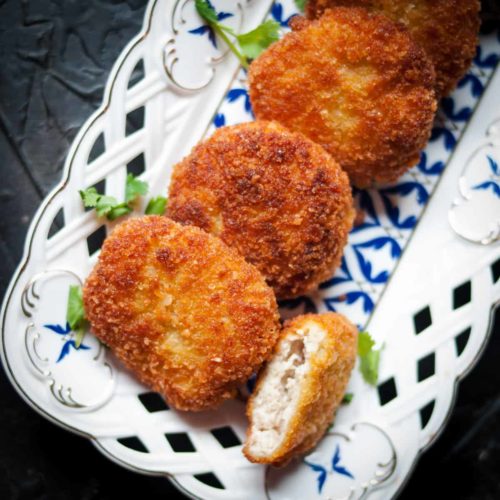
Flavoursome… like actual delicious flavour in the batter and also in the chicken Light and crispy. Like, you just take a bite and you FEEL that crispiness, that fluffy lightness that makes you go ‘mmmmm!’. Moist! Not dry - nuh-uh! Neither the chicken, nor the coating should be dry! We want juicy tenderness from the meat, and a crunchiness from the batter that isn’t drying or heavy. Not oily! Need I say more?
👉 How to get that PERFECT chicken pakora batter
It didn’t take me too many trials to get the flavour and spice mix for the chicken pakoras just right. I kinda had that going from me in my past attempts too. What took a while was getting the texture of the batter right. And by ‘a while’, I mean about 8 or 9 times. I lost count eventually. So during my research, I got down to three elements that make a HUGE difference in getting that crispy, light yet crunchy coating. Here they are, in order of impact: I’m going to break down the elements now. And again, if you don’t want to read about it all, feel free to scroll past and get to the recipe… BUT I always find knowing about all the ✨science✨ behind these things helps gain knowledge that can be transferred to other recipes too!
1. Using bicarbonate of soda in pakoras
Bicarbonate of soda is a pretty well-known pakora batter ingredient. This certainly may not be big news to anyone. But I had to do a trial run of this just to see how much of a difference it makes. So I tested out three batters - one with no bicarbonate of soda, one with a pinch, and one with about ¼ tsp. And ladies and gentlemen, it makes a BIG difference. It takes the batter from flat to light and airy and enhances the crisp-factor. There was a definite increase in airiness and crispiness between the batter with less bicarbonate of sofa and the one with more. Also, the shape of the pakoras changed too - more bicarbonate of soda = more puffing. So summary of all this is - Do NOT skip the bicarbonate of soda! It makes a BIG difference to the batter.
2. What flours to use for the pakora batter
In the past, I’ve always made the batter with just gram flour. And it was always lacklustre. Just meh. Like ‘yes ok, chicken pakora’, but not ‘WOW OMG CHICKEN PAKORA!!!’, if you get my drift. So I decided to experiment with different flours. I asked around, looked at other recipes, spoke to my wonderful Instagram community and I could see the same 3 ingredients being recommended the most: cornflour, rice flour and semolina. So I did what any sane mad scientist would do and set up a little science experiment. I trialled different pakora batters - first I did 3 sets, one with gram flour + cornflour, one with gram flour + rice flour and one with gram flour + semolina. I did all these WITHOUT bicarbonate of soda because I wanted to see the impact of the flour without the rising aid from the bicarb, to get a true idea of what the flours actually do. Here is what my results showed!
Gram flour + semolina (2:1 ratio)
This was my least favourite out of the bunch. It did make the batter crunchier than a standard gram flour batter, but it felt dry, dense and heavy.
Gram flour + rice flour (2:1 ratio)
This batter was a lot better than the previous one. The pakora coating had a crunchy bite to it which I enjoyed and the texture of the batter was lovely too.
Gram flour + cornflour (2:1 ratio)
This batter turned out to be my favourite out the three I had trialled so far. The batter was crispy and light. Having said that, I will say it was VERY SIMILAR to the rice flour too. An almost unnoticeable difference. After these trials, I decided to combine some of them (extra, I know) because, well I was at it anyway so why not? In the name of SCIENCE!
Gram flour + semolina + cornflour (4:1:1 ratio)
I trialled this hoping the crunch from the semolina plus the crispy lightness from the cornflour may work together to create something good but I was really disappointed in this. Semolina has firmly been wiped off the charts for me… it was making the batter too tough and dense, defeating any crispy chicken pakora aspirations of mine.
Gram flour + cornflour + rice flour (4:1:1 ratio)
OK, so THIS was a really goooooooooooooooood one! I felt like this combination gave the perfect degree of light crispiness whilst also giving it a crunch I really really wanted it to get.
So, what ARE the best flours to use in the chicken pakora batter?
After doing ALL those trials, I have finally come to the conclusion that gram flour plus ANY combination of rice and/or cornflour is the WAY TO GO! They both aid in giving the pakora batter more texture than gram flour alone. Despite my unscientific scientific trials finding gram flour + cornflour + rice flour to be the best combination, I have to be HONEST with ya’ll and tell you it wasn’t a significant difference. Like, I won’t tell you your pakoras won’t be absolutely delicious if you don’t use all those flours. The cornflour makes the batter crispy and light, the rice flour also makes them crispy and light, You can make your decision of what kind of batter you want based off that! You just got cornflour at home? Sounds good! Only got rice flour? That’s OK too, just use that! You wanna use both? Go for it! Whichever way you decide to do it, using rice/cornflour will definitely enhance your chicken pakora and its wow factor.
3. Using cold water or sparkling water in the pakora batter
Out of the first two elements I mentioned, I think this is the least impactful element BUT it does make a noticeable difference. Water as cold as you can get it helps keep the batter light and airy because it helps the batter not absorb much oil when frying. If you can get your hands on some UNFLAVOURED, UNSWEETENED sparkling/soda water, that is awesome! There’s something about the fizziness that helps get things even more crisp. I first saw this on a Jamie Oliver show many moons ago and was reminded about it from my Instagram community. And it DOES work.
🌿 What other ingredients are in chicken pakora?
After A LOT of fine tuning (And I mean A LOT), these are the other ingredients also starring in my BEST chicken pakora recipe:
Boneless chicken, chopped into bite-sized pieces. More on this further on. Fresh coriander - adds a very characteristic flavour and fragrance which is so classic to South Asian flavours. Lemon juice - not only does this add a very nice zing, it also helps keep the chicken soft! A lovely array of spices, including salt (of course), cumin powder, coriander powder, chilli flakes and chilli powder. Dried fenugreek (kasoori methi in Urdu) adds a fragrance and flavour which matures the flavour in a very subtle way. Green chillies, chopped finely - I feel like THIS really gives this recipe such a BEAUTIFUL kick! If you cut them quite fine, it doesn’t feel like your mouth is on fire, rather it just feels like the pakora is scattered with a few zings of juicy heat here and there - definitely not ‘spicy’ in my books, as a Pakistani who doesn’t love blow-your-brains-out levels of spice. If you want to work around the spice levels, please read further into the post for adjustments. Garlic - This adds beautiful depth too. I tried ginger too and tbh, personally I didn’t find it added much. You can add ginger if you want anyway, though!
🍗 What kind of chicken should I use for chicken pakoras?
Thigh or breast pieces? Both are A-OK - thigh is juicier and more moist, but breast is more firm and you may find it’s easier to get your butcher to dice them into a more uniform cubed shape. It’s totally your preference. Cooked or raw? I have trialled this recipe with both and my personal preference is raw. TREMENDOUSLY. The reason for this is twofold: I found cooked chicken to become very tough, dry and chewy in the pakora. And it makes sense - when you cook the chicken (assuming you boil/steam it), the moisture from the chicken will be drawn out. And then you cook it some more - can you see where this is going? I personally found pakoras made from pre-cooked chicken breast UNBEARABLE to eat, even though when cooked from raw , chicken breast was fine! If you HAVE to use cooked chicken for any reason, I’d really recommend thigh over breast. Also, CONVENIENCE! If you are making these pakoras from scratch, there’s no need to spend time pre-cooking them! Boneless or bone-in? I am firmly in team boneless here, but again, it’s your call. Chicken pakora technically CAN be cooked with bone-in chicken too if that’s whatcha like! They will likely need some more time frying though, to ensure the chicken is cooked through.
♨️ How to make chicken pakoras
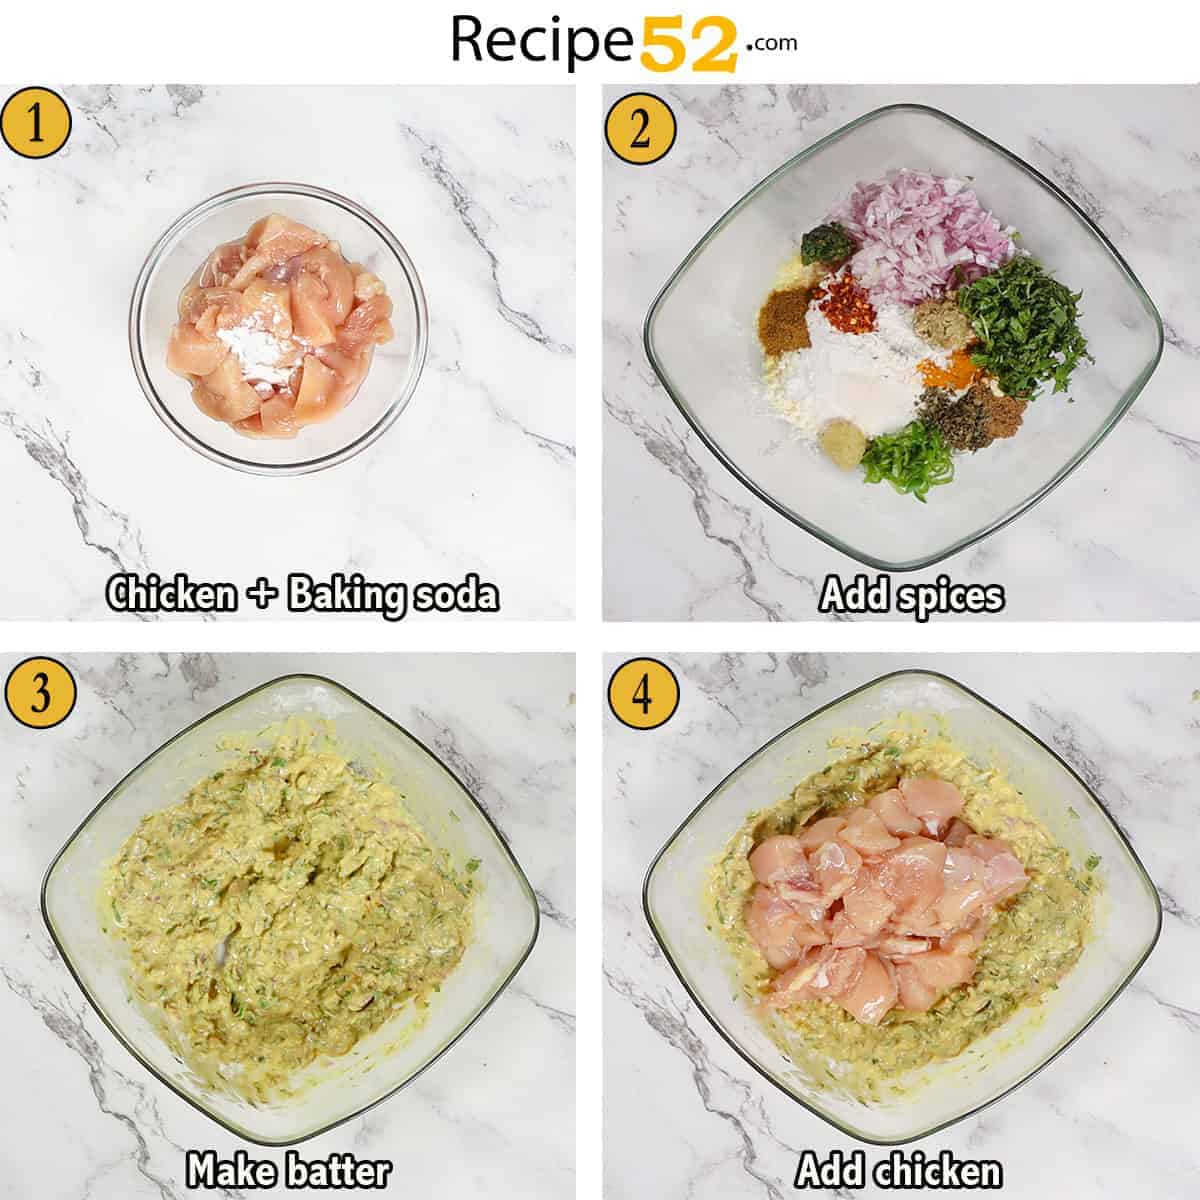
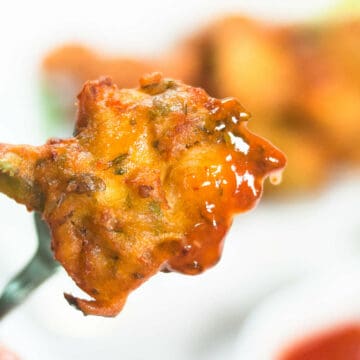
Start off by mixing the following ingredients: all the spices, gram flour, rice flour and/or cornflour, chopped coriander, minced garlic, chopped chilies and lemon juice. Mix all these until well combined, ideally with a whisk to get any pesky clumps from the flours Add in the chicken, and then a small amount of water. Stir the mixture, adding water a little bit at a time until the mixture become a thick but fluid - kind of like the texture of PVA glue - smooth, but thick. Be careful with this - a batter too runny will mean the coating won’t be as crispy and flavourful. Next, preheat some oil in a pan or karahi for some deep frying action. You’ll know the oil is hot enough when you drop a bit of the pakora batter into the oil and it floats back to the top, sizzling away. Drop in the coated chicken pieces, one at a time. Don’t overcrowd the pan, it messes with the temperature of the oil and can lead to limp, dull pakoras. Fry the pakoras, turning them occasionally if they need a flip, but don’t touch them too much. Once the batter is crispy and a deep gold, drain the pakoras well using a slotted spoon before bringing them onto a colander lined with tissue to drain some more while you continue to fry the rest of the batter.
🌶️ How spicy are these?
You may look at the ingredients list and be like ‘Hmm, damn girl. Three types of chilli.’ And yup, there are! There’s red chilli powder, chilli flakes and finely chopped fresh green chilli. But honestly, I would put these as a ⅗ on the spice level. Like, they aren’t mild, but they won’t blow your taste buds off. If you are used to eating Pakistani/Indian cuisine which is inherently a bit hot, these will be fine for you. If you chop the green chilies superfine, they won’t be a bother. If you’d like to know how suitable these are for kids - my one-year-old son really enjoyed these (disclaimer: he does LOVE his Desi food), but having said that my slightly less easy to please 5-year-old daughter found them too spicy. I think if you will be serving these to children, perhaps back off on the spice elements by between 25-50% (unless you have a son like mine).
🌟 Some additional chicken pakora tips
Running the flours through a sieve before adding them in will also help with that whole crispy, lightweight vibe we’re going for 😉. It’s always good to do one test pakora before throwing them all into the frying pan. Do just one and have a taste of it. Feel like you want to adjust the salt or spice? Go ahead, you’ve just saved the entire batch from not living their best pakora life. The temperature of the oil is really important to ensure your pakoras are cooked properly. I can’t give you an exact temperature (because I’m DESI and we work with ANDAZA - ha!) but if you start frying the pakoras and they begin to turn brown almost immediately, the oil is definitely too hot. And if they don’t seem to be catching colour, it’s definitely not hot enough. I find preheating the oil for 5 minutes, doing 2 small batches on high heat, then turning down things down to a medium-level for any further batches works best. Further to that point, just another reminder to work in small batches and not overcrowd the pan, as tempting as it may be. Overcrowding the pan reduced the temperature of the oil, and frying the pakoras in oil that isn’t as hot as it should be will lead to limp pakoras with no crisp. Sad. Many restaurants add a bit of red food colouring to their pakoras. I haven’t but if you like that look feel free to add a bit. You can work as hard as you want trying to ensure your coating is all crispy and airy but it’s no use if your pakoras end up oily. To avoid oily pakoras, make sure you drain them properly using a slotted spoon until no more oil is dripping out, and then allow them to rest over a tissue-lined colander. The colander will help keep the airflow going and avoid them getting soggy. Giving them a light rub (gently!) with a tissue can also help pick up some excess oil spots too.
❄️ Storing and reheating
How long can I keep chicken pakora batter?
OK so, this may not be what you want to hear but… once the chicken mixture is combined with water, it doesn’t actually keep so great for longer than 2ish hours. They just loose their awesomeness. The coriander and chicken release moisture into the batter and it messes up all the ratios. You CAN fix the excess moisture by adding in some gram flour, but it just isn’t the same. It knocks off all the flavour ratios. Due to this, I don’t recommend making wet batter in advance. If you want to do some sort of advance prep, you can mix up all the ingredients minus the water and chicken and then add in those when you’re about to fry.
How do I reheat chicken pakoras?
The best way to reheat chicken pakoras is in the oven, at about 180c uncovered for 10-15 minutes. Do not keep them in the oven for too long - once they are heated through remove them immediately otherwise they may become dry. They can also be air fried with success for 4-6 minutes at 200c. It may be tempting to heat them in the microwave - but this will make them soggy and limp, so it’s a solid NO from me!
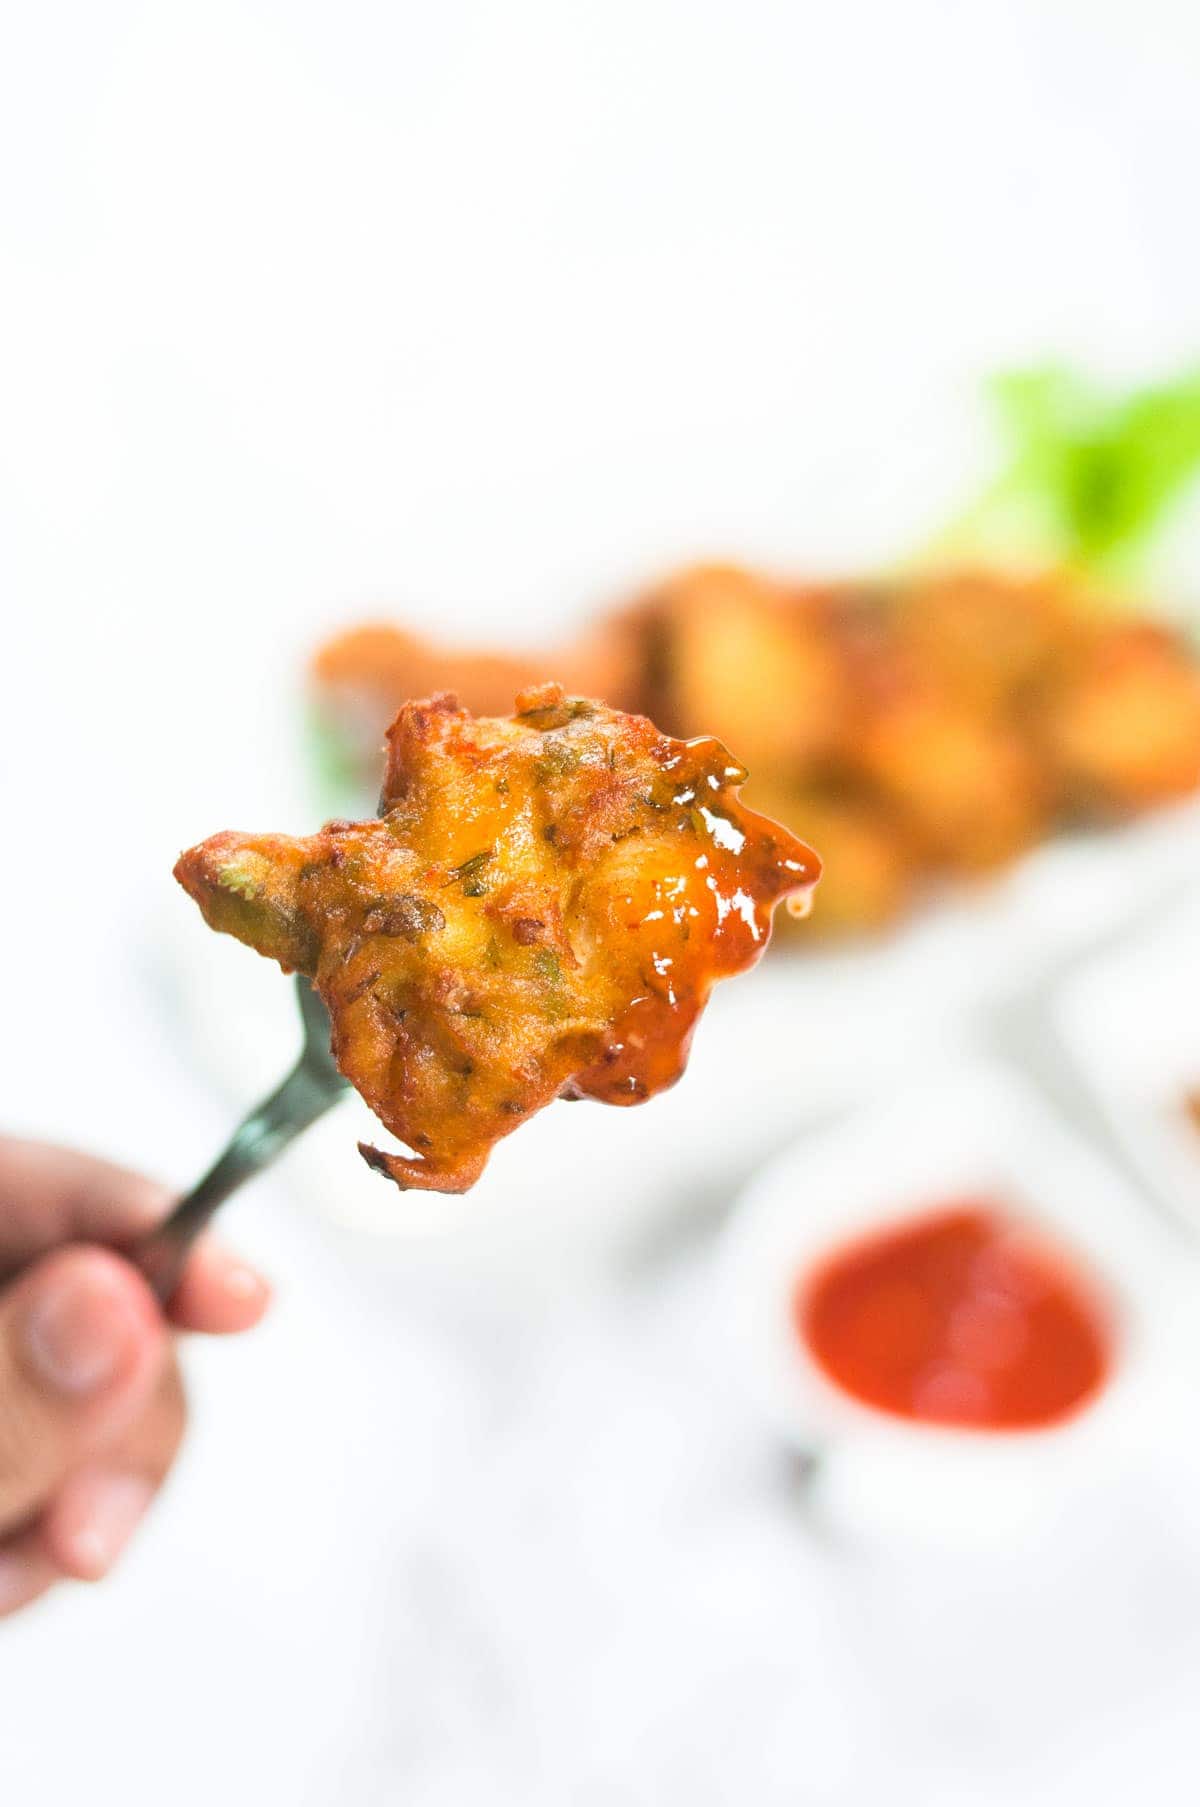
🍽️ Serving suggestions
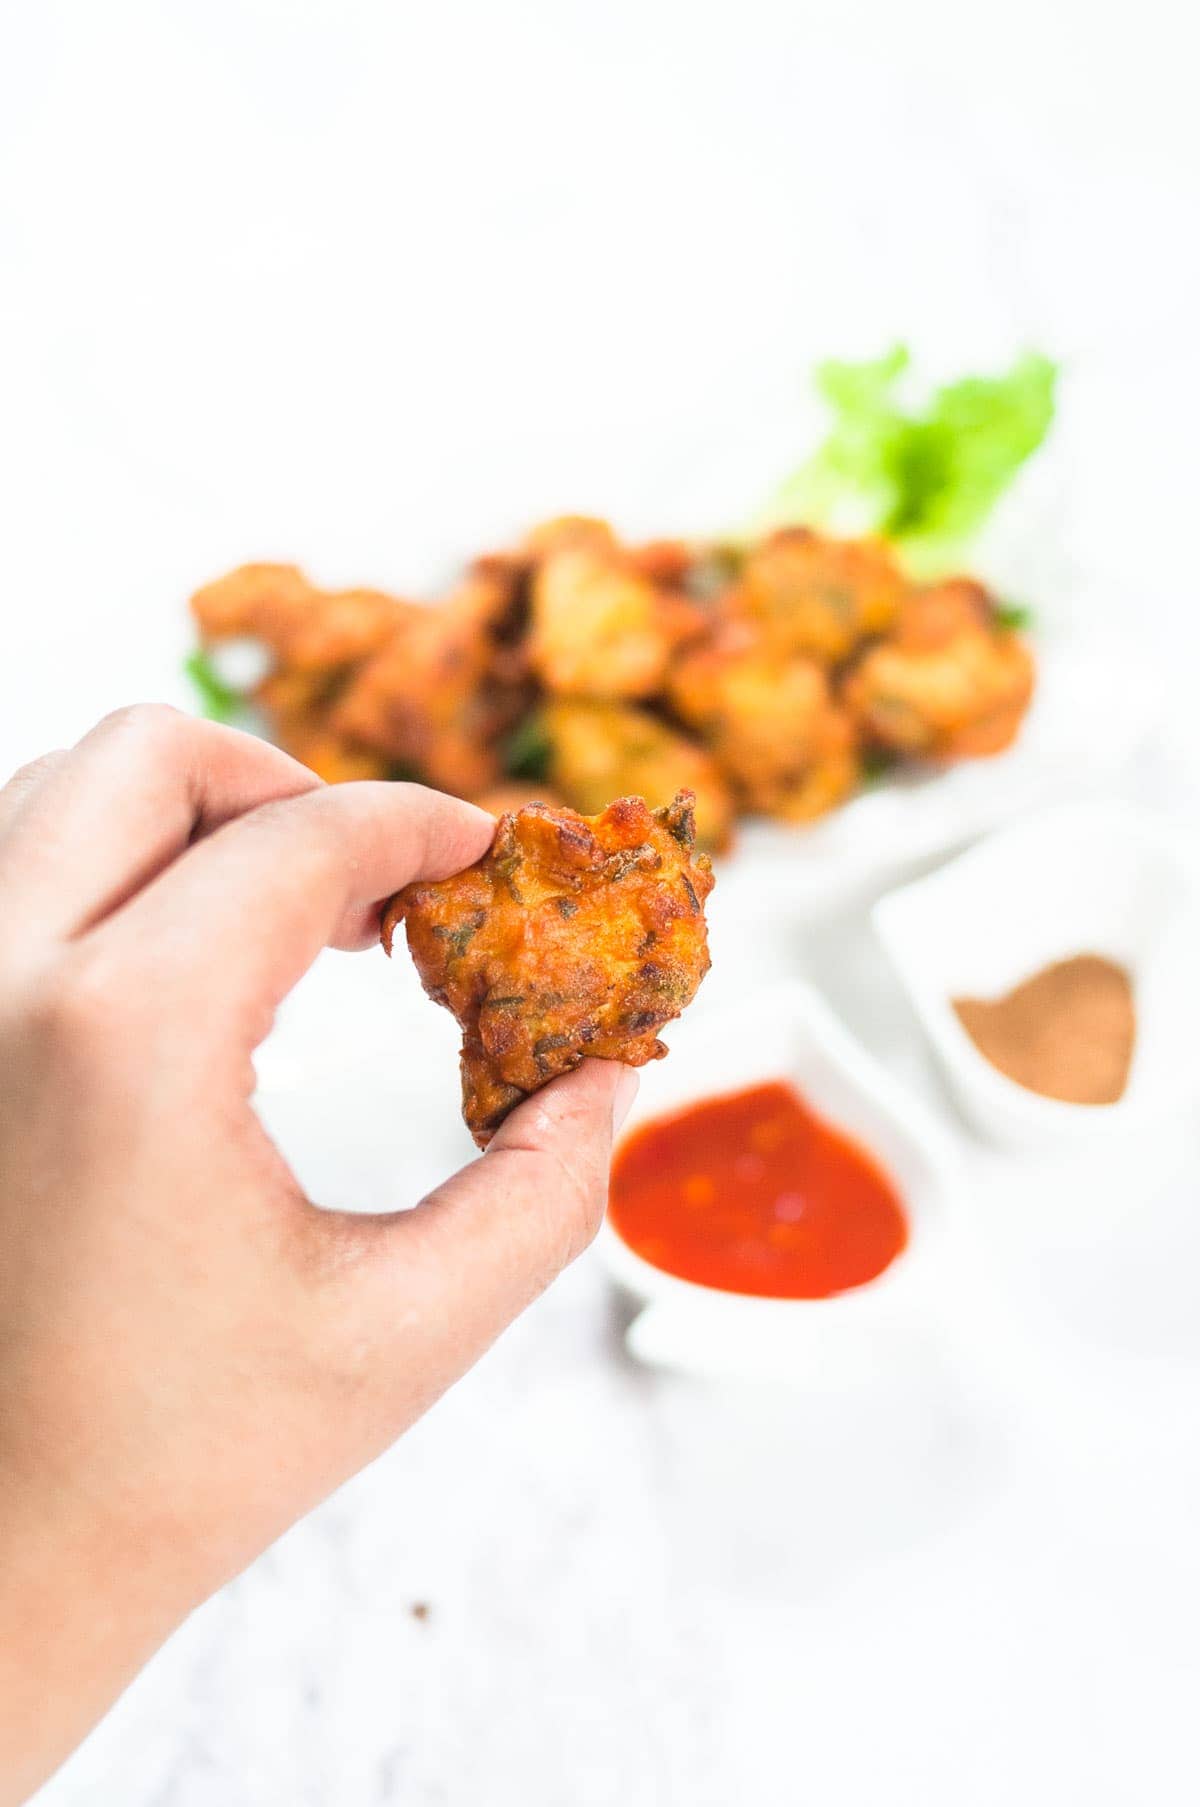
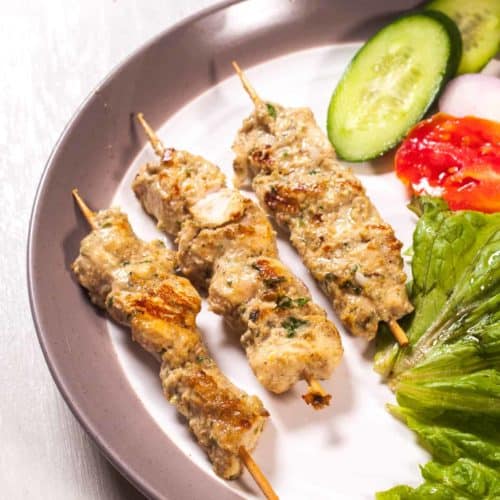
Chicken pakoras go really well with a sauce or chutney with a bit of a zing to them. During my taste trials, I was enjoying them alongside this potent tangy and spicy chutney from Chai and Churro’s Bun Kebab recipe. I imagine these would go well with any sweet and spicy sauce or a chilli jam. You can also serve these with a few wedges of lemon and a sprinkle of chaat masala if you fancy!
🥣 Variations
Feel free to use this batter with fish, prawns, potato slices, onions, anything really! You can also use this batter with minced/ground meat (keema) too. Make sure you ask for superfine minced meat - if you get yours from the butchers ask them to run the meat through the machine twice for that SUPER superfine keema! It’ll be like chicken pakora nuggets 🙂 You can also add some finely chopped onion into this batter too alongside the rest of the ingredients - add as much as you want! It will add a good crunch and works well with all the flavours.
📋 Recipe
Enter your email & I’ll send it right over. Plus, you’ll get bonus Pakistani food-goodness from Fatima Cooks, like new recipe alerts, exclusive email-only recipes + more! By submitting this form, you consent to receive emails from me. Your details are secure. Opt-out any time.


title: “Chicken Pakora Recipe” ShowToc: true date: “2024-10-14” author: “James Hardy”
Chicken pakora are a deep-fried chicken version of gram flour fritters. Boneless chicken pieces are rolled in a spiced gram flour batter to make these popular Indian appetizers. They are also spelled as chicken pakodas.
What goes into this recipe?
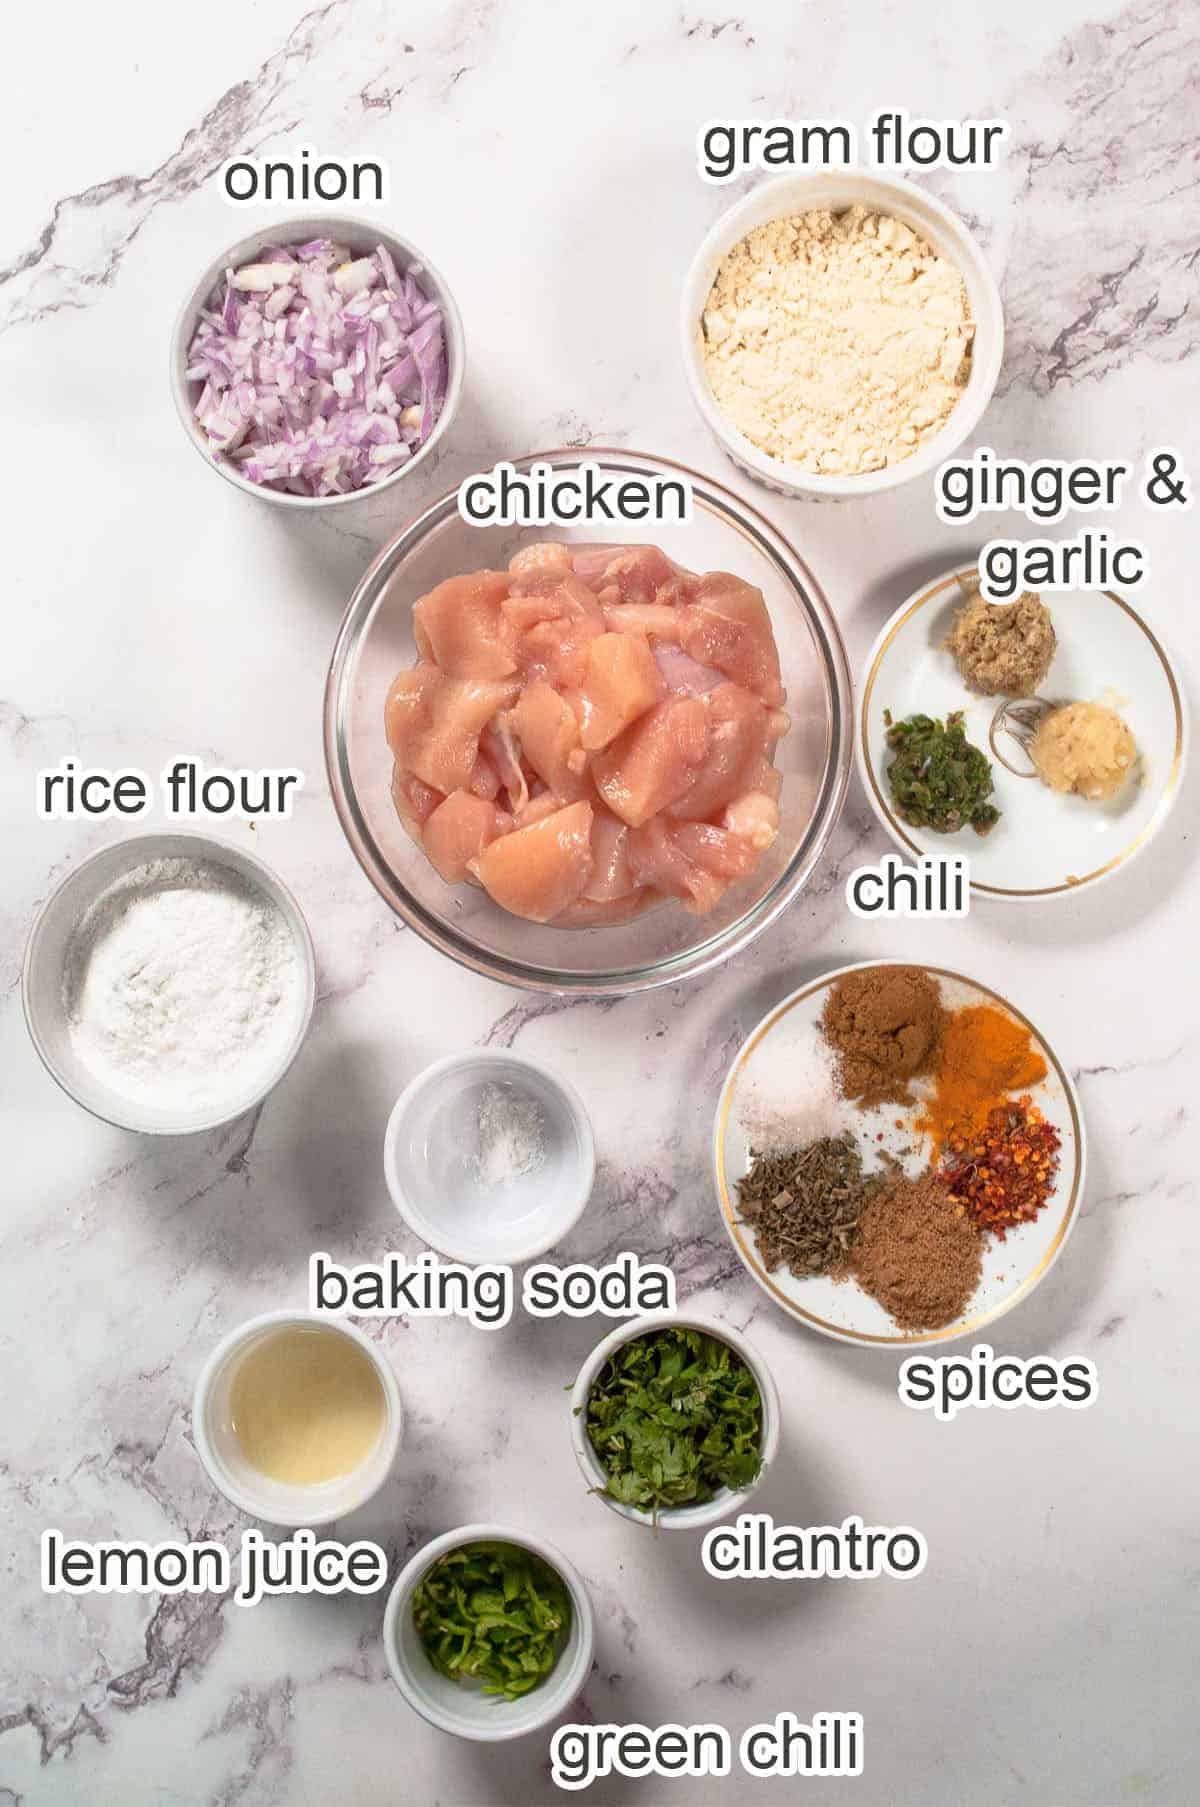
Let’s look at the ingredients to make crispy chicken pakora recipe. We are using baking soda to velvet the chicken, which ensures that you will have a juicy bite. Fenugreek leaves and chopped onions give the batter a unique pakora flavor. The addition of rice flour to the batter, combined with the right consistency, ensures that the pakora are moist inside and crispy on the edges, just like street style pakoras.
Chicken: I used boneless chicken breast, but the boneless chicken thigh will work too. Baking soda: Mixing baking soda with chicken and leaving it for a few minutes helps to make it soft and juicy. If you wish to skip the baking soda, marinate the chicken for 2 hours and add 2 tablespoons of yogurt to the batter. Gram flour: Gram flour is made from Bengal gram and is also called besan. You sub this with chickpea flour too. You can find it in any Indian store. Rice flour: This flour helps to get crispy edges on the pakoras. You can substitute it with cornstarch or more gram flour, with some compromise on crispiness. Indian spices: I used a typical Indian spice blend of cumin, coriander, red chili flakes or red chilli powder, turmeric, and salt. You can substitute it with basic Indian curry powder if needed. Dried fenugreek leaves: These leaves add a typical Indian flavor to the pakoras. They are the same herbs that we use in butter chicken and chicken karahi. If you don’t have them, substitute them with curry leaves. Ginger, garlic, chili: I used freshly minced, but paste will work as well. Green chilli slices: I used thick and large, less spicy chilies. These add a spicy flavor to each bite. Skip them if you can’t handle spice or are making the pakoras for kids. Onions and lemon juice: I used red onion, but you can use white or yellow too. Adding lemon juice will add tanginess and enhance the flavor of the chicken pakoras. Oil: Use any neutral oil to fry.
How to make this recipe?
Make chicken pakora recipe, follow these easy steps: If you try this Chicken Pakora recipe, I’d LOVE to hear your feedback in the comments. Your 5-ratings motivate me to do my best. Stay connected for more recipes and videos on Facebook, Instagram, Pinterest, and Youtube. I wanted to create a quick recipe, so I omitted to marinate it. If you could marinate for 2-4 hours, the chicken will absorb the flavors and give a more homogenized deep flavor. A very runny batter will be difficult to fry, and a very thick batter will make thick, round pakoras that will not get crisp. We need flat, small pakoras that will get crispy on the edges easily. You also add garam masala to the batter. Deep Frying: Use a spoon to pour batter into the wok. This will ensure that you add both batter and chicken to each pakora. Fry in batches in moderately hot oil on medium heat. Let the chicken pakoras get golden brown and crispy. Very hot oil can burn pakoras and leave the chicken undercooked. On the contrary, low heat can overcook the chicken and make it dry, resulting in rubbery pakoras. Serving: Serve chicken pakora as an appetizer or side before the main course. Or pair pakoras with a cup of masala chai at a tea party. These also make a great lunchbox snack for kids. Serve hot pakora with your favorite tamarind chutney or green chutney or a dip. Couple with masala chai for the perfect tea-time moment. You can store the chicken pakora batter in the fridge for 12 hours and fry as needed.
📖 Recipe