In the future, you’re lifting the cover off of a pan and seeing the plump, happy, soft Chinese pork buns that you’ve just made with your own two hands. You did it, and it wasn’t that difficult at all. It was, in fact, easy. A feeling of complete amazement and a huge sense of personal accomplishment overwhelms you. You go about the rest of your day patting yourself on the back for your brilliance. For you can now make baozi and they can be pan-fried pork buns or steamed pork buns! Now that you’ve seen the future, you must give this recipe a try. From making the dough, to the filling, to the buns themselves, you can really achieve a big batch of perfect steamed or pan-fried baozi, or buns, in a matter of two hours. These buns can be easily frozen and cooked later, whenever the mood for baozi strikes. This particular pork bun recipe is for Carrot Ginger Pork Buns and although similar to Sheng jian bao made primarily of pork, this ginger carrot pork filling is…I have to say…one of the best fillings we’ve ever tried. The sweetness of the carrot, combined with the pork and the ginger is just heavenly. Making the dough is no more difficult than assembling a pizza dough. But here’s a tip: we knew someone—a lady from China, no less—who used to make baozi using store bought Pillsbury biscuit dough. This lends your baozi a rich, buttery flavor that isn’t traditional, but actually isn’t half bad. We really prefer to make our own baozi dough, but you can try the Pillsbury method if you’re feeling lazy. In other news, today is the 1-year anniversary of our blog! Twelve months ago today, we joined the food blogging community and began this entire family adventure. These carrot ginger pork buns are truly worthy of a celebratory anniversary post. If you have a spare couple of hours, make them!
Step 1: Make the pork bun Dough: Makes about 15 large or 30 small
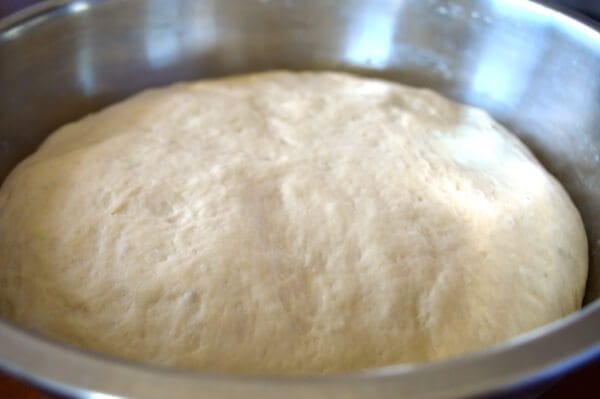
In a large mixing bowl or mixer with a dough hook attachment, completely dissolve yeast and sugar in the lukewarm water. Add the flour and knead for about 15 minutes. The dough should be pretty soft and not too firm. If it seems dry, add a little more water. Cover the mixing bowl with a damp kitchen towel and let it proof one hour.
While it’s proofing, make the filling:
Step 2: Make the pork bun filling
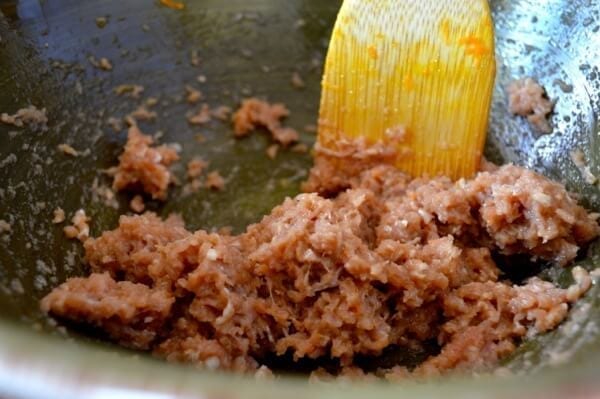
Combine the ground pork, sesame oil, light soy sauce, cooking oil, white pepper, and salt, and mix for a few minutes, until the meat mixture resembles a fine paste, then set aside.
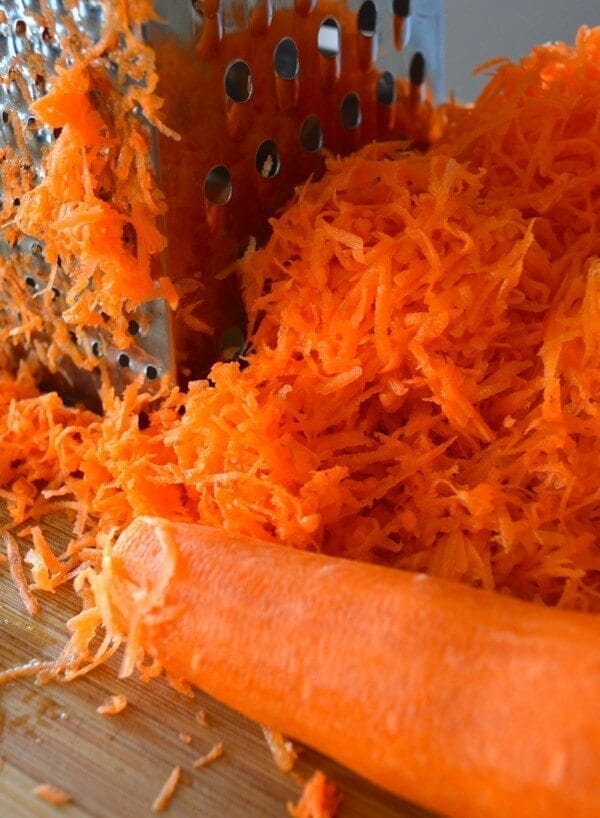
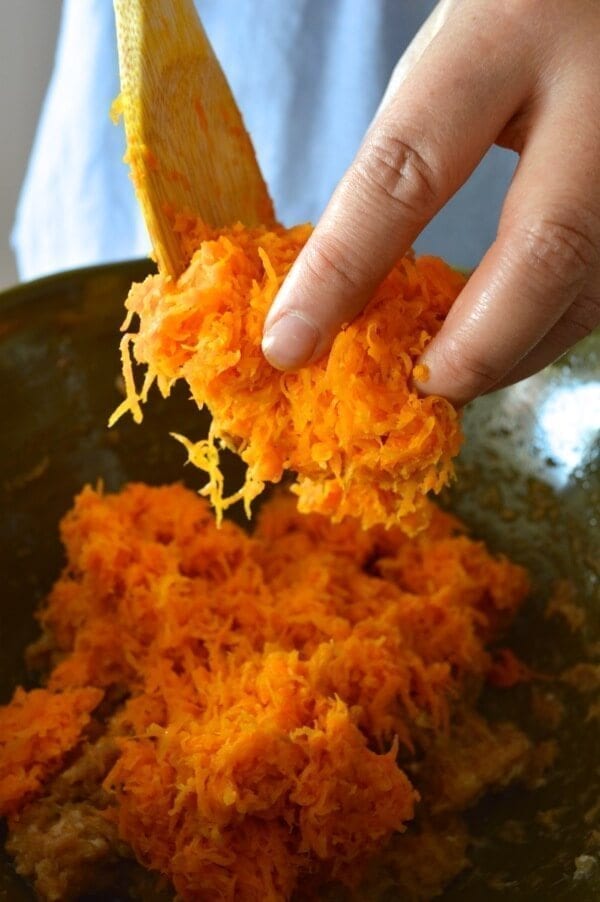
Heat a couple tablespoons of oil in a pan over medium heat and cook the grated carrots for a few minutes until they turn color (they shouldn’t be mushy. Cook just until they’re not raw anymore). Let cool completely.
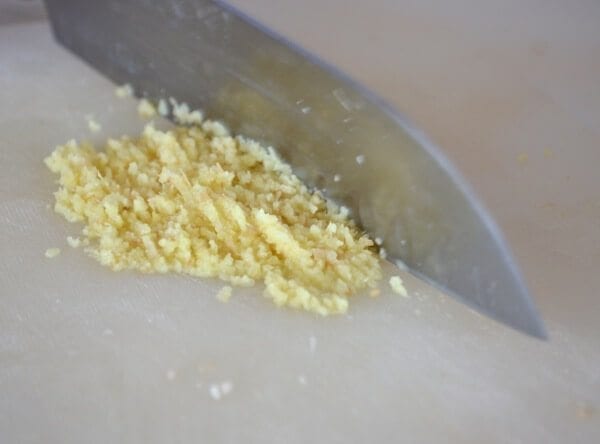
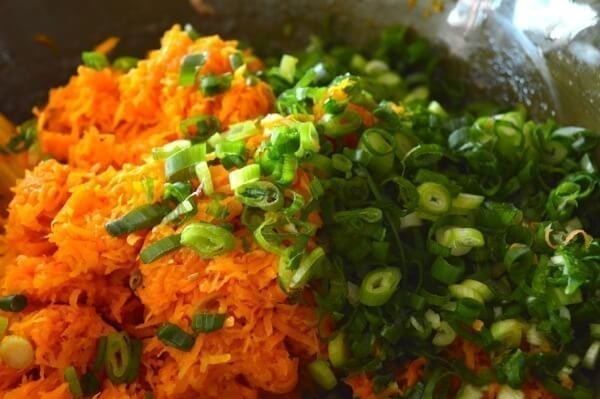
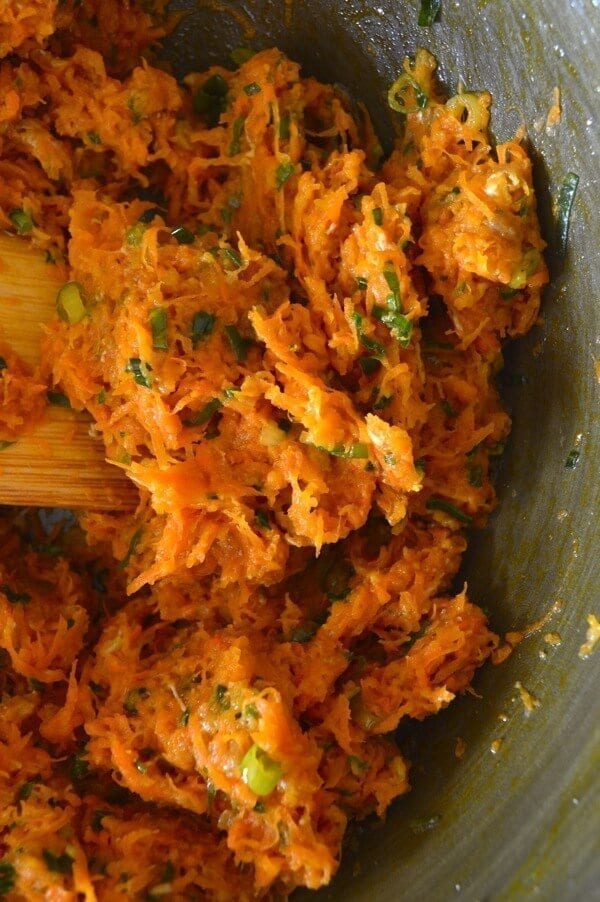
Combine the pork mixture, the cooked carrots, and chopped scallion, ginger, salt, sesame oil, and shaoxing wine. Mix for a couple minutes, until the entire mixture resembles a paste.
Step 3: Assemble the baozi
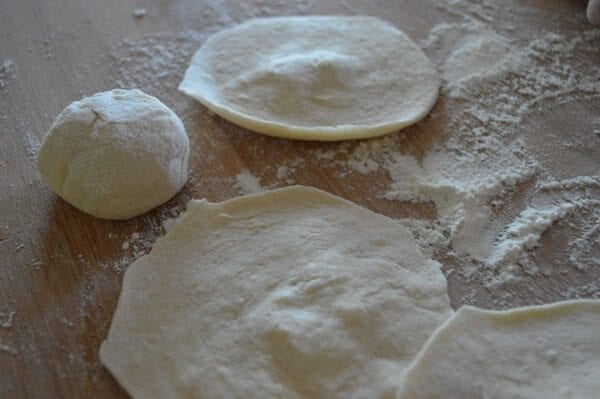
After the dough has finished proofing, turn it out on a clean surface dusted with flour. Knead for 2 minutes to get ride of any air pockets. Roll the dough into a long tube and rip off chunks of dough to make individual dough balls. They should be about the size of a golf ball for larger buns, and about half that size for smaller buns. Take each dough ball, and with a tapered rolling pin, roll from the edge towards the center, without actually rolling the center of the dough too much. The goal is to flatten the dough into a round circle with a thinner edge and thicker center. The difference in thickness should be about 1:2.
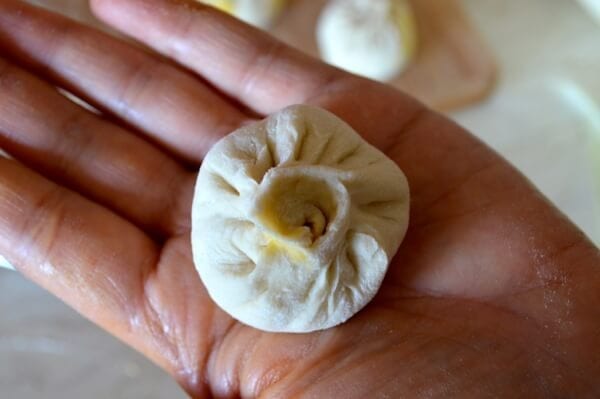
Add some filling to the center of each disk (about 1 ½ tablespoons for the larger buns and 2 teaspoons for the smaller ones). You can start with a smaller amount of filling until you get the hang of the folding. As illustrated in the video below, the buns are folded with one hand holding the skin and filling, and the other hand pleating the edges of the dough disk like an accordion. As you fold, the goal is to make it all the way around the circle, until you’ve sealed it at the top. You’ll be making about 10-15 folds. That’s it!
Folding Baozi – The Woks of Life from The Woks of Life on Vimeo. Once the top is closed, a bun is born. Lay the buns on a floured surface while you finish assembling them.
Once assembled, let the buns proof under a clean kitchen towel for another 15 minutes before cooking or freezing. To freeze, lay the buns on a baking sheet lined with parchment paper and put the baking sheet in the freezer. Once the buns are frozen, transfer them to a Ziploc bag, press out as much air as you can from the bag, and freeze for up to two months. To cook, just follow the directions below as if you were cooking them fresh. The cooking times will just be a little longer!
Step 4: Cook the pork buns!
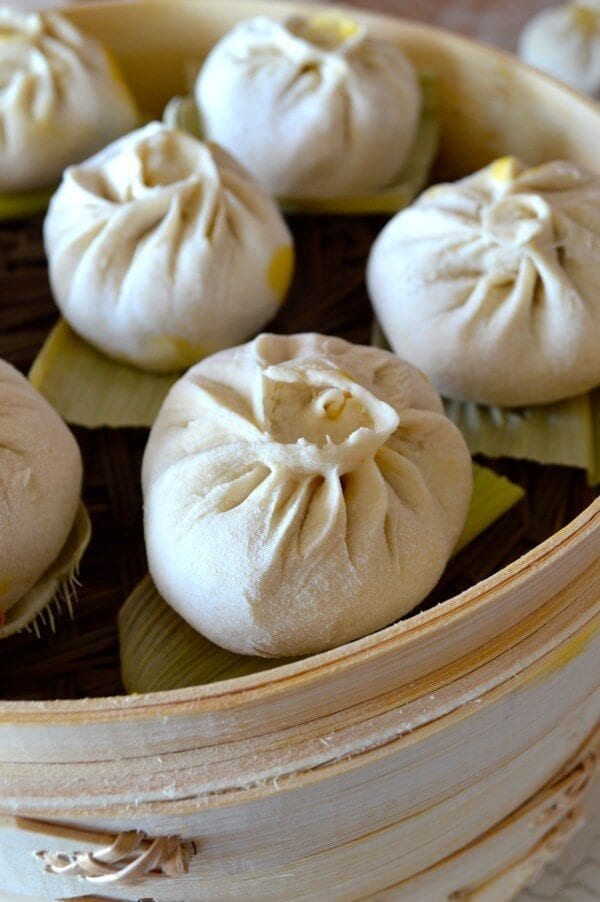
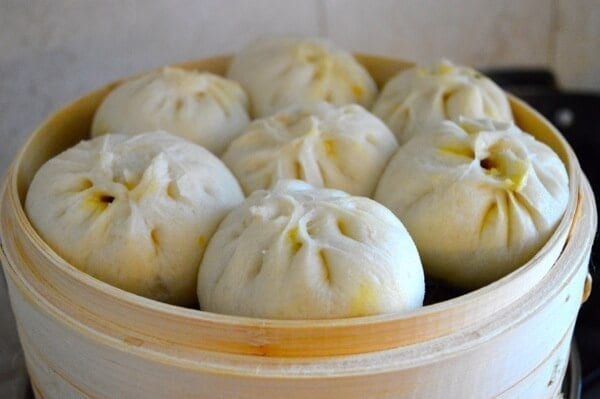
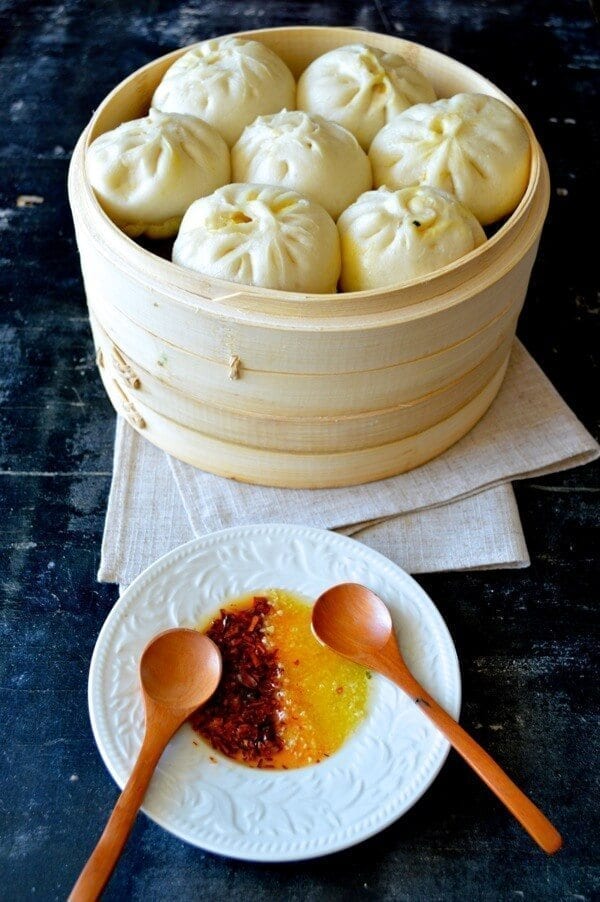
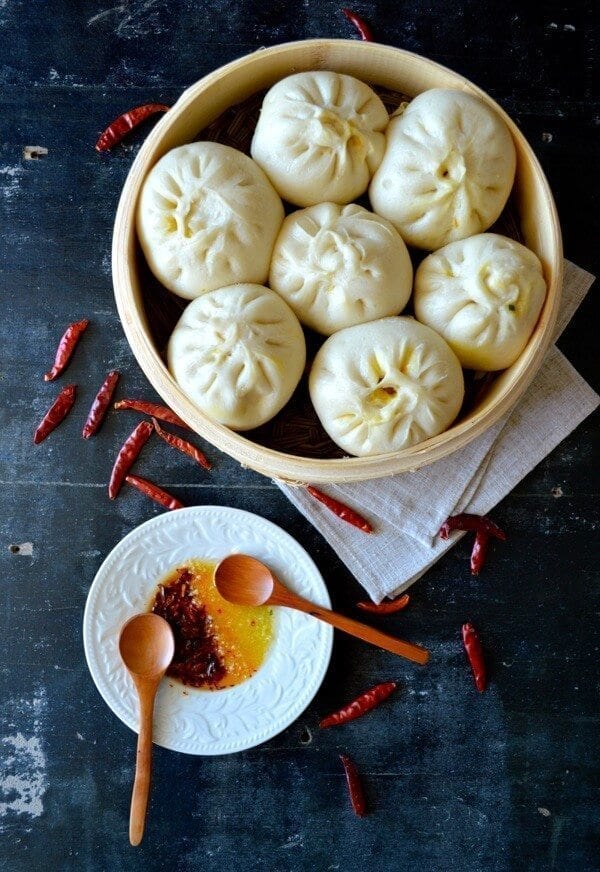
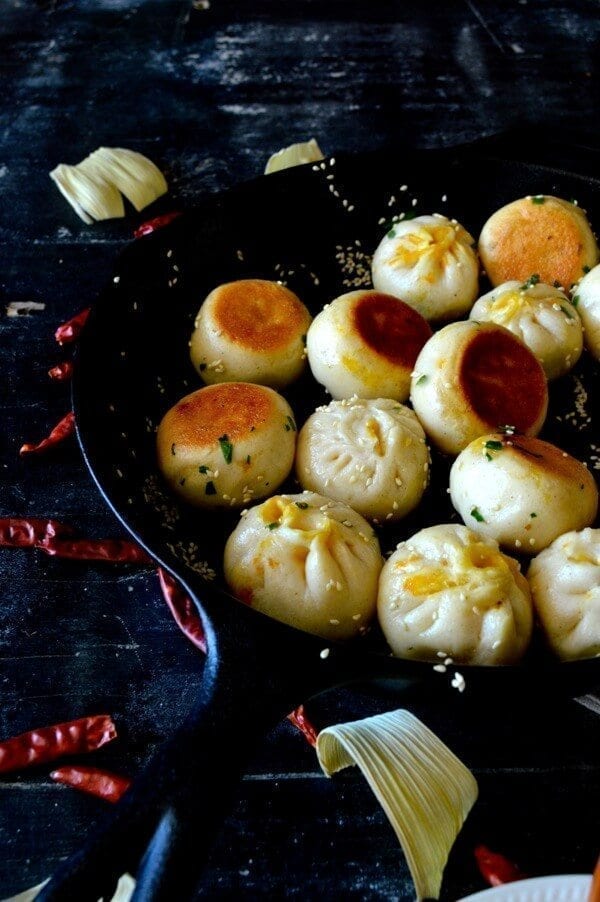
There are 2 ways to cook your baozi: steaming and pan-frying, or “sheng jian.” Both are delicious. To make steamed pork buns: I used a double-leveled bamboo steamer. You can use whatever steaming apparatus you normally use (we also have one of these metal multi-level steamers at home). Check our our Chinese Cooking tools page for a more tools we use for steaming. Here are a few things to remember about steaming your buns: Start with cold water, and put your pork buns on the steamer. Turn on the heat to medium. Set the timer for 12-15 minutes for smaller buns and 15-20 minutes for the larger ones. To see if the buns are cooked, press the buns lightly with your finger. If the dough immediately bounces back, they’re done. Keep a close eye on them. Over-steaming will cause the buns to collapse, so cooking time is important.
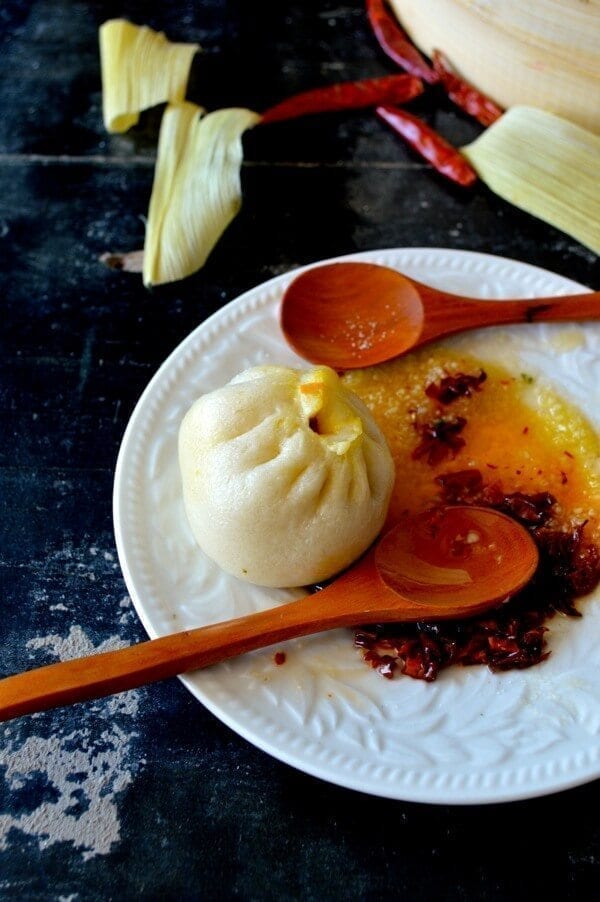
Once they’re done, turn off the heat, keep the lid on, and let the buns “rest” for about 2 minutes before taking them out. Then eat!
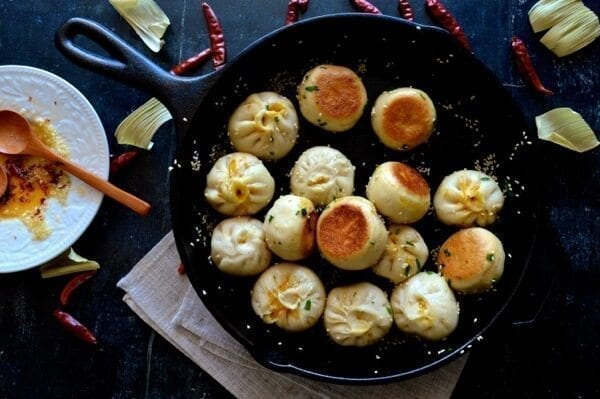
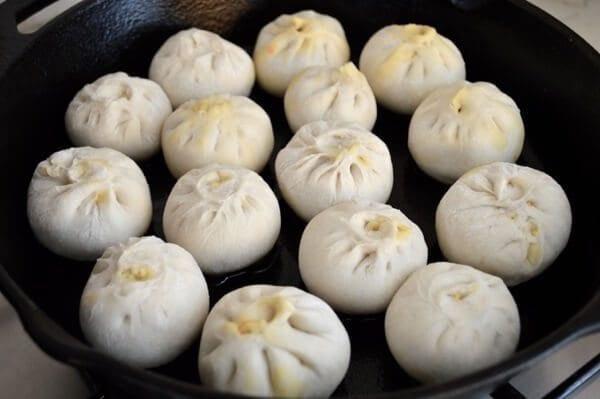
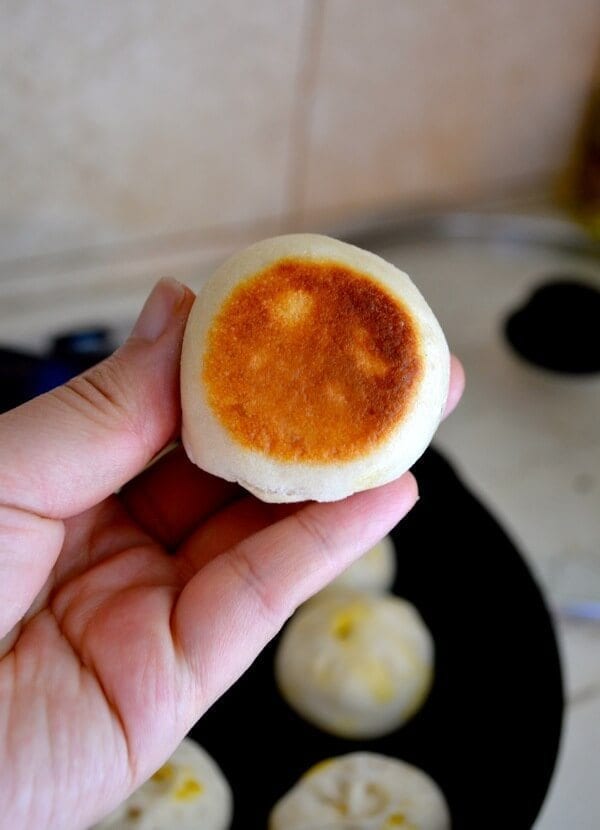
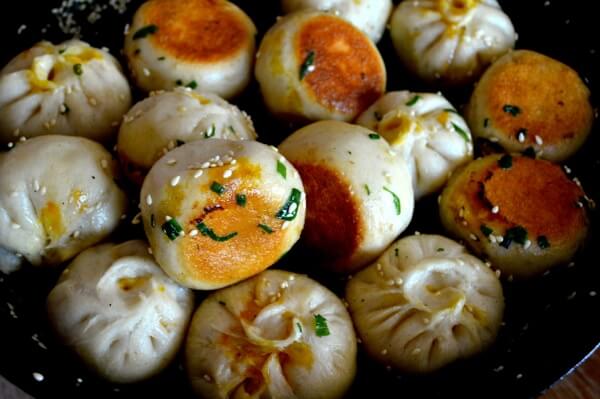
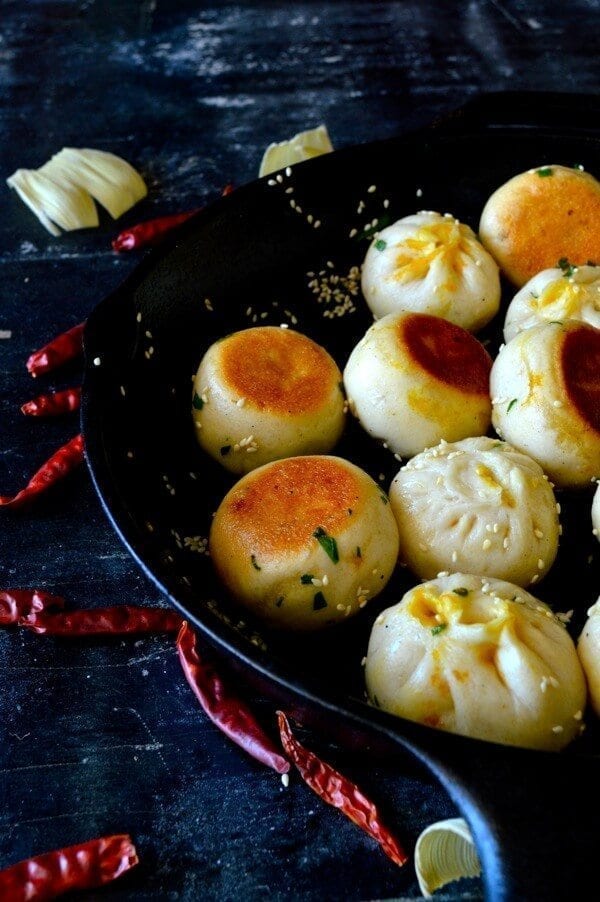
To make pan-fried pork buns: Pre-heat a flat-bottomed cast-iron or other seasoned pan over medium heat. Add the oil and swirl it around the pan to coat it evenly. Add the buns to the pan.
Let them cook for a few minutes until the bottoms turn golden brown.
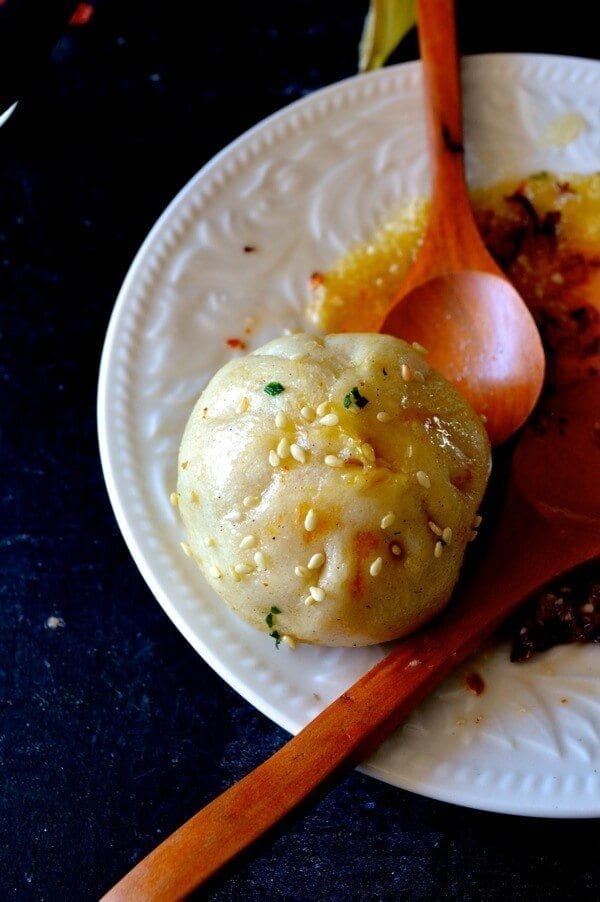
Once golden, add the water to the pan and immediately cover with a lid. Turn the heat down to medium low and let the buns steam for 7-10 minutes until all the water is evaporated. Uncover the lid, and toss the buns around with scallion and toasted sesame seeds. Done!
We have honestly abandoned non-stick cookware in favor of cast iron cooking and you will see cast iron pans in a lot of our recipe photos. Check Chinese Cooking tools page where you will find a section on Cast iron cookware.
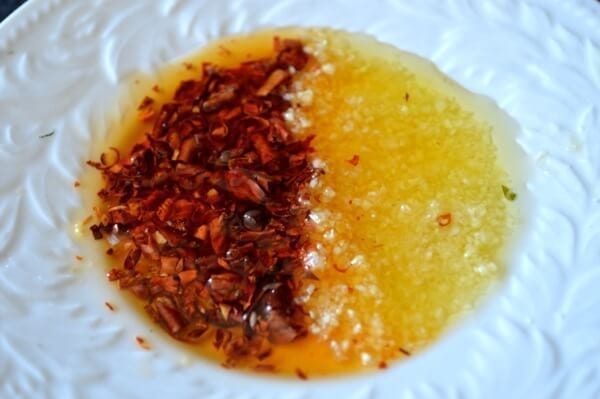
A final note: the best dipping concoction ever: We didn’t serve these buns with Chinese vinegar or soy sauce. We served them with our own toasted chili and garlic oil. Raw garlic may not be your thing, but it is here in Beijing, and for good reason. It’s so good with dumplings and baozi!