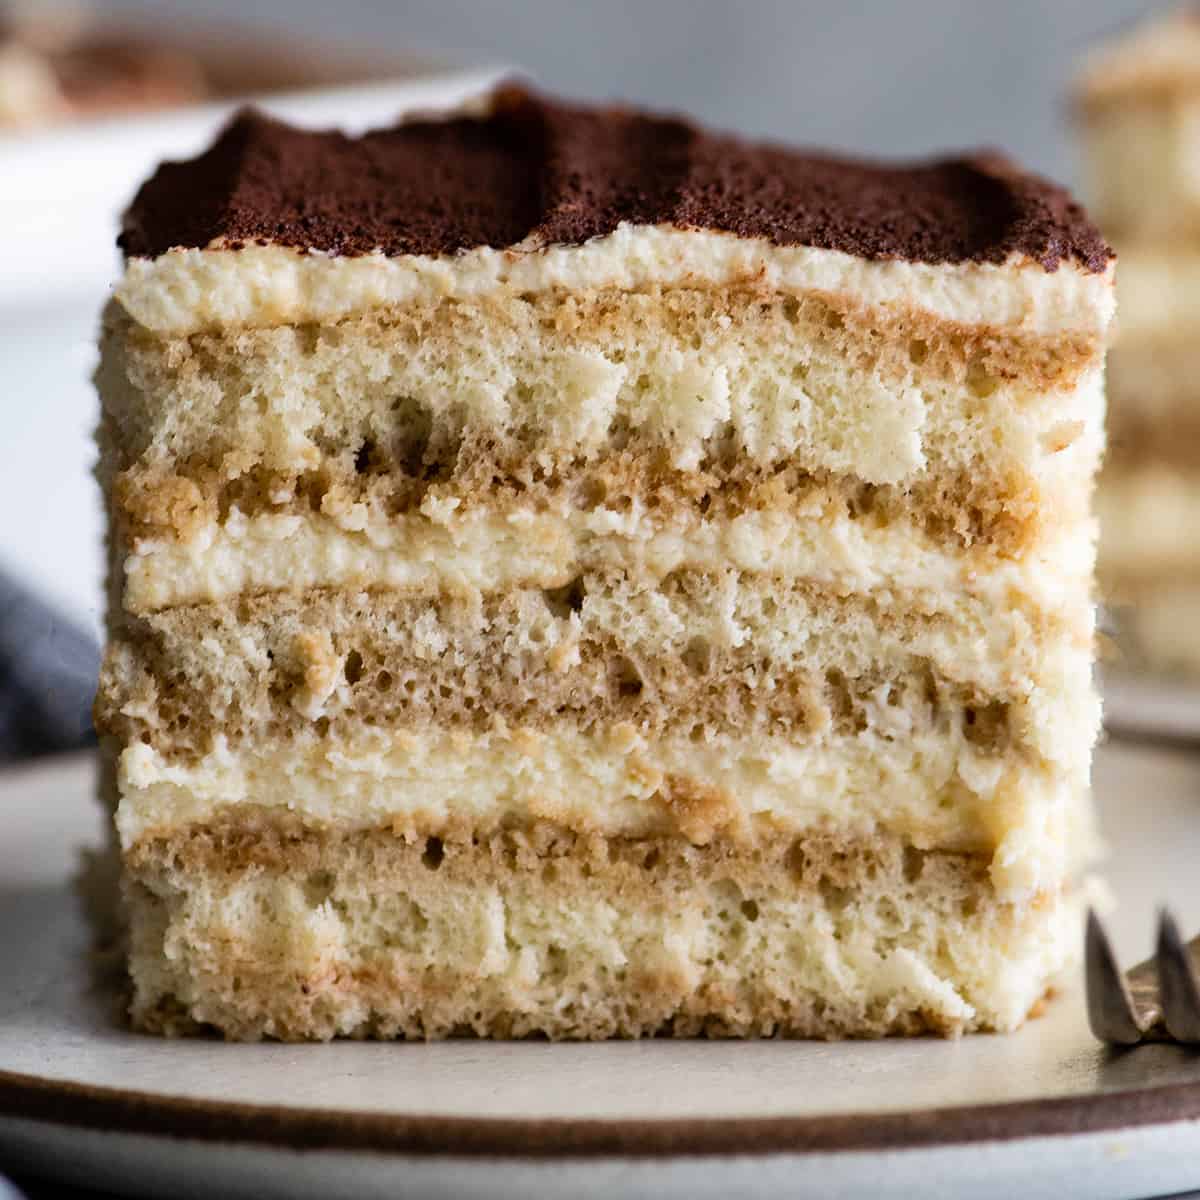
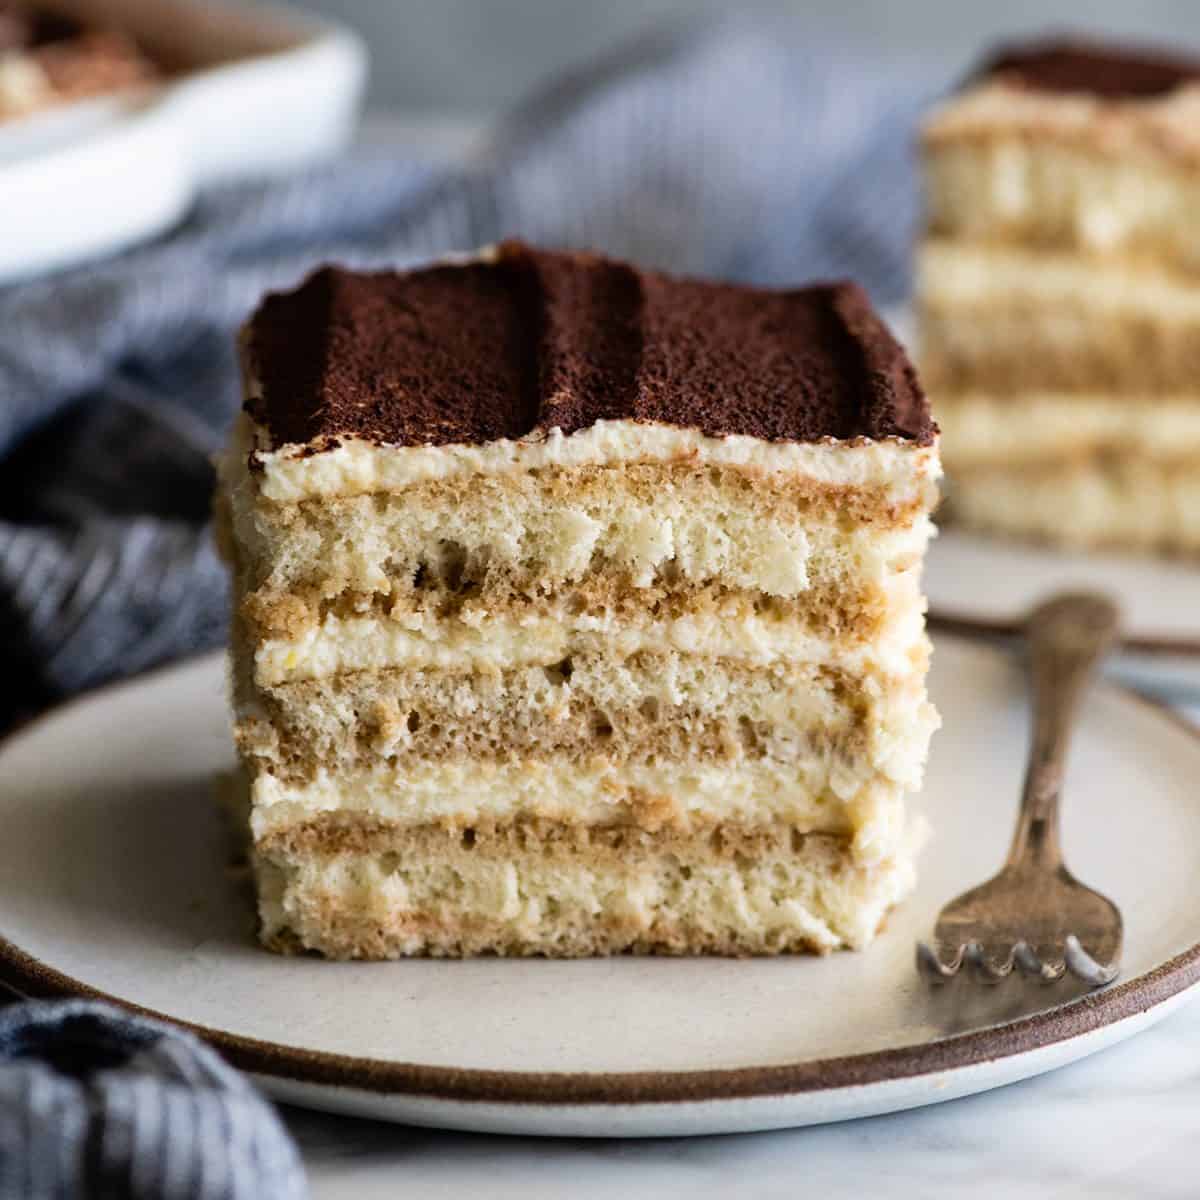
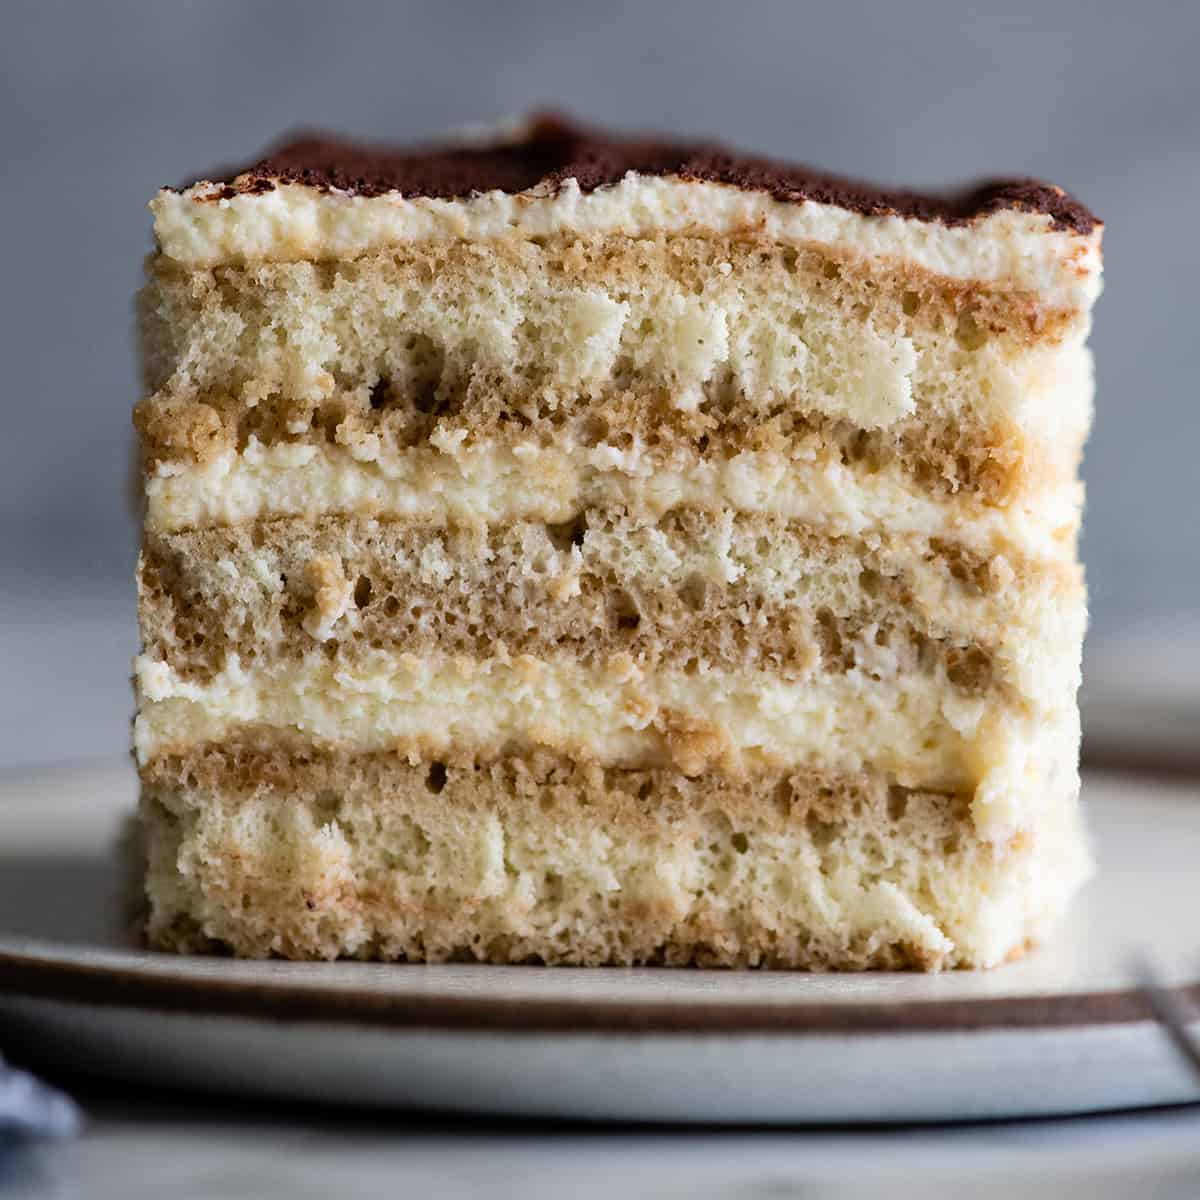
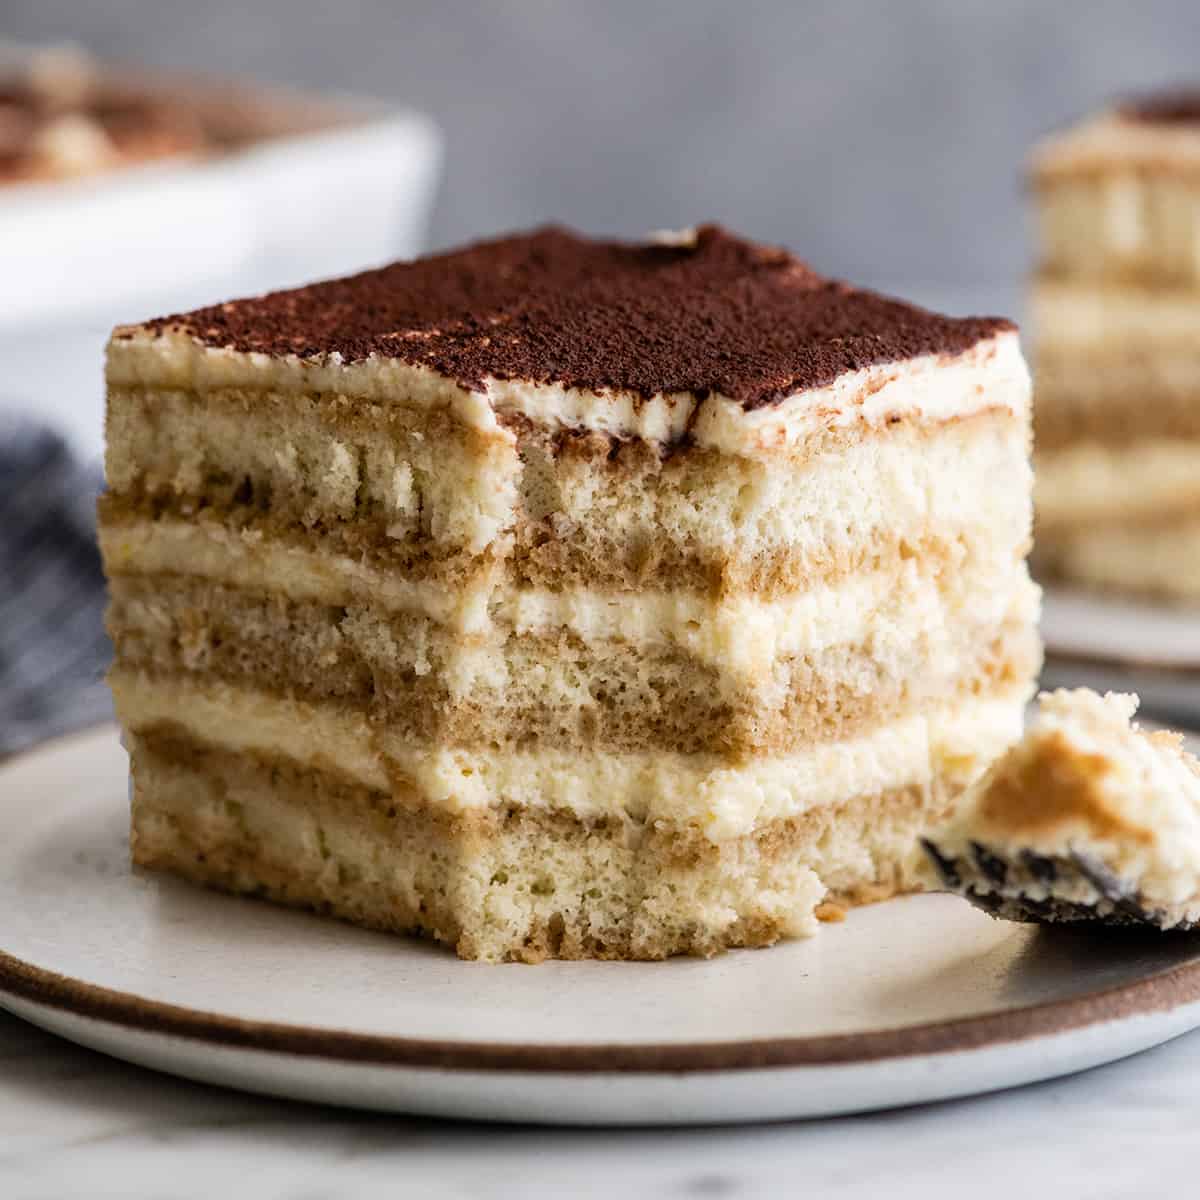
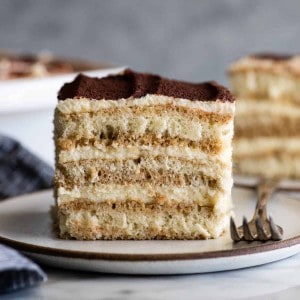
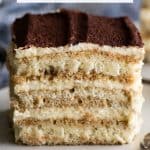
Posted Feb 06, 2021, Updated Mar 12, 2024 Tiramisu is one of my husband’s favorite desserts (right after these Homemade Eclairs), so early on in our marriage I set out to create the best Tiramisu recipe – and this is it. This authentic Tiramisu Recipe made completely from scratch. A creamy mascarpone filling sits between three layers (because for Ritch, many layers is the key to making the best tiramisu) of homemade lady fingers soaked in rum & coffee with a dusting of cocoa powder on top. It is seriously the absolute best tiramisu cake ever. What makes this tiramisu recipe unique is that the lady finger layers are made as three large squares (or circles) to fit the baking pan – not individual lady fingers. This makes the process easier both during baking and assembling!
Tiramisu Recipe: Ingredients & Substitutions
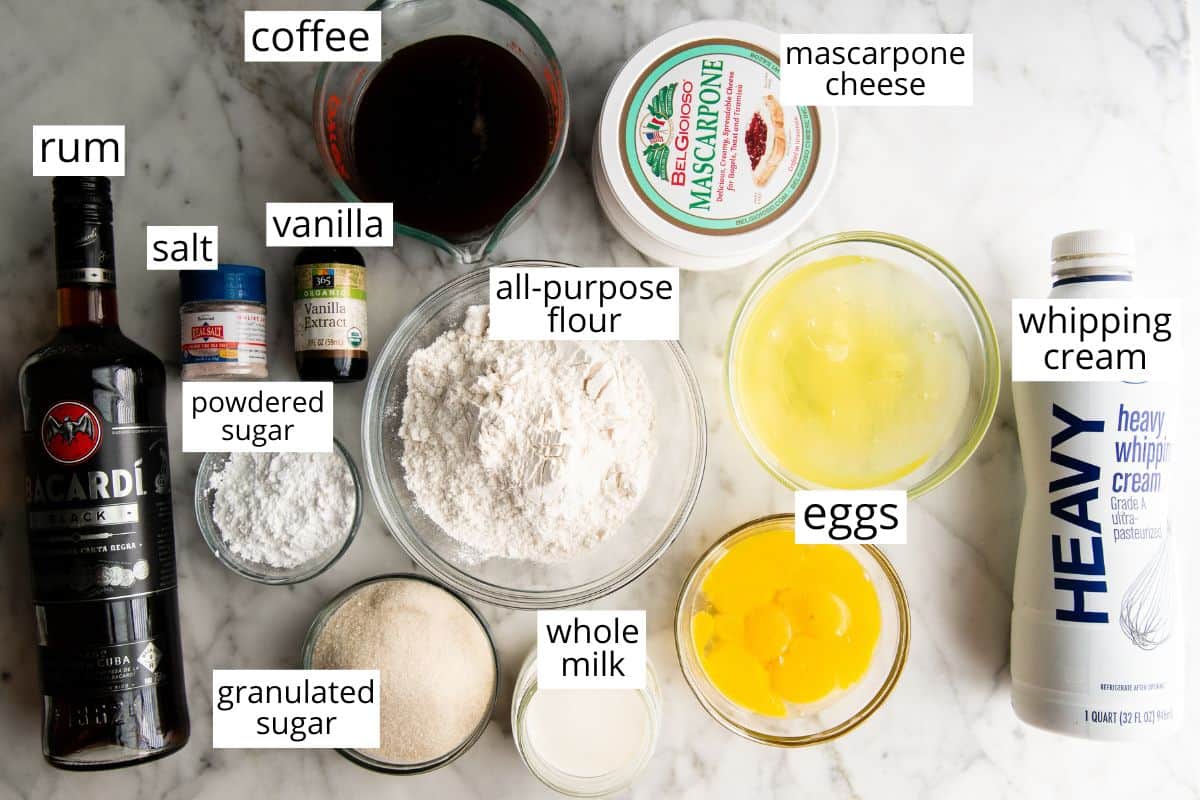
Granulated sugar. Use white granulated sugar or organic cane sugar for both the lady fingers and filling. Whole milk. Half and half can be used in place of whole milk. Mascarpone cheese. This is a key ingredient to authentic tiramisu – please do not make any substitutions. You need 16 oz in this recipe so be mindful of that, as it’s often sold in 8 oz portions. Coffee. Use a strong brewed coffee or espresso to make this tiramisu recipe. I like to use instant coffee to make it quick and easy. Rum. Another key ingredient in an authentic tiramisu recipe. If desired you can just use coffee, but I don’t recommend leaving out the rum.
Lady Fingers
This tiramisu recipe calls for homemade lady fingers. They are softer and more delicate than store bought and way more delicious. You may substitute store-bought if you are short on time.
How to Make Tiramisu
Making the best tiramisu takes time but it’s so worth it. I’ll walk you through how to make tiramisu step-by-step, including how to make homemade lady fingers! And don’t forget to watch the video!
Make the Lady Fingers
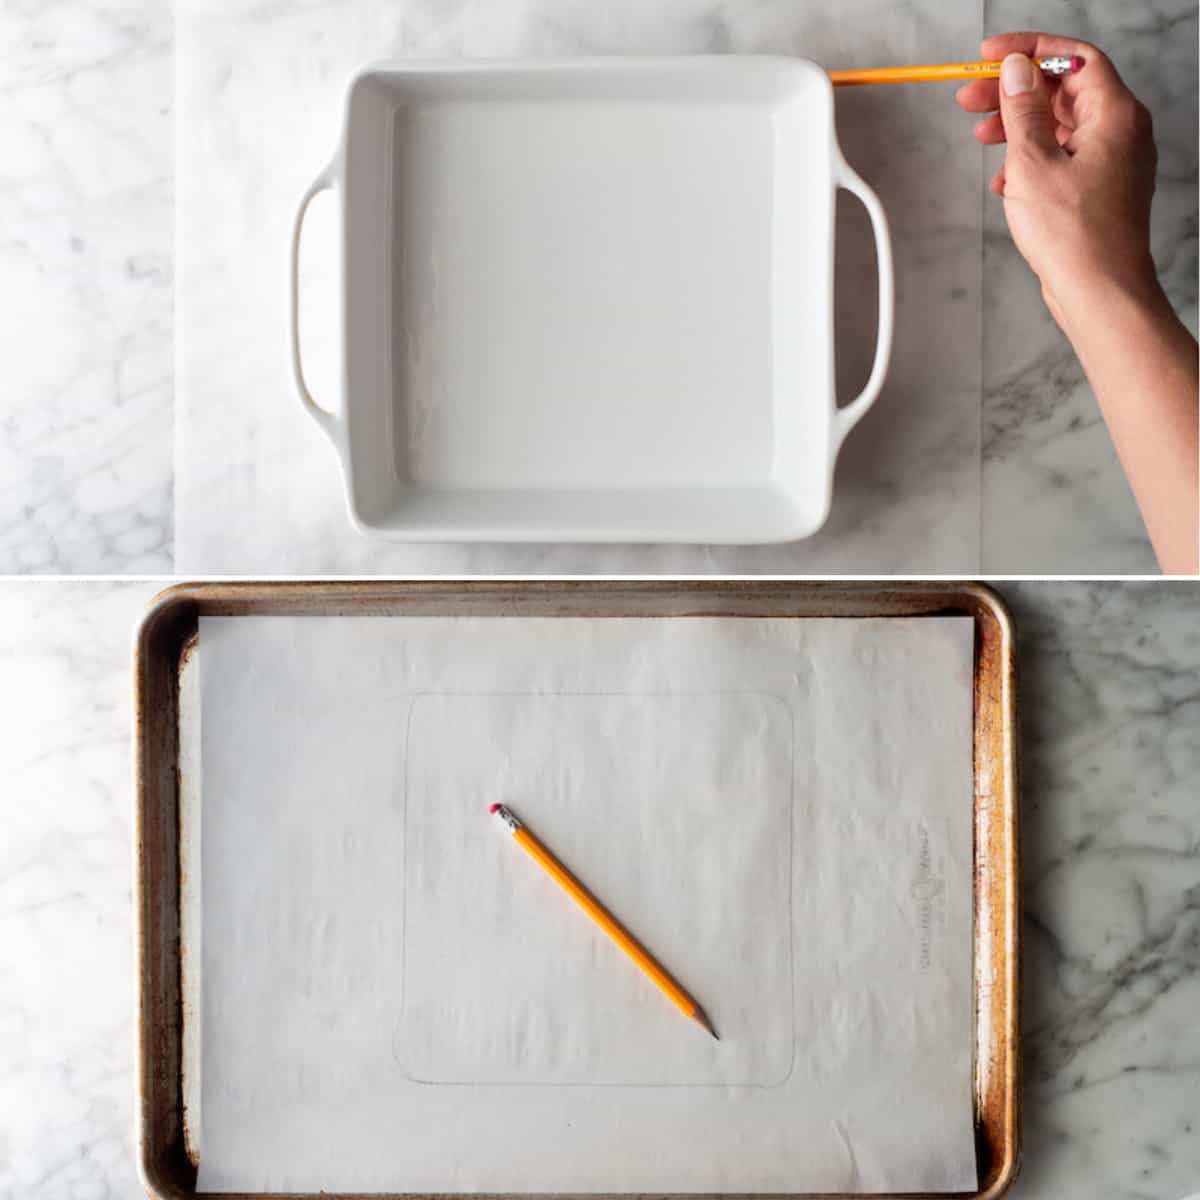
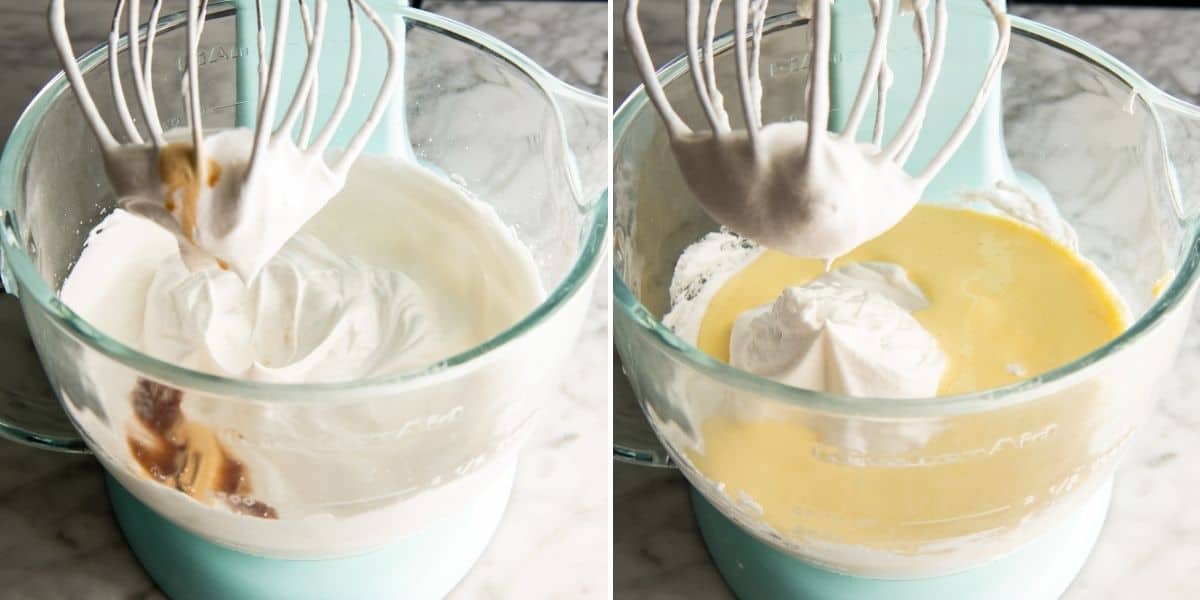
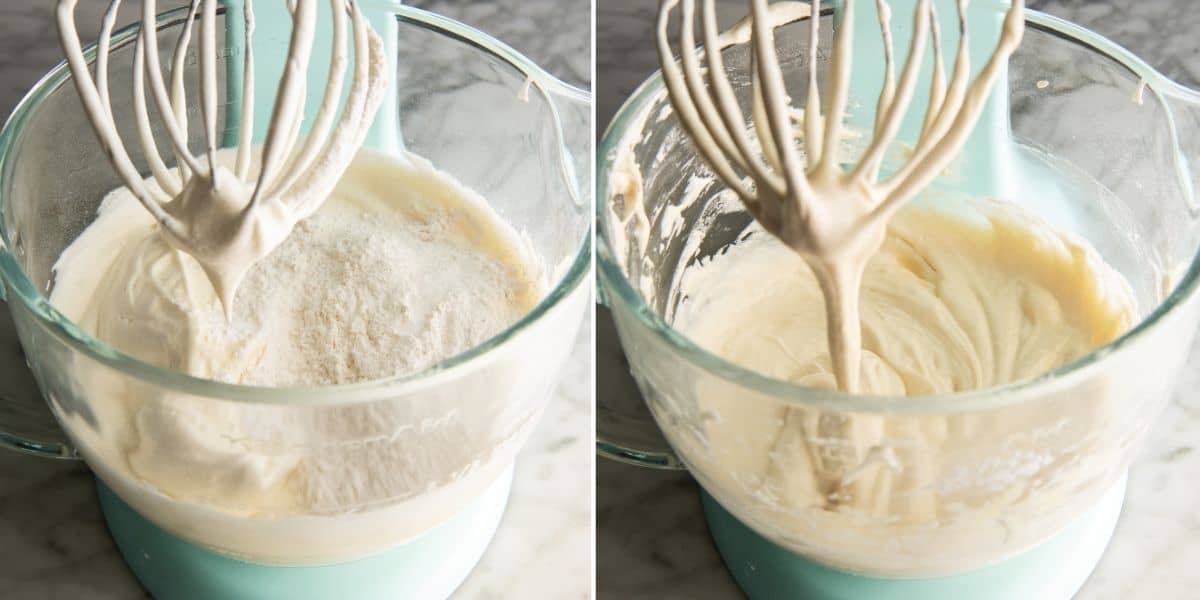
The first step in making this authentic tiramisu recipe is to make the lady fingers – because they need to be baked and cooled. I created my own method so the tiramisu cake is easier to assemble – which includes baking the lady fingers to fit the pan you are using instead of in individual “finger” shapes. Begin by lining 3 baking sheets with parchment paper (for the 3 layers). Trace the bottom of an 8×8” or 9×9” square pan or 9” round cake pan on each piece of parchment paper (whichever pan you choose to use to make this tiramisu recipe). Then set them aside. Next, in the bowl of a standing mixer fitted with the wire whisk attachment (or in a large bowl with a hand-held mixer), whip the egg yolks and ¼ cup of sugar with an electric mixer until thick and pale. Transfer mixture to a different bowl, scraping the bowl clean and rinse off the beater. In same bowl, whip the egg whites. Once the egg whites starts to thicken, add the remaining ½ cup sugar and continue beating. Once stiff peaks form, add the vanilla and beat to combine. Then, gently stir in egg yolk mixture on low speed until smooth. Next, add the flour and salt and gently stir or fold in with a spatula. The batter should be thick and pale yellow (see photo below).
Bake the Lady Fingers
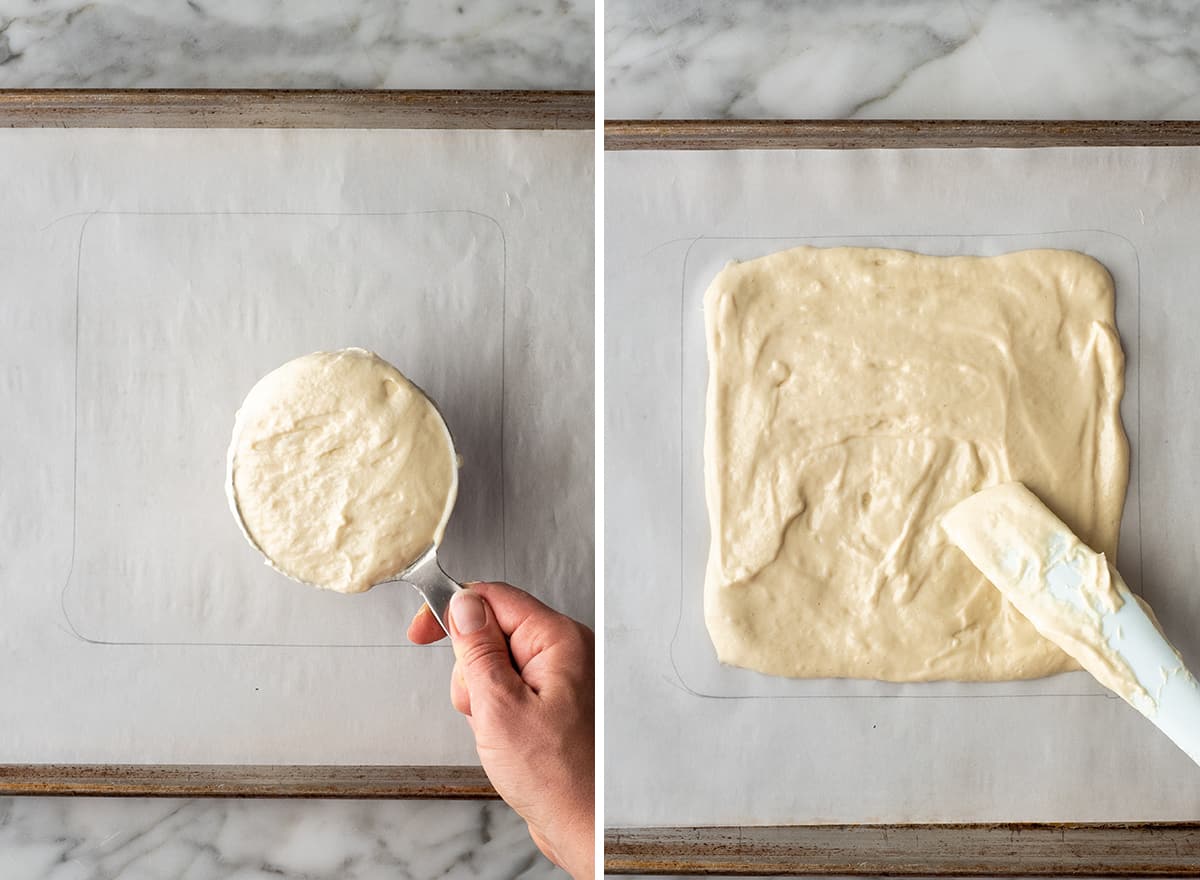
Pour about 1 cup of batter into the center of each square (or circle) traced on the parchment paper. Evenly spread it out to fit the square, leaving about ¼” border. The batter should be about 1/2” thick. Repeat with remaining two traced shapes. Bake for 10-12 minutes, until the lady fingers are set and very lightly browned. Then, carefully transfer the parchment paper to a wire rack to cool. Once the lady fingers have cooled completely, carefully remove them from the parchment paper, set aside to use in this tiramisu recipe.
Make the Tiramisu Filling
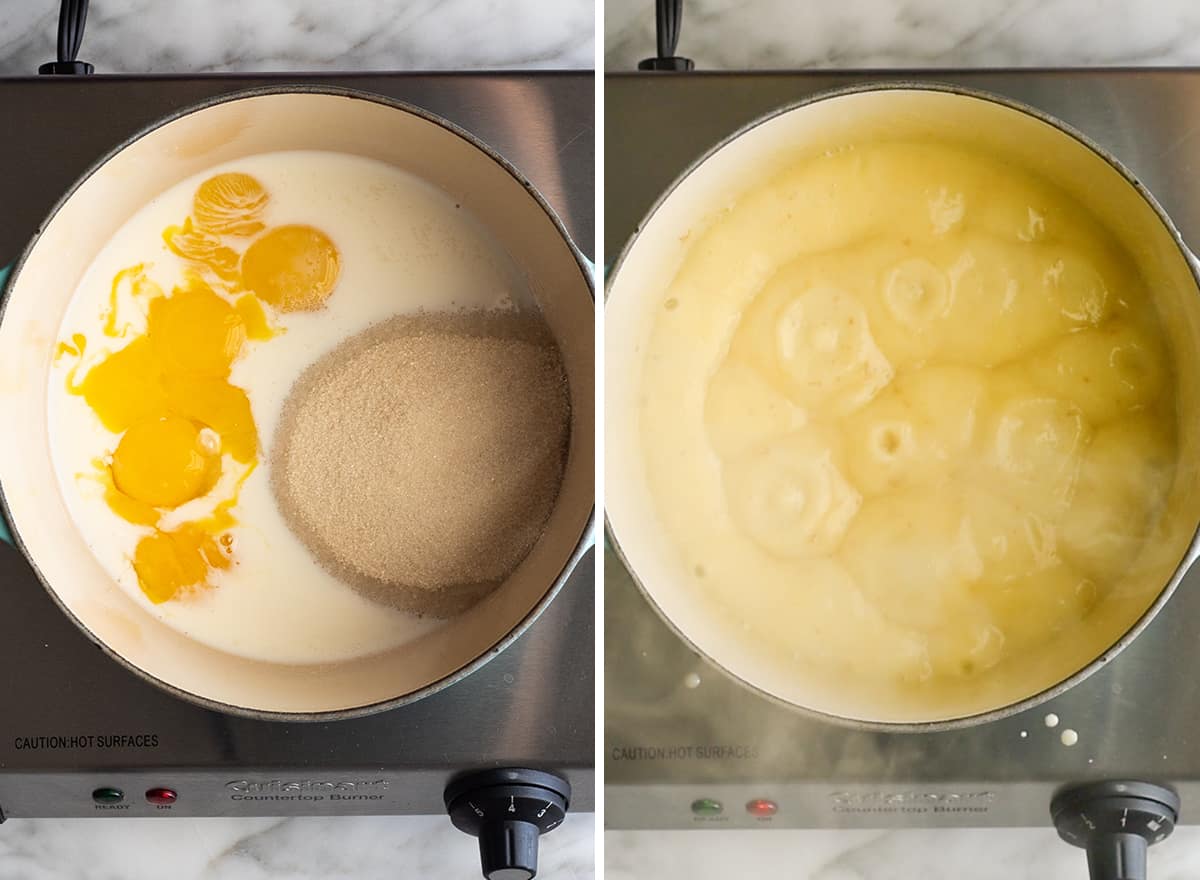
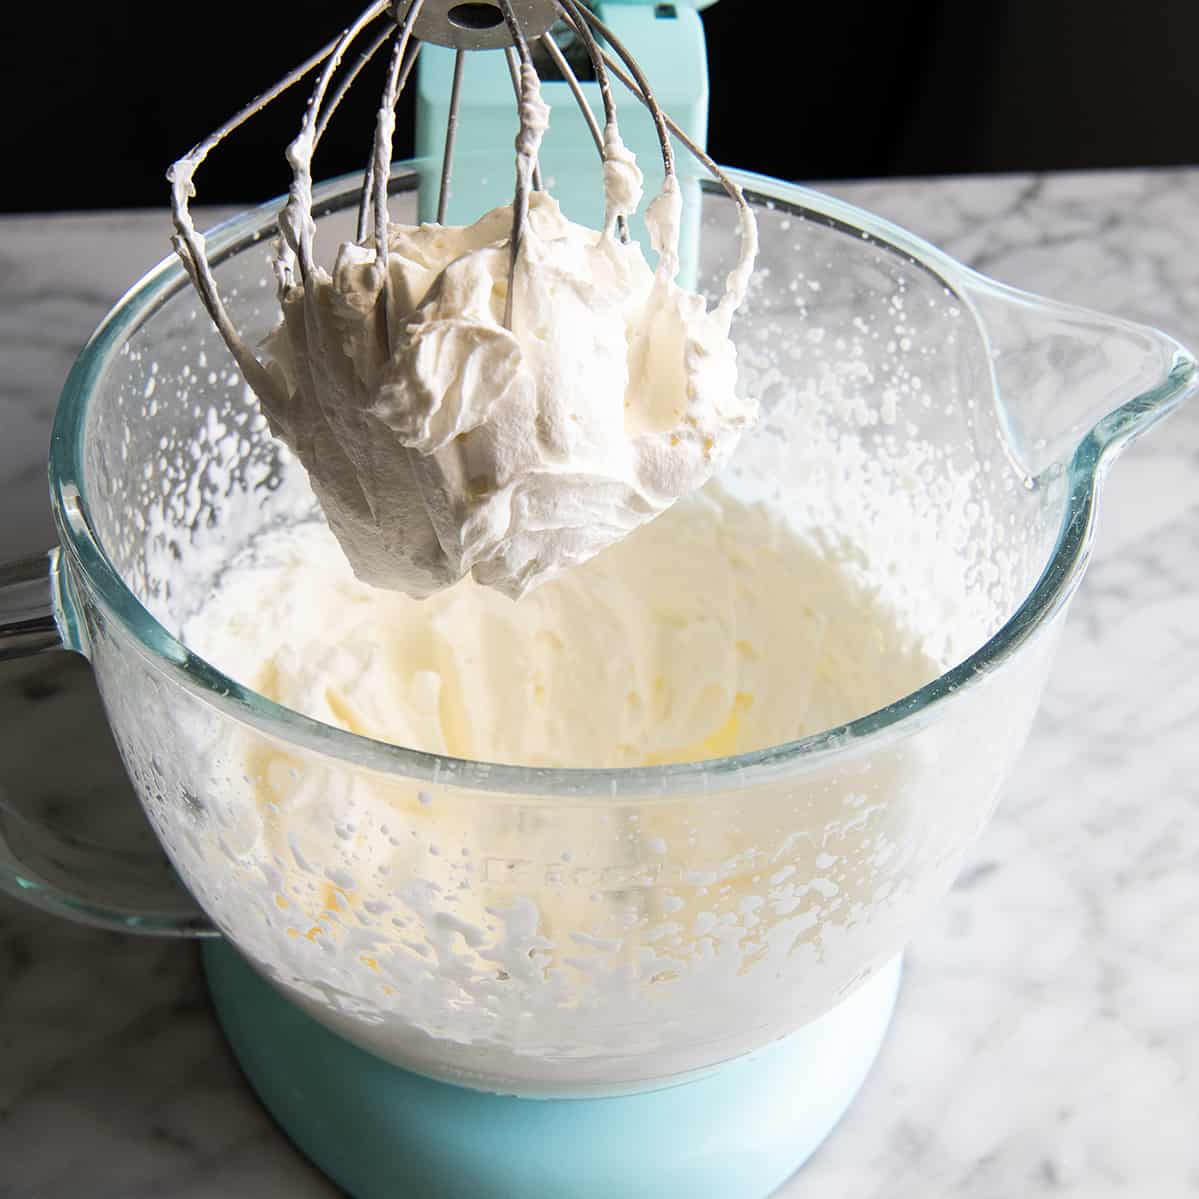
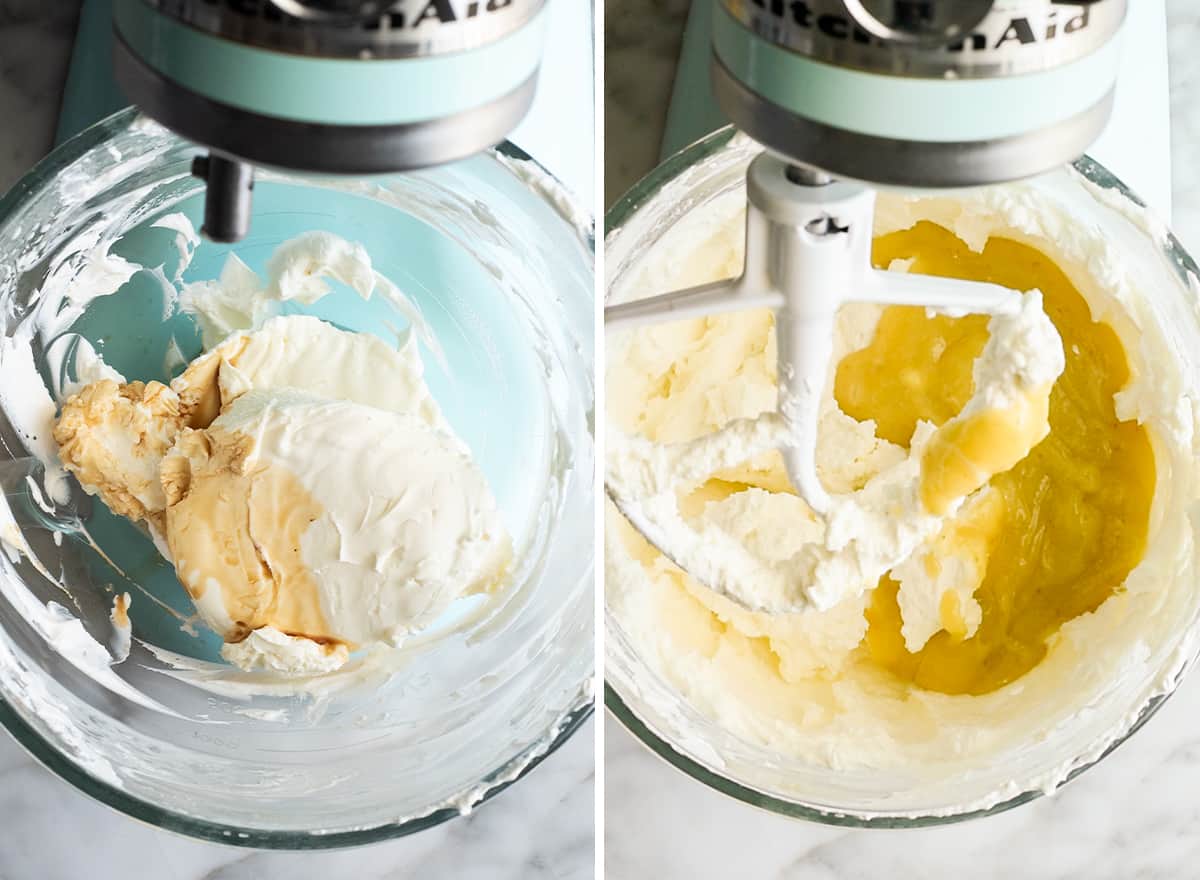
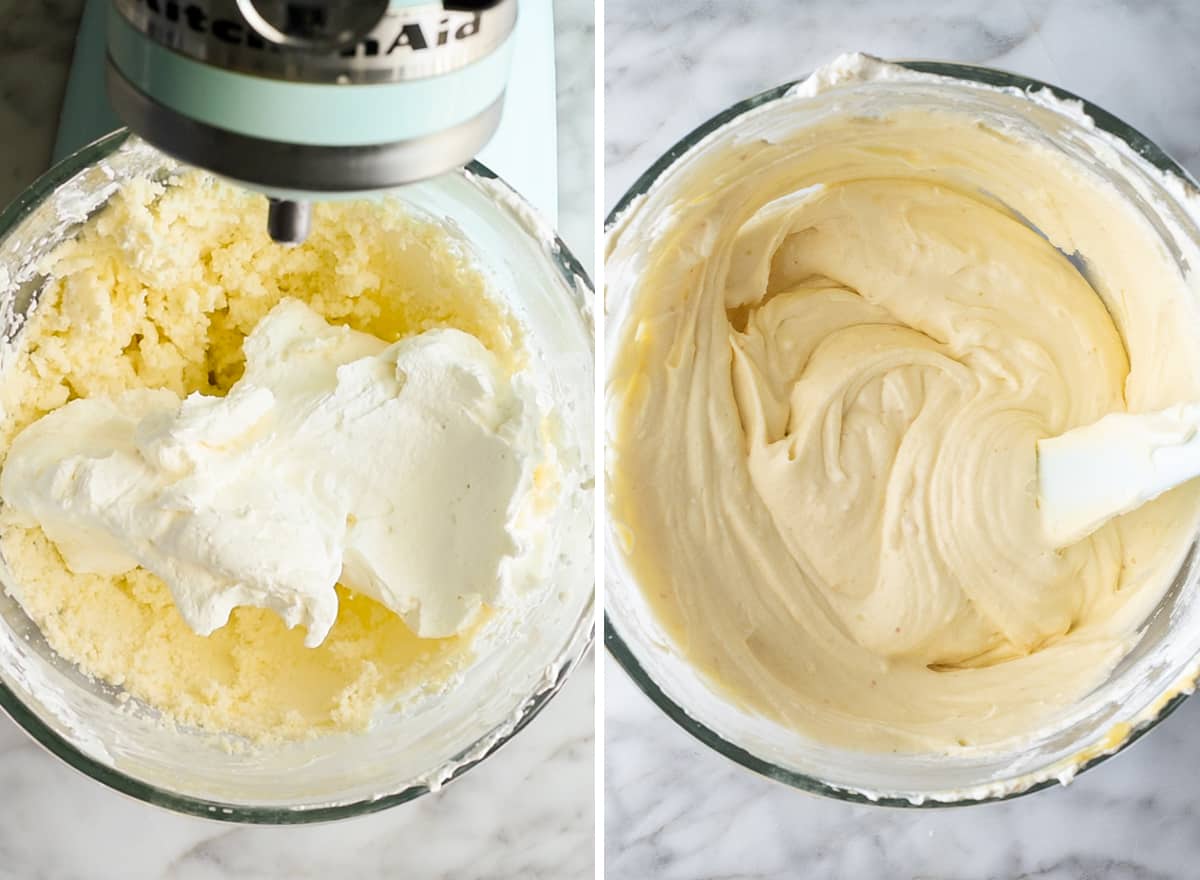
In a medium saucepan, whisk together egg yolks, milk and sugar until combined. Then, cook over medium heat, whisking constantly, until mixture boils. Turn the heat to medium- low and boil for 1 minute, then remove the pan from heat and transfer the mixture to a container with lid – but don’t put the lid on yet. Leave the lid open and whisk the mixture every few minutes until it’s cooled slightly. Then put the lid on and chill in the refrigerator for 1 hour. In the bowl of a standing mixer fitted with the wire whisk attachment (or in a large bowl with a hand-held mixer), Beat the heavy whipping cream and powdered sugar until stiff peaks form, transfer to a different bowl. In the same bowl used to beat whipping cream (but with the cream no longer in it), beat the mascarpone and vanilla with the paddle attachment until combined. Beat in the chilled custard until smooth. Gently fold in the beaten whipping cream until combined.
Make the Soaking Liquid
Brew coffee or espresso and let it cool, or use instant coffee or instant espresso and brew 1 ¾ cups. Whisk the rum into the coffee, then pour the mixture into a large dish or baking pan that will fit the layers.
Assemble the Tiramisu Cake
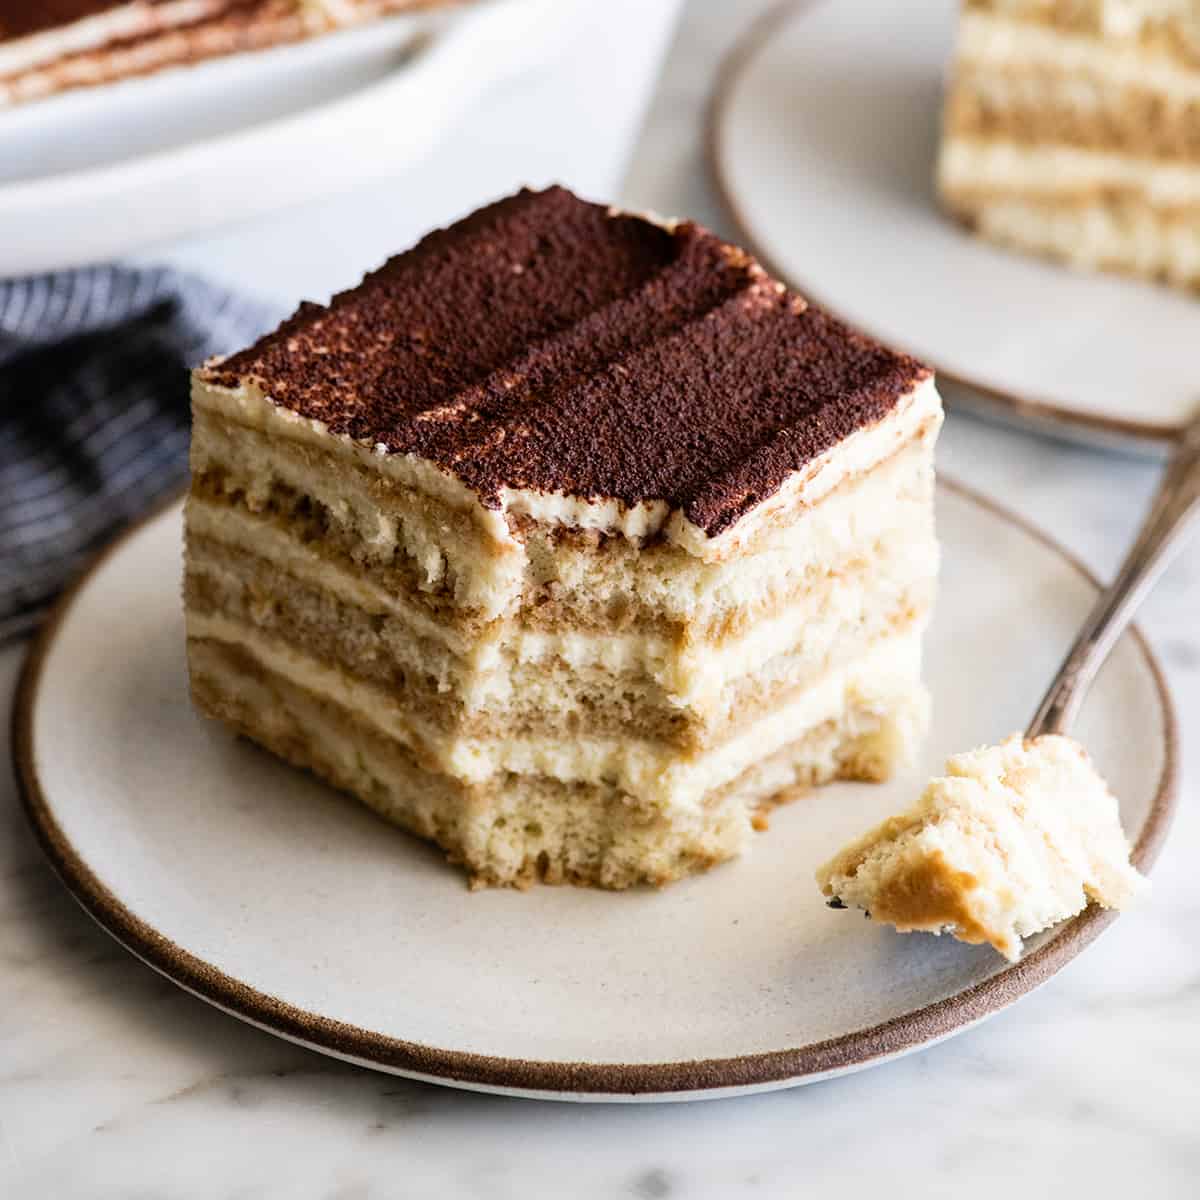
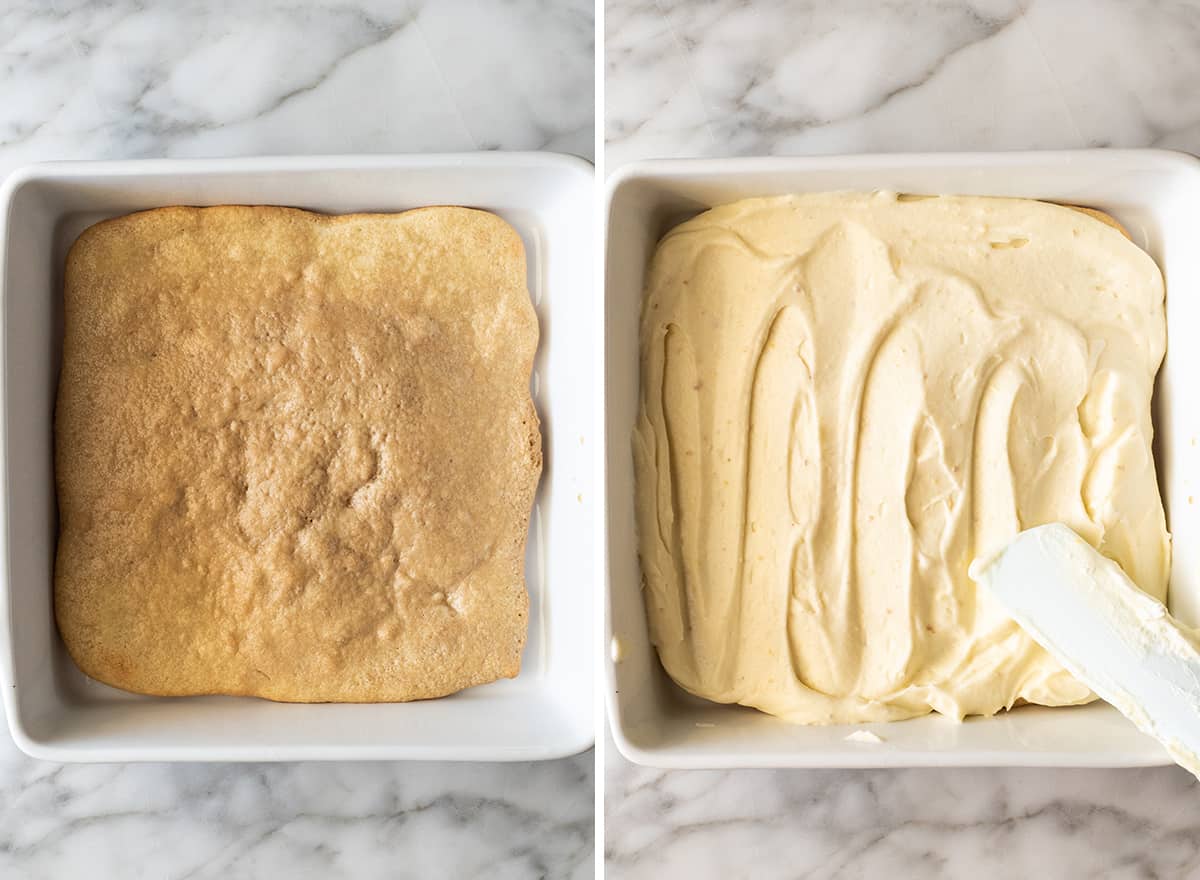
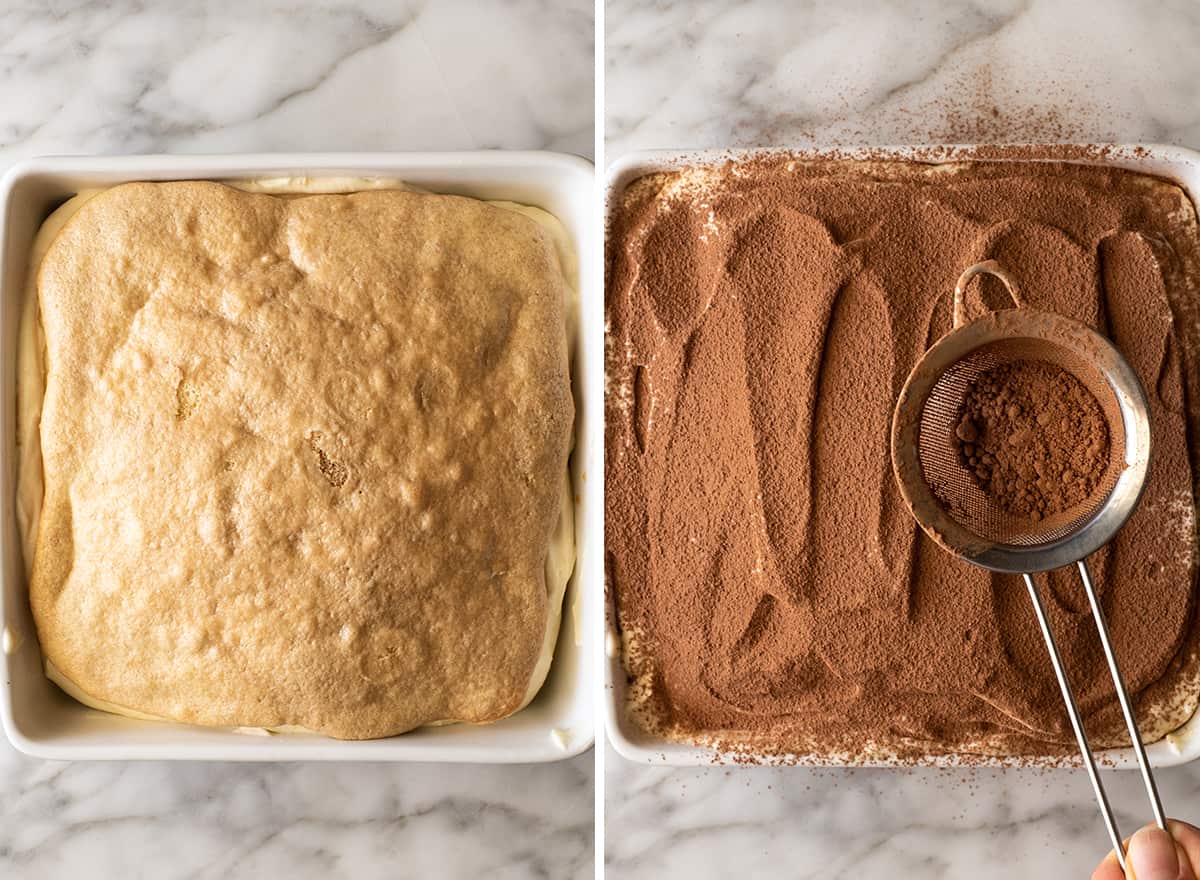
To assemble, make sure you have all the equipment and components of the recipe set out and ready to go! Begin by quickly dipping one of the three lady finger layers into the soaking liquid for about 5-10 seconds. Do not drop it in and let it sit or it will soak up too much liquid and fall apart. Remember, homemade lady fingers are more delicate than store-bought. If using hard store-bought you will need to soak them longer. Place it in the bottom of the baking dish you used to trace the shape, then spread 1/3 of the filling mixture evenly on top of the soaked lady finger. Repeat with the second and third lady finger layers and remaining custard. Alternating soaked lady finger, custard, soaked lady finger, custard. Then, sprinkle cocoa powder over the top custard layer until covered.
Chill the Tiramisu
Once assembled, chill the Italian tiramisu for at least 8 hours, or overnight. Chilling is critical for the flavors to blend together and the texture to be just right.
Serve
After chilling and when you’re ready to serve, cut the tiramisu cake into square portions and serve cold.
Store
If you are lucky enough to have any leftovers, store them in an airtight container in the refrigerator for 5-7 days.
Freeze
If you make and love our recipes, it would mean so much to me if you would leave a comment and rating! And don’t forget to follow along with us on Instagram, Pinterest, Facebook, and Youtube – be sure to tag @joyfoodsunshine and use the hashtag #joyfoodsunshine so we can see your creations!
![]()